
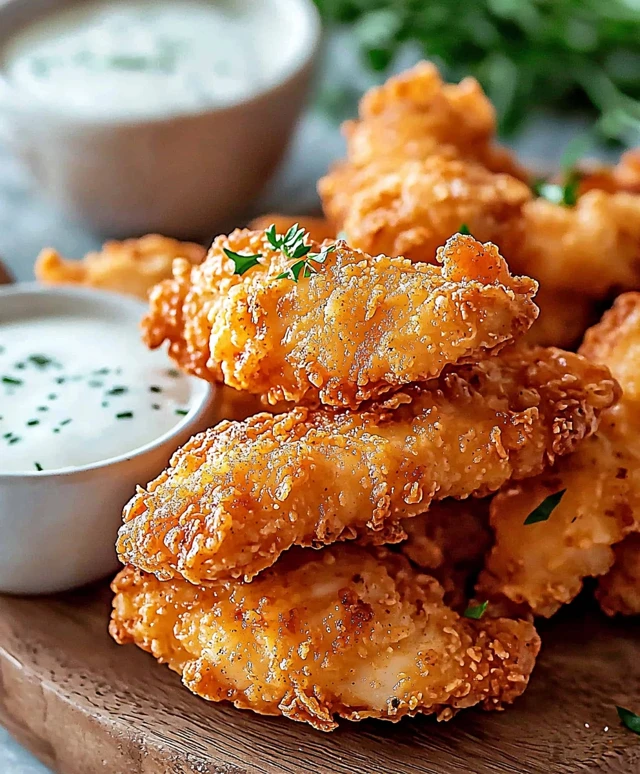
Buttermilk Fried Chicken Tenders are a beloved comfort food that never fails to impress. The crispy, golden exterior combined with the tender, juicy meat creates a delightful contrast that keeps everyone coming back for more. This dish has its roots in Southern cuisine, where the tradition of marinating chicken in buttermilk has been passed down through generations. The acidity of the buttermilk not only tenderizes the chicken but also infuses it with a rich flavor that is simply irresistible.
People adore Buttermilk Fried Chicken Tenders for their incredible taste and texture, making them perfect for any occasionwhether it’s a casual family dinner or a festive gathering with friends. Plus, they are surprisingly easy to prepare, allowing you to whip up a batch in no time. Join me as we dive into this mouthwatering recipe that will surely become a staple in your kitchen!
Ingredients:
- 1 pound chicken tenders
- 2 cups buttermilk
- 1 tablespoon hot sauce (optional)
- 1 cup all-purpose flour
- 1 teaspoon garlic powder
- 1 teaspoon onion powder
- 1 teaspoon paprika
- 1 teaspoon salt
- 1/2 teaspoon black pepper
- 1/2 teaspoon cayenne pepper (adjust to taste)
- Vegetable oil (for frying)
Preparing the Marinade
1. In a large mixing bowl, pour in the 2 cups of buttermilk. If you like a little kick, add the tablespoon of hot sauce to the buttermilk and whisk it together until well combined. This will not only add flavor but also help tenderize the chicken. 2. Add the chicken tenders to the buttermilk mixture, ensuring they are fully submerged. Cover the bowl with plastic wrap or a lid and refrigerate for at least 2 hours, or ideally overnight. This marinating process is crucial for achieving juicy and flavorful chicken tenders.Preparing the Coating
3. While the chicken is marinating, lets prepare the coating. In a separate large bowl, combine the flour, garlic powder, onion powder, paprika, salt, black pepper, and cayenne pepper. Mix these dry ingredients together until they are evenly distributed. This blend of spices will give your chicken tenders a deliciously seasoned crust. 4. Once the chicken has marinated, remove it from the refrigerator. Let the excess buttermilk drip off the tenders, but do not rinse them. You want that buttermilk to cling to the chicken to help the flour coating stick. 5. Dredge each chicken tender in the seasoned flour mixture. Make sure to coat each piece thoroughly, pressing the flour onto the chicken to ensure it adheres well. Shake off any excess flour and set the coated tenders aside on a plate. This step is essential for achieving that crispy texture we all love.Cooking Process
6. In a large, deep skillet or a heavy-bottomed pot, pour in enough vegetable oil to cover the bottom by about 1 inch. Heat the oil over medium-high heat until it reaches 350°F (175°C). You can test if the oil is ready by dropping a small pinch of flour into the oil; if it sizzles, youre good to go! 7. Carefully add the chicken tenders to the hot oil in batches, making sure not to overcrowd the pan. Fry the tenders for about 4-5 minutes on each side, or until they are golden brown and cooked through. The internal temperature of the chicken should reach 165°F (75°C) for safe consumption. 8. Once cooked, use a slotted spoon or tongs to remove the chicken tenders from the oil and place them on a plate lined with paper towels. This will help absorb any excess oil and keep the tenders crispy. 9. Repeat the frying process with the remaining chicken tenders, ensuring the oil temperature remains consistent. If the oil starts to smoke, reduce the heat slightly.Assembling and Serving
10. Once all the chicken tenders are fried and resting on paper towels, its time to serve! You can serve them as is or with your favorite dipping sauces. Some great options include ranch dressing, honey mustard, or a spicy aioli. 11. For a complete meal, consider serving the chicken tenders alongside a fresh salad, coleslaw, or crispy fries. You can also make a delicious sandwich by placing the tenders in a toasted bun with lettuce, tomato, and your choice of sauce. 12. If you have any leftovers (which is rare, but it happens!), store them in an airtight container in the refrigerator for up to 3 days. To reheat, place them in a preheated oven at 375°F (190°C) for about 10-15 minutes to regain their crispiness.Tips for Perfect Buttermilk Fried Chicken Tenders
– **Marination Time**: The longer you marinate the chicken, the more flavorful and tender it will be. If you can, aim for an overnight soak. – **Oil Temperature**: Maintaining the right oil temperature is key to achieving crispy chicken. If the oil is too hot, the outside will burn before the inside cooks. If its too cool, the chicken will absorb too much oil and become greasy. – **Batch Cooking**: Fry in small batches to ensure even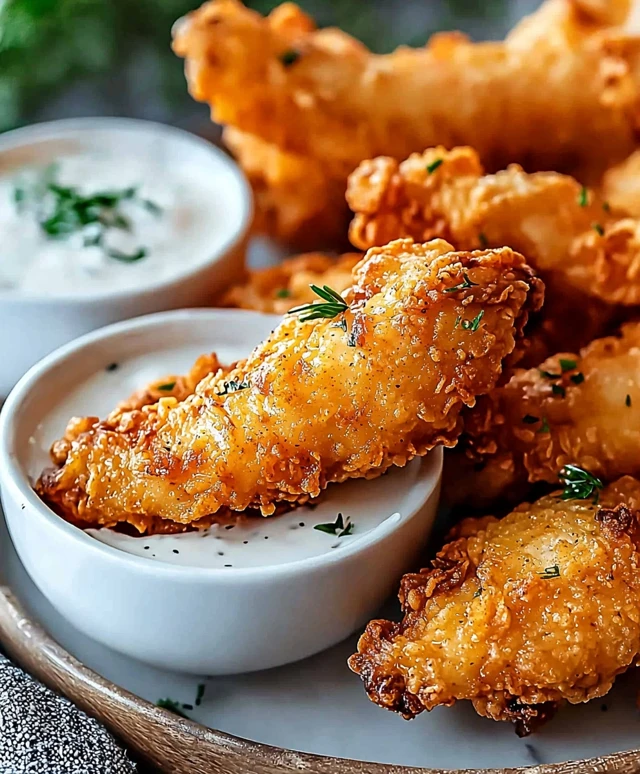
Conclusion:
In conclusion, these Buttermilk Fried Chicken Tenders are an absolute must-try for anyone looking to elevate their home cooking game. The combination of the tangy buttermilk marinade and the crispy, golden coating creates a flavor and texture that is simply irresistible. Whether you’re serving them as a main dish with a side of creamy coleslaw and fluffy biscuits or tossing them into a salad for a delightful crunch, these tenders are versatile enough to fit any occasion. Feel free to get creative with your serving suggestions! You can pair them with a variety of dipping sauces like honey mustard, barbecue, or even a spicy sriracha mayo for an extra kick. If you’re feeling adventurous, try adding some herbs or spices to the breading for a unique twist, or even experiment with different types of flour for a gluten-free option. The possibilities are endless! I encourage you to give this recipe a try and experience the joy of making your own Buttermilk Fried Chicken Tenders at home. Once you do, I would love to hear about your experience! Share your thoughts, any variations you tried, or even a picture of your delicious creation. Cooking is all about sharing and enjoying, so lets spread the love for these tasty tenders together! PrintButtermilk Fried Chicken Tenders: The Ultimate Crispy Recipe for a Delicious Meal
- Total Time: 155 minutes
- Yield: 4 servings 1x
Description
These Buttermilk Fried Chicken Tenders are marinated in a zesty buttermilk mixture and coated in a seasoned flour blend, resulting in juicy, flavorful, and perfectly crispy tenders. Ideal for a quick dinner or party snack, they are sure to be a hit with everyone!
Ingredients
- 1 pound chicken tenders
- 2 cups buttermilk
- 1 tablespoon hot sauce (optional)
- 1 cup all-purpose flour
- 1 teaspoon garlic powder
- 1 teaspoon onion powder
- 1 teaspoon paprika
- 1 teaspoon salt
- 1/2 teaspoon black pepper
- 1/2 teaspoon cayenne pepper (adjust to taste)
- Vegetable oil (for frying)
Instructions
- In a large mixing bowl, pour in the 2 cups of buttermilk. If desired, add the tablespoon of hot sauce and whisk until well combined.
- Add the chicken tenders to the buttermilk mixture, ensuring they are fully submerged. Cover and refrigerate for at least 2 hours, or ideally overnight.
- In a separate bowl, combine the flour, garlic powder, onion powder, paprika, salt, black pepper, and cayenne pepper. Mix until evenly distributed.
- Once marinated, remove the chicken from the refrigerator. Let excess buttermilk drip off but do not rinse.
- Dredge each chicken tender in the seasoned flour mixture, pressing the flour onto the chicken to ensure it adheres. Shake off excess flour and set aside.
- In a large skillet or heavy-bottomed pot, pour enough vegetable oil to cover the bottom by about 1 inch. Heat the oil over medium-high heat until it reaches 350°F (175°C).
- Carefully add the chicken tenders in batches, frying for about 4-5 minutes on each side until golden brown and cooked through (internal temperature should reach 165°F/75°C).
- Use a slotted spoon or tongs to remove the tenders and place them on a plate lined with paper towels to absorb excess oil.
- Repeat the frying process with the remaining chicken tenders, ensuring the oil temperature remains consistent.
- Serve the chicken tenders as is or with your favorite dipping sauces like ranch dressing, honey mustard, or spicy aioli.
- For a complete meal, pair with a fresh salad, coleslaw, or crispy fries. You can also make a sandwich with the tenders in a toasted bun with lettuce, tomato, and sauce.
- Store any leftovers in an airtight container in the refrigerator for up to 3 days. Reheat in a preheated oven at 375°F (190°C) for about 10-15 minutes to regain crispiness.
Notes
- Marination Time: Longer marination results in more flavorful and tender chicken. Aim for overnight if possible.
- Oil Temperature: Maintain the right oil temperature for crispy chicken. Too hot will burn the outside; too cool will make it greasy.
- Batch Cooking: Fry in small batches to ensure even cooking and crispiness.
- Prep Time: 15 minutes
- Cook Time: 20 minutes
Leave a Comment