
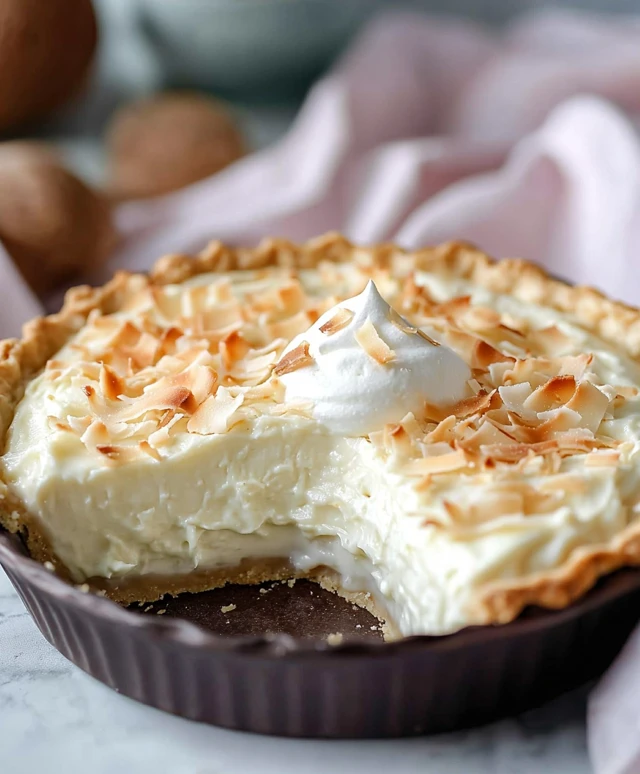
Vegan Coconut Cream Pie is a delightful dessert that brings a taste of tropical paradise right to your kitchen. As someone who has always been passionate about creating delicious plant-based treats, I can assure you that this pie is not only a feast for the eyes but also a celebration of flavors. The history of coconut cream pie dates back to the early 20th century, where it became a beloved staple in American households, often associated with family gatherings and special occasions. What makes this Vegan Coconut Cream Pie so irresistible is its creamy texture, rich coconut flavor, and the perfect balance of sweetness that leaves everyone wanting more. Plus, its incredibly convenient to make, allowing you to whip up a stunning dessert without any dairy or eggs. Join me as we dive into this delightful recipe that will surely impress your friends and family!
Ingredients:
- 1 ½ cups graham cracker crumbs (or vegan alternative)
- ½ cup coconut oil, melted
- ¼ cup maple syrup
- 1 can (13.5 oz) full-fat coconut milk
- ½ cup coconut cream (scooped from the top of the coconut milk can)
- ½ cup powdered sugar
- 1 teaspoon vanilla extract
- 2 tablespoons cornstarch
- ¼ teaspoon salt
- 1 cup shredded unsweetened coconut
- Fresh fruit or additional coconut for garnish (optional)
Preparing the Crust
1. Start by preheating your oven to 350°F (175°C). This will ensure that your crust bakes evenly and becomes nice and crispy. 2. In a mixing bowl, combine the graham cracker crumbs, melted coconut oil, and maple syrup. Stir until the mixture is well combined and resembles wet sand. 3. Press the mixture firmly into the bottom and up the sides of a 9-inch pie pan. Make sure to pack it tightly to create a sturdy crust. 4. Bake the crust in the preheated oven for about 10 minutes, or until its lightly golden. Keep an eye on it to prevent burning. 5. Once baked, remove the crust from the oven and let it cool completely while you prepare the filling.Preparing the Coconut Cream Filling
6. In a medium saucepan, combine the full-fat coconut milk, coconut cream, powdered sugar, cornstarch, and salt. Whisk everything together until smooth and well combined. 7. Place the saucepan over medium heat and continue to whisk the mixture as it heats up. This is crucial to prevent lumps from forming. 8. As the mixture heats, it will begin to thicken. Keep whisking for about 5-7 minutes until it reaches a pudding-like consistency. You want it to be thick enough to hold its shape but still creamy. 9. Once thickened, remove the saucepan from the heat and stir in the vanilla extract. This adds a lovely flavor to the filling. 10. Allow the filling to cool for about 10 minutes at room temperature. This will help it set a bit more before pouring it into the crust.Assembling the Pie
11. Once the filling has cooled slightly, pour it into the cooled graham cracker crust. Use a spatula to spread it evenly across the crust. 12. After pouring the filling, sprinkle the shredded coconut evenly over the top. This adds texture and enhances the coconut flavor. 13. Cover the pie with plastic wrap or aluminum foil and refrigerate for at least 4 hours, or overnight if possible. This allows the filling to set completely and makes slicing easier.Serving the Pie
14. When youre ready to serve, remove the pie from the refrigerator. If you want to add a little extra flair, you can top it with fresh fruit like sliced strawberries or mango, or additional toasted coconut. 15. Use a sharp knife to slice the pie into wedges. Serve chilled for the best flavor and texture. 16. Enjoy your delicious vegan coconut cream pie with friends and family! Its a perfect dessert for any occasion, and I guarantee it will impress everyone, even those who arent vegan.Tips for Success
17. If you want a more intense coconut flavor, consider using coconut extract in addition to the vanilla extract. Just a few drops will do the trick! 18. For a gluten-free version, make sure to use gluten-free graham crackers or a nut-based crust. 19. If you prefer a sweeter pie, feel free to adjust the amount of powdered sugar in the filling to your taste. 20. To make the pie even more decadent, you can add a layer of vegan whipped cream on top before serving. Just whip some coconut cream with a bit of powdered sugar and vanilla until fluffy. 21. Store any leftovers in the refrigerator, covered, for up to 3 days. The pie may soften slightly, but it will still be delicious! This vegan coconut cream pie is not only easy to make but also incredibly satisfying. The creamy filling paired with the crunchy crust creates a delightful contrast that will have everyone coming back for seconds. Enjoy the process of making this pie, and dont forget to share it with your loved ones!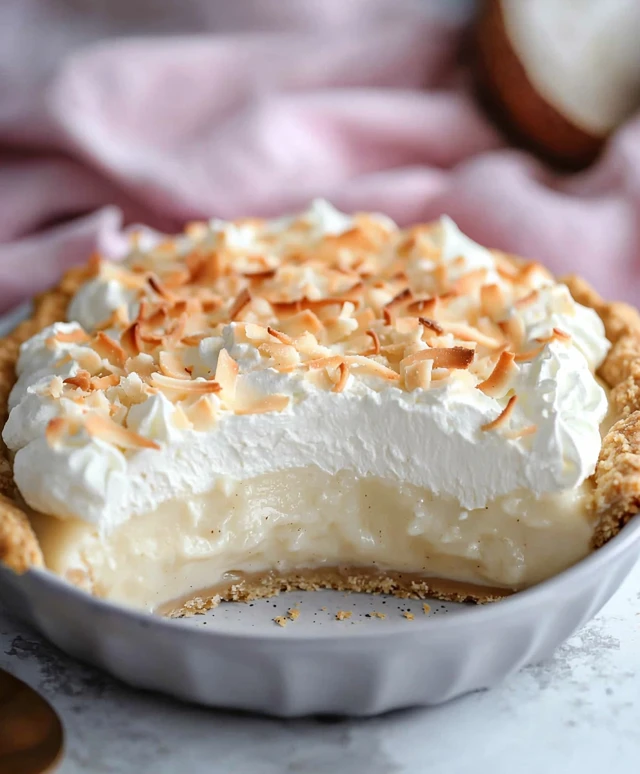
Conclusion:
In summary, this Vegan Coconut Cream Pie is an absolute must-try for anyone looking to indulge in a deliciously creamy dessert without compromising on their dietary choices. The combination of rich coconut flavor, a smooth and velvety filling, and a perfectly flaky crust makes this pie a standout treat that will impress both vegans and non-vegans alike. For serving suggestions, I recommend topping each slice with a dollop of coconut whipped cream and a sprinkle of toasted coconut flakes for that extra touch of elegance. You can also experiment with variations by adding a layer of fresh fruit, such as sliced bananas or berries, to enhance the flavor profile and add a pop of color. If you’re feeling adventurous, try infusing the filling with a hint of lime or almond extract for a unique twist! I encourage you to give this Vegan Coconut Cream Pie a try and share your experience with friends and family. Whether you’re hosting a gathering or simply treating yourself, this pie is sure to be a hit. Don’t forget to snap a photo and tag me when you make itI can’t wait to see your delicious creations! So roll up your sleeves, gather your ingredients, and dive into this delightful recipe that celebrates the joy of plant-based cooking. Happy baking! PrintVegan Coconut Cream Pie: A Delicious Dairy-Free Dessert Recipe
- Total Time: 270 minutes
- Yield: 8 servings 1x
Description
Enjoy a creamy and delicious Vegan Coconut Cream Pie with a crunchy graham cracker crust. This delightful dessert features a rich coconut filling that’s perfect for any occasion, impressing both vegans and non-vegans alike!
Ingredients
- 1 ½ cups graham cracker crumbs (or vegan alternative)
- ½ cup coconut oil, melted
- ¼ cup maple syrup
- 1 can (13.5 oz) full-fat coconut milk
- ½ cup coconut cream (scooped from the top of the coconut milk can)
- ½ cup powdered sugar
- 1 teaspoon vanilla extract
- 2 tablespoons cornstarch
- ¼ teaspoon salt
- 1 cup shredded unsweetened coconut
- Fresh fruit or additional coconut for garnish (optional)
Instructions
- Preheat your oven to 350°F (175°C).
- In a mixing bowl, combine graham cracker crumbs, melted coconut oil, and maple syrup. Stir until well combined and resembles wet sand.
- Press the mixture firmly into the bottom and up the sides of a 9-inch pie pan.
- Bake the crust for about 10 minutes, or until lightly golden. Let it cool completely.
- In a medium saucepan, combine full-fat coconut milk, coconut cream, powdered sugar, cornstarch, and salt. Whisk until smooth.
- Place the saucepan over medium heat, whisking continuously to prevent lumps.
- Heat for about 5-7 minutes until the mixture thickens to a pudding-like consistency.
- Remove from heat and stir in vanilla extract. Allow to cool for about 10 minutes.
- Pour the filling into the cooled graham cracker crust, spreading it evenly.
- Sprinkle shredded coconut over the top.
- Cover with plastic wrap or aluminum foil and refrigerate for at least 4 hours, or overnight.
- Remove the pie from the refrigerator. Optionally, top with fresh fruit or additional toasted coconut.
- Slice into wedges and serve chilled.
Notes
- For a more intense coconut flavor, consider adding coconut extract.
- Use gluten-free graham crackers for a gluten-free version.
- Adjust powdered sugar to taste for a sweeter pie.
- For added decadence, top with vegan whipped cream before serving.
- Store leftovers in the refrigerator for up to 3 days.
- Prep Time: 20 minutes
- Cook Time: 10 minutes


Leave a Comment