
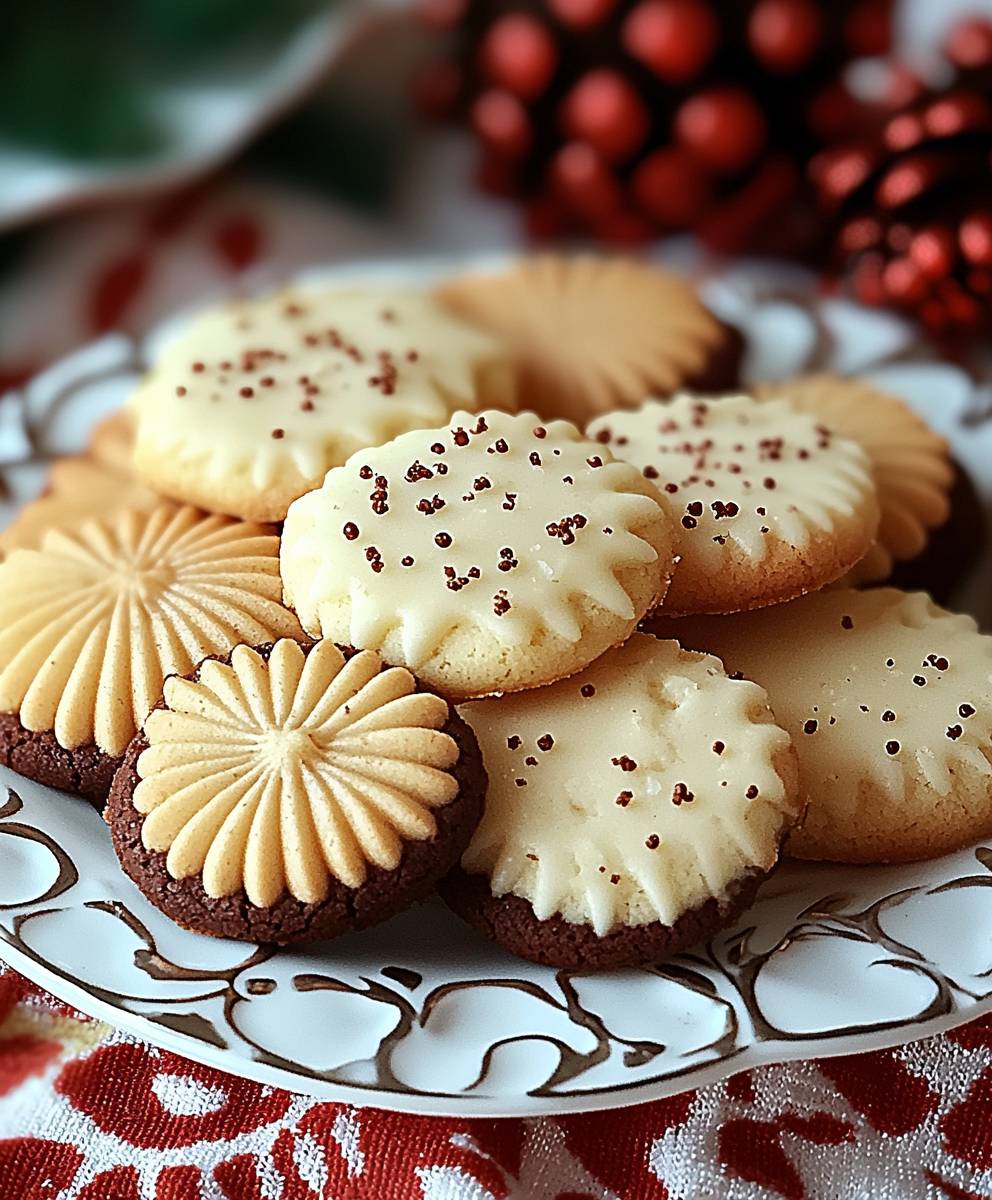
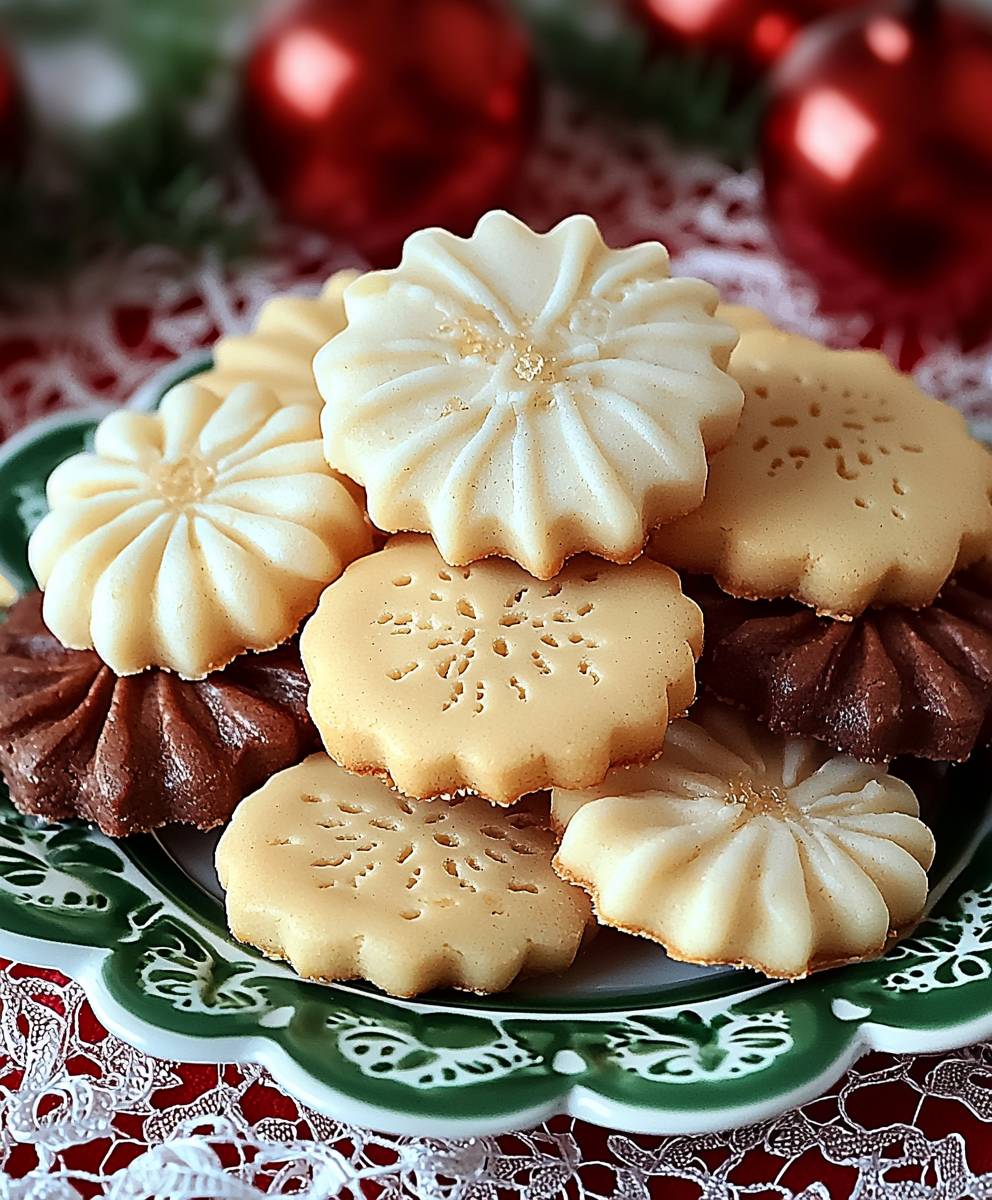
Butter Cookies, those melt-in-your-mouth delights, are more than just a sweet treat; they’re a symbol of warmth, comfort, and shared moments. Have you ever wondered why a simple cookie can evoke such powerful feelings? Perhaps it’s the buttery richness, the delicate crumb, or the sheer joy of biting into a perfectly baked masterpiece. I know I have!
These cookies, with their humble origins in medieval Europe, have traveled across continents and cultures, adapting and evolving into countless variations. From the classic shortbread of Scotland to the intricate spritz cookies of Germany, each culture has put its unique stamp on this beloved confection. The beauty of butter cookies lies in their versatility. They can be enjoyed plain, adorned with sprinkles, dipped in chocolate, or sandwiched with jam the possibilities are endless!
But what truly makes these cookies so irresistible? It’s the perfect balance of simplicity and indulgence. The buttery flavor, the satisfying snap, and the delicate sweetness create a symphony of textures and tastes that tantalize the senses. Plus, they’re incredibly easy to make, making them the perfect treat for both seasoned bakers and kitchen novices alike. Whether you’re baking for a holiday gathering, a special occasion, or simply a cozy night in, these cookies are guaranteed to bring a smile to everyone’s face. So, let’s get baking and create some unforgettable memories with these classic treats!
Ingredients:
- 1 cup (2 sticks) unsalted butter, softened
- ¾ cup granulated sugar
- 1 large egg
- 1 teaspoon vanilla extract
- 2 ¼ cups all-purpose flour
- ¼ teaspoon salt
- Optional: Sprinkles, sanding sugar, or melted chocolate for decorating
Preparing the Dough:
- Cream the Butter and Sugar: In a large bowl, or the bowl of your stand mixer fitted with the paddle attachment, cream together the softened butter and granulated sugar until light and fluffy. This usually takes about 3-5 minutes. Make sure your butter is truly softened, but not melted, for the best results. Scrape down the sides of the bowl occasionally to ensure everything is evenly mixed. I find that using room temperature butter is key to achieving that perfect creamy texture.
- Incorporate the Egg and Vanilla: Beat in the egg and vanilla extract until well combined. Don’t overmix at this stage; just mix until everything is incorporated. Overmixing can lead to tougher cookies. The vanilla extract adds a lovely warmth to the cookies, but you can experiment with other extracts like almond or lemon for a different flavor profile.
- Combine Dry Ingredients: In a separate medium bowl, whisk together the all-purpose flour and salt. Whisking helps to evenly distribute the salt throughout the flour, ensuring a consistent flavor in every bite.
- Gradually Add Dry Ingredients to Wet Ingredients: Gradually add the dry ingredients to the wet ingredients, mixing on low speed until just combined. Be careful not to overmix the dough, as this can develop the gluten in the flour and result in tough cookies. Mix until the flour is just incorporated, and then stop. A few streaks of flour are okay at this point.
- Form the Dough into a Disc: Turn the dough out onto a lightly floured surface and gently form it into a disc. Wrap the disc tightly in plastic wrap. This helps prevent the dough from drying out in the refrigerator.
- Chill the Dough: Refrigerate the dough for at least 1 hour, or preferably 2 hours, to allow the gluten to relax and the butter to firm up. This chilling time is crucial for preventing the cookies from spreading too much during baking. You can even chill the dough overnight for even better results.
Rolling and Cutting the Cookies:
- Preheat the Oven: Preheat your oven to 375°F (190°C). Line baking sheets with parchment paper or silicone baking mats. This will prevent the cookies from sticking and make cleanup a breeze.
- Prepare Your Work Surface: Lightly flour a clean, flat surface. This will prevent the dough from sticking as you roll it out.
- Roll Out the Dough: Remove the chilled dough from the refrigerator and unwrap it. On the lightly floured surface, roll out the dough to about ¼ inch thickness. Try to roll it out evenly so that the cookies bake uniformly. If the dough is too cold and hard to roll, let it sit at room temperature for a few minutes to soften slightly.
- Cut Out the Cookies: Use your favorite cookie cutters to cut out shapes from the rolled-out dough. Dip the cookie cutters in flour before each cut to prevent sticking. You can use any shape you like stars, hearts, circles, or even seasonal shapes.
- Place Cookies on Baking Sheets: Carefully transfer the cut-out cookies to the prepared baking sheets, leaving about 1 inch of space between each cookie. This allows for proper air circulation and prevents the cookies from sticking together during baking.
- Reroll Scraps: Gather the dough scraps, reroll them, and cut out more cookies. Keep in mind that the cookies made from rerolled dough may be slightly tougher than the first batch, so try to minimize the number of times you reroll the dough.
Baking the Cookies:
- Bake the Cookies: Bake for 8-10 minutes, or until the edges are lightly golden brown. The baking time will vary depending on the thickness of your cookies and your oven. Keep a close eye on them to prevent them from burning.
- Cool on Baking Sheets: Remove the baking sheets from the oven and let the cookies cool on the baking sheets for a few minutes before transferring them to a wire rack to cool completely. This allows the cookies to firm up slightly and prevents them from breaking when you move them.
Decorating the Cookies (Optional):
- Prepare Your Decorations: While the cookies are cooling, prepare your decorations. You can use sprinkles, sanding sugar, melted chocolate, or royal icing.
- Decorate the Cookies: Once the cookies are completely cool, decorate them as desired. For sprinkles or sanding sugar, brush the cookies with a thin layer of melted butter or corn syrup to help the decorations adhere. For melted chocolate, dip the cookies in the chocolate or drizzle it over the top. For royal icing, use a piping bag to create intricate designs.
- Let Decorations Set: Allow the decorations to set completely before storing the cookies. This will prevent the decorations from smudging or sticking together.
Tips and Tricks for Perfect Butter Cookies:
- Use High-Quality Butter: The quality of your butter will significantly impact the flavor and texture of your cookies. Use a good-quality unsalted butter for the best results.
- Don’t Overmix the Dough: Overmixing the dough can develop the gluten in the flour and result in tough cookies. Mix until the flour is just incorporated, and then stop.
- Chill the Dough Thoroughly: Chilling the dough is crucial for preventing the cookies from spreading too much during baking. Chill the dough for at least 1 hour, or preferably 2 hours.
- Roll Out the Dough Evenly: Roll out the dough to an even thickness so that the cookies bake uniformly.
- Don’t Overbake the Cookies: Overbaking the cookies will result in dry, crumbly cookies. Bake until the edges are lightly golden brown.
- Let the Cookies Cool Completely Before Decorating: Decorating warm cookies can cause the decorations to melt or smudge. Let the cookies cool completely before decorating.
- Store the Cookies Properly: Store the cookies in an airtight container at room temperature for up to 5 days.
Variations:
- Lemon Butter Cookies: Add 1 tablespoon of lemon zest to the dough for a bright, citrusy flavor.
- Almond Butter Cookies: Add ½ teaspoon of almond extract to the dough for a nutty flavor.
- Chocolate Butter Cookies: Add ¼ cup of unsweetened cocoa powder to the dry ingredients for a chocolatey twist.
- Spice Butter Cookies: Add ½ teaspoon of ground cinnamon, nutmeg, or ginger to the dry ingredients for a warm, spiced flavor.
- Sandwich Cookies: Spread frosting or jam between two cookies to create a delicious sandwich cookie.
Troubleshooting:
- Cookies are spreading too much: Make sure the butter is not too soft. Chill the dough for a longer period of time. Ensure your oven temperature is accurate.
- Cookies are too tough: Avoid overmixing the dough.
- Cookies are burning: Reduce the oven temperature slightly. Make sure your oven is properly calibrated.
- Dough is too crumbly: Add a tablespoon of milk or water to the dough to help it come together.
Enjoy your homemade butter cookies! They are perfect for holidays, parties, or just a simple treat.
Conclusion:
And there you have it! These aren’t just any cookies; they’re melt-in-your-mouth, buttery perfection. I truly believe this butter cookies recipe is a must-try for anyone who appreciates a classic treat, whether you’re a seasoned baker or just starting out. The simplicity of the ingredients combined with the satisfying result makes it a winner every time. But why is it a must-try, you ask? Well, beyond the incredible flavor, it’s the versatility that really shines. Imagine serving these delicate cookies with a scoop of vanilla bean ice cream for an elegant dessert. Or perhaps alongside a steaming mug of hot chocolate on a chilly evening. They’re also perfect for gifting package them in a pretty tin and you’ve got a homemade present that’s sure to impress. And the variations! Oh, the possibilities are endless! Feeling adventurous? Add a teaspoon of lemon zest to the dough for a bright, citrusy twist. Or how about incorporating some finely chopped nuts, like almonds or pecans, for added texture and flavor? For the chocolate lovers among us, dipping half of each cookie in melted dark chocolate and sprinkling with sea salt is an absolute game-changer. You could even sandwich two cookies together with a layer of raspberry jam or Nutella for an extra special treat. I’ve even seen people use them as the base for mini cheesecakes! The beauty of this recipe is that it’s a blank canvas, ready for your own creative touch.Serving Suggestions:
* Serve with a glass of cold milk or a cup of hot coffee. * Pair with fresh berries and whipped cream for a light and refreshing dessert. * Use as a base for mini tarts or cheesecakes. * Crumble over ice cream or yogurt for added texture and flavor. * Pack in lunchboxes for a sweet treat. * Gift to friends and family in a decorative tin.Variations to Explore:
* Add lemon or orange zest for a citrusy flavor. * Incorporate chopped nuts, such as almonds, pecans, or walnuts. * Dip in melted chocolate and sprinkle with sea salt. * Sandwich with jam, Nutella, or frosting. * Add a touch of spice, such as cinnamon or nutmeg. * Experiment with different extracts, such as vanilla, almond, or peppermint. * Use different cookie cutters to create fun and festive shapes. I’m so excited for you to try this recipe and experience the joy of baking these delightful butter cookies for yourself. I know you’ll love them as much as I do! So, what are you waiting for? Preheat that oven, gather your ingredients, and get ready to create some magic in the kitchen. And most importantly, don’t forget to share your creations! I’d absolutely love to see your photos and hear about your experiences. Did you try any of the variations? Did you add your own special touch? Let me know in the comments below! Happy baking! I can’t wait to hear all about your delicious adventures with these cookies. I’m confident that this recipe will become a staple in your baking repertoire, a go-to for special occasions and everyday treats alike. Enjoy! Print
Butter Cookies: The Ultimate Guide to Baking Perfect Treats
- Total Time: 90 minutes
- Yield: 24–36 cookies 1x
Description
Classic, buttery cut-out cookies perfect for decorating.
Ingredients
- 1 cup (2 sticks) unsalted butter, softened
- ¾ cup granulated sugar
- 1 large egg
- 1 teaspoon vanilla extract
- 2 ¼ cups all-purpose flour
- ¼ teaspoon salt
- Optional: Sprinkles, sanding sugar, or melted chocolate for decorating
Instructions
- Cream the Butter and Sugar: In a large bowl, or the bowl of your stand mixer fitted with the paddle attachment, cream together the softened butter and granulated sugar until light and fluffy (3-5 minutes). Scrape down the sides of the bowl occasionally.
- Incorporate the Egg and Vanilla: Beat in the egg and vanilla extract until well combined. Don’t overmix.
- Combine Dry Ingredients: In a separate medium bowl, whisk together the all-purpose flour and salt.
- Gradually Add Dry Ingredients to Wet Ingredients: Gradually add the dry ingredients to the wet ingredients, mixing on low speed until just combined. Be careful not to overmix.
- Form the Dough into a Disc: Turn the dough out onto a lightly floured surface and gently form it into a disc. Wrap the disc tightly in plastic wrap.
- Chill the Dough: Refrigerate the dough for at least 1 hour, or preferably 2 hours.
- Preheat the Oven: Preheat your oven to 375°F (190°C). Line baking sheets with parchment paper or silicone baking mats.
- Prepare Your Work Surface: Lightly flour a clean, flat surface.
- Roll Out the Dough: Remove the chilled dough from the refrigerator and unwrap it. On the lightly floured surface, roll out the dough to about ¼ inch thickness.
- Cut Out the Cookies: Use your favorite cookie cutters to cut out shapes from the rolled-out dough. Dip the cookie cutters in flour before each cut to prevent sticking.
- Place Cookies on Baking Sheets: Carefully transfer the cut-out cookies to the prepared baking sheets, leaving about 1 inch of space between each cookie.
- Reroll Scraps: Gather the dough scraps, reroll them, and cut out more cookies.
- Bake the Cookies: Bake for 8-10 minutes, or until the edges are lightly golden brown.
- Cool on Baking Sheets: Remove the baking sheets from the oven and let the cookies cool on the baking sheets for a few minutes before transferring them to a wire rack to cool completely.
- Prepare Your Decorations: While the cookies are cooling, prepare your decorations. You can use sprinkles, sanding sugar, melted chocolate, or royal icing.
- Decorate the Cookies: Once the cookies are completely cool, decorate them as desired. For sprinkles or sanding sugar, brush the cookies with a thin layer of melted butter or corn syrup to help the decorations adhere. For melted chocolate, dip the cookies in the chocolate or drizzle it over the top. For royal icing, use a piping bag to create intricate designs.
- Let Decorations Set: Allow the decorations to set completely before storing the cookies. This will prevent the decorations from smudging or sticking together.
Notes
- Use high-quality butter for the best flavor.
- Don’t overmix the dough.
- Chilling the dough is crucial to prevent spreading.
- Roll the dough evenly for uniform baking.
- Don’t overbake the cookies.
- Let the cookies cool completely before decorating.
- Store in an airtight container at room temperature for up to 5 days.
- Prep Time: 20 minutes
- Cook Time: 8 minutes

Leave a Comment