
Red Velvet Cookies, those crimson delights that dance on your tongue, are more than just a sweet treat; they’re a little piece of edible history! Have you ever wondered where these captivating cookies get their vibrant color and uniquely tangy flavor? It’s a story that intertwines Southern charm with a dash of culinary innovation.
While the exact origins are debated, the red velvet flavor profile, traditionally achieved through a reaction between cocoa powder, buttermilk, and vinegar, gained popularity in the early 20th century. Some attribute its rise to the Waldorf-Astoria Hotel, while others point to savvy marketing by food companies during the Depression era. Regardless of its precise beginnings, Red Velvet Cookies have become a beloved classic, especially around holidays like Valentine’s Day and Christmas.
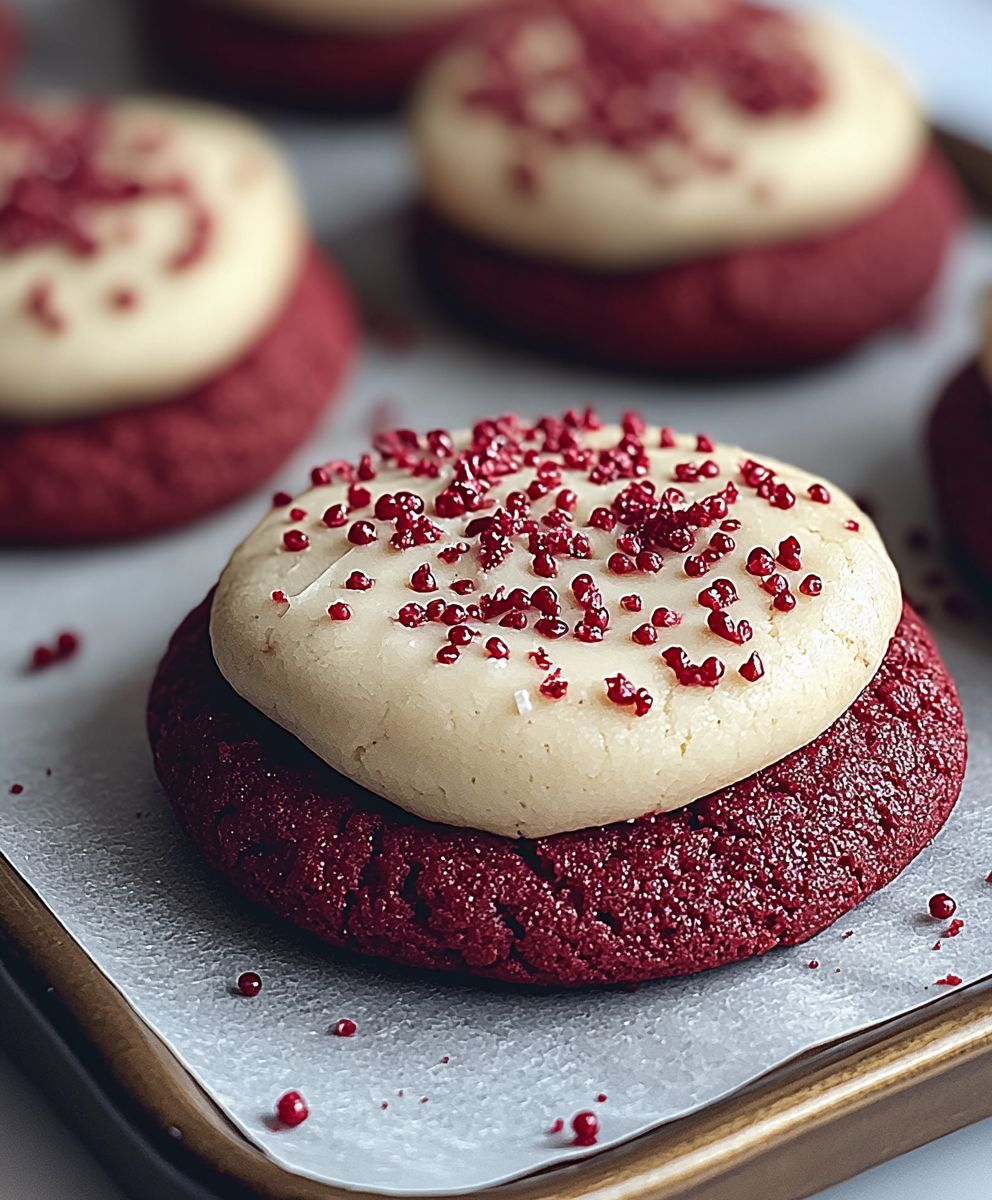
What makes these cookies so irresistible? It’s the perfect balance of flavors and textures. The subtle cocoa notes, the slight tang from the buttermilk (or a clever substitute!), and the melt-in-your-mouth tenderness create an experience that’s both comforting and exciting. Plus, let’s be honest, that striking red hue makes them incredibly appealing! Whether you’re baking them for a special occasion or simply craving a delicious homemade cookie, this recipe is sure to become a new favorite. Get ready to indulge in the magic of red velvet!

Ingredients:
- 2 1/4 cups all-purpose flour
- 1 teaspoon baking soda
- 1 teaspoon baking powder
- 1/2 teaspoon salt
- 1 cup (2 sticks) unsalted butter, softened
- 1 1/2 cups granulated sugar
- 2 large eggs
- 1 teaspoon vanilla extract
- 1 ounce (2 tablespoons) red food coloring
- 1 tablespoon unsweetened cocoa powder
- 1 teaspoon white vinegar
- 1 cup buttermilk
- 1 1/2 cups white chocolate chips
Preparing the Dough:
- Combine Dry Ingredients: In a medium bowl, whisk together the flour, baking soda, baking powder, and salt. Make sure everything is evenly distributed. This ensures that the cookies will rise properly and have a consistent texture. Set this bowl aside for later.
- Cream Butter and Sugar: In a large bowl (or the bowl of your stand mixer), cream together the softened butter and granulated sugar until light and fluffy. This usually takes about 3-5 minutes on medium speed. Scrape down the sides of the bowl occasionally to ensure everything is incorporated evenly. The mixture should be noticeably lighter in color and texture. This step is crucial for creating a tender cookie.
- Add Eggs and Vanilla: Beat in the eggs one at a time, mixing well after each addition. Then, stir in the vanilla extract. Make sure the eggs are fully incorporated before adding the vanilla. This helps to emulsify the mixture and prevent the cookies from becoming greasy.
- Prepare the Red Velvet Mixture: In a small bowl, whisk together the red food coloring, cocoa powder, and white vinegar. The vinegar helps to activate the red food coloring and enhances the red velvet flavor. It also reacts with the baking soda to create a slightly tangy taste.
- Add Red Velvet Mixture to Butter Mixture: Add the red velvet mixture to the creamed butter and sugar and beat until well combined. The mixture should be a vibrant red color. Scrape down the sides of the bowl to ensure even distribution of the color.
- Alternate Adding Dry and Wet Ingredients: Gradually add the dry ingredients to the wet ingredients, alternating with the buttermilk. Begin and end with the dry ingredients. Add about 1/3 of the dry ingredients, then 1/2 of the buttermilk, then another 1/3 of the dry ingredients, then the remaining buttermilk, and finally the remaining dry ingredients. Mix until just combined. Be careful not to overmix the dough, as this can result in tough cookies. Overmixing develops the gluten in the flour, leading to a chewier, less tender cookie.
- Fold in White Chocolate Chips: Gently fold in the white chocolate chips until they are evenly distributed throughout the dough. Be careful not to overmix at this stage. The white chocolate chips add a touch of sweetness and creaminess to the cookies.
- Chill the Dough: Cover the bowl with plastic wrap and chill the dough in the refrigerator for at least 1 hour, or preferably 2-3 hours. Chilling the dough allows the gluten to relax, which results in a more tender cookie. It also prevents the cookies from spreading too much during baking. You can even chill the dough overnight for even better results.
Baking the Cookies:
- Preheat Oven: Preheat your oven to 350°F (175°C). Line baking sheets with parchment paper or silicone baking mats. Parchment paper prevents the cookies from sticking to the baking sheet and makes cleanup easier. Silicone baking mats provide even heat distribution and prevent the cookies from browning too quickly on the bottom.
- Scoop Dough: Use a cookie scoop or spoon to drop rounded tablespoons of dough onto the prepared baking sheets, leaving about 2 inches between each cookie. This allows the cookies to spread without running into each other. For uniform cookies, use a cookie scoop.
- Bake: Bake for 9-11 minutes, or until the edges are set and the centers are slightly soft. The baking time may vary depending on your oven, so keep a close eye on the cookies. Do not overbake the cookies, as they will become dry and crumbly. The cookies should still be slightly soft in the center when you remove them from the oven.
- Cool: Let the cookies cool on the baking sheets for a few minutes before transferring them to a wire rack to cool completely. This allows the cookies to firm up slightly and prevents them from breaking when you move them. Cooling the cookies completely on a wire rack allows air to circulate around them, preventing them from becoming soggy.
Tips and Variations:
- Cream Cheese Frosting: For an extra decadent treat, frost the cooled cookies with cream cheese frosting. The tangy cream cheese frosting complements the red velvet flavor perfectly.
- Add Nuts: Add chopped pecans or walnuts to the dough for a nutty flavor and texture. About 1/2 cup of chopped nuts is a good amount.
- Use Different Chocolate Chips: Experiment with different types of chocolate chips, such as dark chocolate or milk chocolate.
- Make Cookie Sandwiches: Spread cream cheese frosting between two cookies to make cookie sandwiches.
- Adjust Red Food Coloring: The amount of red food coloring can be adjusted to achieve the desired color intensity. Keep in mind that too much food coloring can affect the taste of the cookies. Gel food coloring is recommended for a more vibrant color without adding excess liquid.
- Buttermilk Substitute: If you don’t have buttermilk, you can make a substitute by adding 1 tablespoon of white vinegar or lemon juice to 1 cup of milk. Let it sit for 5 minutes before using.
- Storage: Store the cookies in an airtight container at room temperature for up to 3 days. They can also be frozen for longer storage.
- Preventing Spreading: If your cookies are spreading too much, try chilling the dough for a longer period of time or adding a tablespoon or two of flour to the dough.
- High Altitude Baking: If you live at a high altitude, you may need to adjust the recipe slightly. Try reducing the amount of baking powder by 1/4 teaspoon and increasing the amount of liquid by 1-2 tablespoons.
Troubleshooting:
- Cookies are too dry: Overbaking is the most common cause of dry cookies. Make sure to bake the cookies for the recommended time and check them frequently. You can also try adding a tablespoon of milk or buttermilk to the dough.
- Cookies are too flat: Not chilling the dough enough or using too much butter can cause cookies to spread too much. Make sure to chill the dough for at least 1 hour and use the correct amount of butter.
- Cookies are too hard: Overmixing the dough or using too much flour can result in hard cookies. Be careful not to overmix the dough and measure the flour accurately.
- Cookies are not red enough: The quality of the red food coloring can affect the color of the cookies. Use a high-quality gel food coloring for the best results.
Enjoy your delicious Red Velvet Cookies!
Conclusion:
And there you have it! These Red Velvet Cookies are more than just a treat; they’re an experience. From the vibrant color to the melt-in-your-mouth texture and that irresistible hint of cocoa, every bite is pure bliss. I truly believe this recipe is a must-try for anyone who loves baking, or simply enjoys a delicious cookie. It’s the perfect balance of sweet and tangy, soft and chewy, making it a crowd-pleaser for any occasion. But why is this recipe so special? It’s the simplicity! You don’t need to be a professional baker to whip up a batch of these beauties. The ingredients are readily available, the instructions are straightforward, and the results are consistently amazing. Plus, the red velvet flavor is just so unique and comforting, it’s hard to resist. Forget store-bought cookies; once you’ve tasted these homemade delights, you’ll never go back. Looking for serving suggestions? These cookies are fantastic on their own, of course, but they also pair wonderfully with a cold glass of milk, a warm cup of coffee, or even a scoop of vanilla ice cream. Imagine a red velvet cookie ice cream sandwich talk about a decadent treat! For a more sophisticated touch, try crumbling them over a cheesecake or using them as a base for mini tarts. The possibilities are endless! And speaking of possibilities, let’s talk variations! Feel free to get creative and customize this recipe to your liking. Add white chocolate chips for an extra touch of sweetness, or chopped pecans for a nutty crunch. For a festive twist, sprinkle the cookies with red and green sprinkles during the holidays. If you’re feeling adventurous, try adding a swirl of cream cheese frosting on top for an even more indulgent experience. You could even experiment with different extracts, like almond or peppermint, to create unique flavor combinations. I’ve personally made these cookies countless times, and they always disappear in a flash. They’re perfect for bake sales, potlucks, holiday gatherings, or simply a cozy night in. They also make a thoughtful and delicious gift for friends and family. Trust me, once you share these cookies, you’ll be everyone’s favorite baker! So, what are you waiting for? Grab your ingredients, preheat your oven, and get ready to bake some magic. I’m confident that you’ll love these Red Velvet Cookies as much as I do. They are truly the perfect treat for any occasion. I’m so excited for you to try this recipe! And I would absolutely love to hear about your experience. Did you make any variations? Did you serve them with anything special? What did your friends and family think? Please, please, please share your thoughts and photos in the comments below. Your feedback is invaluable, and it helps me to continue creating and sharing delicious recipes that you’ll love. Happy baking! I can’t wait to see your creations! Print
Red Velvet Cookies: The Ultimate Guide to Baking Perfection
- Total Time: 89 minutes
- Yield: 24–30 cookies 1x
Description
Soft and chewy red velvet cookies studded with sweet white chocolate chips. These vibrant cookies are easy to make and perfect for any occasion!
Ingredients
- 2 1/4 cups all-purpose flour
- 1 teaspoon baking soda
- 1 teaspoon baking powder
- 1/2 teaspoon salt
- 1 cup (2 sticks) unsalted butter, softened
- 1 1/2 cups granulated sugar
- 2 large eggs
- 1 teaspoon vanilla extract
- 1 ounce (2 tablespoons) red food coloring
- 1 tablespoon unsweetened cocoa powder
- 1 teaspoon white vinegar
- 1 cup buttermilk
- 1 1/2 cups white chocolate chips
Instructions
- Combine Dry Ingredients: In a medium bowl, whisk together the flour, baking soda, baking powder, and salt. Set aside.
- Cream Butter and Sugar: In a large bowl (or the bowl of your stand mixer), cream together the softened butter and granulated sugar until light and fluffy (3-5 minutes on medium speed). Scrape down the sides of the bowl occasionally.
- Add Eggs and Vanilla: Beat in the eggs one at a time, mixing well after each addition. Then, stir in the vanilla extract.
- Prepare the Red Velvet Mixture: In a small bowl, whisk together the red food coloring, cocoa powder, and white vinegar.
- Add Red Velvet Mixture to Butter Mixture: Add the red velvet mixture to the creamed butter and sugar and beat until well combined.
- Alternate Adding Dry and Wet Ingredients: Gradually add the dry ingredients to the wet ingredients, alternating with the buttermilk. Begin and end with the dry ingredients. Mix until just combined. Be careful not to overmix the dough.
- Fold in White Chocolate Chips: Gently fold in the white chocolate chips until they are evenly distributed throughout the dough.
- Chill the Dough: Cover the bowl with plastic wrap and chill the dough in the refrigerator for at least 1 hour, or preferably 2-3 hours.
- Preheat Oven: Preheat your oven to 350°F (175°C). Line baking sheets with parchment paper or silicone baking mats.
- Scoop Dough: Use a cookie scoop or spoon to drop rounded tablespoons of dough onto the prepared baking sheets, leaving about 2 inches between each cookie.
- Bake: Bake for 9-11 minutes, or until the edges are set and the centers are slightly soft.
- Cool: Let the cookies cool on the baking sheets for a few minutes before transferring them to a wire rack to cool completely.
Notes
- For an extra decadent treat, frost the cooled cookies with cream cheese frosting.
- Add chopped pecans or walnuts to the dough for a nutty flavor and texture.
- Experiment with different types of chocolate chips, such as dark chocolate or milk chocolate.
- Spread cream cheese frosting between two cookies to make cookie sandwiches.
- The amount of red food coloring can be adjusted to achieve the desired color intensity. Gel food coloring is recommended.
- If you don’t have buttermilk, you can make a substitute by adding 1 tablespoon of white vinegar or lemon juice to 1 cup of milk. Let it sit for 5 minutes before using.
- Store the cookies in an airtight container at room temperature for up to 3 days. They can also be frozen for longer storage.
- If your cookies are spreading too much, try chilling the dough for a longer period of time or adding a tablespoon or two of flour to the dough.
- If you live at a high altitude, you may need to adjust the recipe slightly. Try reducing the amount of baking powder by 1/4 teaspoon and increasing the amount of liquid by 1-2 tablespoons.
- Cookies are too dry: Overbaking is the most common cause of dry cookies. Make sure to bake the cookies for the recommended time and check them frequently. You can also try adding a tablespoon of milk or buttermilk to the dough.
- Cookies are too flat: Not chilling the dough enough or using too much butter can cause cookies to spread too much. Make sure to chill the dough for at least 1 hour and use the correct amount of butter.
- Cookies are too hard: Overmixing the dough or using too much flour can result in hard cookies. Be careful not to overmix the dough and measure the flour accurately.
- Cookies are not red enough: The quality of the red food coloring can affect the color of the cookies. Use a high-quality gel food coloring for the best results.
- Prep Time: 20 minutes
- Cook Time: 9 minutes


Leave a Comment