
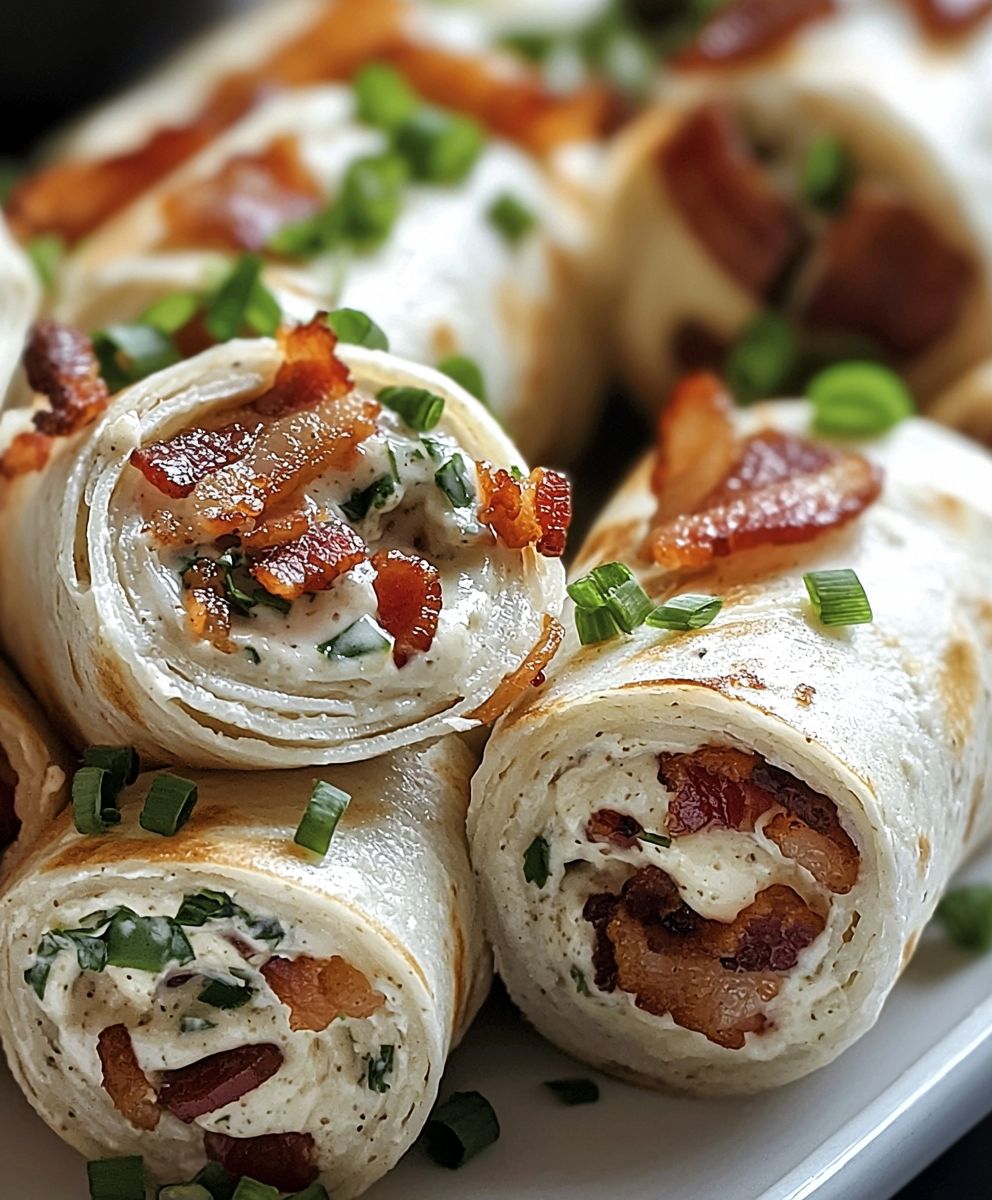
Bacon Ranch Roll Ups: Prepare to meet your new favorite appetizer! Imagine biting into a flaky, golden-brown crescent roll, bursting with savory bacon, creamy ranch, and melted cheese. These aren’t just any snacks; they’re a flavor explosion in every bite, perfect for parties, game days, or even a quick and satisfying weeknight treat.
While the exact origins of Bacon Ranch Roll Ups are shrouded in delicious mystery, their popularity speaks volumes. They represent the perfect marriage of classic American flavors the smoky, salty goodness of bacon, the tangy coolness of ranch dressing, and the comforting warmth of baked dough. This combination has captured hearts (and stomachs!) across generations.
What makes these roll-ups so irresistible? It’s the delightful contrast of textures the crisp bacon against the soft, pillowy dough. It’s the ease of preparation a lifesaver when you’re short on time but craving something truly satisfying. And, of course, it’s the undeniable flavor combination that keeps everyone coming back for more. Whether you’re a seasoned cook or a kitchen novice, these Bacon Ranch Roll Ups are guaranteed to be a crowd-pleaser. So, let’s get rolling and create some deliciousness!

Ingredients:
- 1 package (8 ounces) cream cheese, softened
- 1/2 cup mayonnaise
- 1 packet (1 ounce) dry ranch dressing mix
- 1/2 cup shredded cheddar cheese
- 1/4 cup chopped green onions
- 1 pound bacon, cooked and crumbled
- 1 package (11 ounces) refrigerated crescent roll dough
- 1 tablespoon melted butter
- 1 teaspoon garlic powder
- 1/4 cup grated Parmesan cheese
Preparing the Bacon Ranch Filling
Okay, let’s get started with the heart of these delicious roll-ups: the bacon ranch filling! This is where all the flavor magic happens, so pay close attention. We want a creamy, cheesy, bacon-y explosion in every bite.
- Soften the Cream Cheese: First things first, make sure your cream cheese is nice and soft. If you forgot to take it out of the fridge ahead of time (we’ve all been there!), you can microwave it for about 15-20 seconds, but keep a close eye on it so it doesn’t melt completely. You want it soft enough to easily mix with the other ingredients.
- Combine Cream Cheese and Mayonnaise: In a large bowl, add the softened cream cheese and mayonnaise. Use a hand mixer or a sturdy spoon to blend them together until smooth and creamy. This is your base, so make sure there are no lumps of cream cheese remaining. A smooth base ensures even distribution of flavor.
- Add Ranch Dressing Mix: Now for the ranch! Pour in the entire packet of dry ranch dressing mix. This is what gives the filling that signature tangy, herby ranch flavor we all know and love. Mix it in thoroughly until it’s evenly distributed throughout the cream cheese and mayonnaise mixture.
- Incorporate Cheddar Cheese: Next, add the shredded cheddar cheese. I like to use sharp cheddar for a bit of a kick, but you can use mild or medium cheddar if you prefer a milder flavor. Mix it in until it’s well combined. The cheddar cheese adds a nice cheesy element and helps bind the filling together.
- Add Green Onions: Time for some freshness! Add the chopped green onions to the bowl. Green onions provide a subtle oniony flavor and a pop of color. Mix them in gently so they don’t get bruised.
- Fold in the Bacon: The star of the show! Add the cooked and crumbled bacon to the bowl. Make sure your bacon is nice and crispy for the best texture and flavor. Gently fold it into the filling until it’s evenly distributed. Be careful not to overmix, as you don’t want to break the bacon into tiny pieces. We want those glorious bacon chunks!
- Taste and Adjust: Now, give the filling a taste! This is your chance to adjust the flavors to your liking. If you want more ranch flavor, you can add a little more ranch dressing mix. If you want more cheesy flavor, add a little more cheddar cheese. If you want a bit of a kick, add a pinch of red pepper flakes. Trust your taste buds!
- Chill the Filling (Optional): While not strictly necessary, chilling the filling for about 30 minutes in the refrigerator can make it easier to work with when you’re assembling the roll-ups. This allows the flavors to meld together even more and helps the filling firm up slightly.
Assembling the Bacon Ranch Roll-Ups
Alright, the filling is ready, and now it’s time to assemble these little bites of heaven! This part is pretty straightforward, but a little attention to detail will ensure that your roll-ups look and taste amazing.
- Preheat Oven and Prepare Baking Sheet: Preheat your oven to 375°F (190°C). Line a baking sheet with parchment paper. This will prevent the roll-ups from sticking and make cleanup a breeze.
- Unroll Crescent Roll Dough: Carefully unroll the crescent roll dough onto a clean, lightly floured surface. Separate the dough into triangles. You should have eight triangles in total.
- Spread Filling on Triangles: Take a spoonful of the bacon ranch filling and spread it evenly over each crescent roll triangle, leaving a small border around the edges. Don’t overfill the triangles, or the filling will ooze out during baking. About 2-3 tablespoons of filling per triangle should be perfect.
- Roll Up the Triangles: Starting at the wide end of each triangle, roll it up towards the point. Make sure to roll them up tightly to prevent them from unraveling during baking.
- Place Roll-Ups on Baking Sheet: Place the rolled-up crescents on the prepared baking sheet, with the point facing down. Arrange them evenly, leaving a little space between each roll-up.
Baking and Finishing Touches
Almost there! Now it’s time to bake these beauties and add the final touches that will take them over the top.
- Prepare Garlic Butter Topping: In a small bowl, combine the melted butter and garlic powder. Mix well. This garlic butter topping adds a delicious savory flavor and helps the roll-ups brown beautifully.
- Brush with Garlic Butter: Using a pastry brush, brush the tops of the roll-ups with the garlic butter mixture. Make sure to coat them evenly.
- Sprinkle with Parmesan Cheese: Sprinkle the tops of the roll-ups with grated Parmesan cheese. This adds a salty, nutty flavor and a nice golden-brown crust.
- Bake the Roll-Ups: Place the baking sheet in the preheated oven and bake for 12-15 minutes, or until the roll-ups are golden brown and the filling is bubbly. Keep a close eye on them, as baking times may vary depending on your oven.
- Cool Slightly and Serve: Remove the baking sheet from the oven and let the roll-ups cool slightly on the baking sheet for a few minutes before transferring them to a serving platter. Serve warm and enjoy! These are best served fresh out of the oven, but they can also be reheated if needed.
Tips and Variations
Want to customize these bacon ranch roll-ups to your liking? Here are a few tips and variations to get you started:
- Add Some Heat: For a spicy kick, add a pinch of red pepper flakes to the filling or brush the roll-ups with a little hot sauce before baking.
- Use Different Cheese: Experiment with different types of cheese, such as Monterey Jack, pepper jack, or Colby Jack.
- Add Vegetables: Add some chopped vegetables to the filling, such as diced tomatoes, bell peppers, or spinach.
- Make it a Meal: Serve these roll-ups with a side salad or soup for a complete meal.
- Use Different Dough: If you don’t have crescent roll dough, you can use puff pastry or pizza dough instead. Just adjust the baking time accordingly.
- Make Ahead: You can assemble the roll-ups ahead of time and store them in the refrigerator until you’re ready to bake them. Just add a few minutes to the baking time.
- Freezing: You can freeze the baked roll-ups for up to 2 months. Let them cool completely before freezing, and then wrap them tightly in plastic wrap and aluminum foil. To reheat, bake them in a preheated oven at 350°F (175°C) until heated through.
Serving Suggestions
These bacon ranch roll-ups are perfect for:
- Appetizers
- Party snacks
- Game day gatherings
- Potlucks
- Holiday parties
- A quick and easy weeknight dinner
Enjoy!
I hope you enjoy making and eating these delicious bacon ranch roll-ups! They’re always a crowd-pleaser, and they’re so easy to make. Let me know in the comments if you try them and what you think!
Conclusion:
And there you have it! These Bacon Ranch Roll Ups are truly a must-try for your next gathering, game day, or even just a fun weeknight snack. I know, I know, I’m biased, but trust me on this one. The combination of crispy bacon, creamy ranch, and flaky crescent roll dough is simply irresistible. It’s the kind of appetizer that disappears in minutes, leaving everyone wanting more. But what makes these roll ups so special? It’s the perfect balance of flavors and textures. The salty bacon provides a satisfying crunch, while the ranch dressing adds a cool and tangy creaminess. The crescent roll dough bakes up light and airy, creating a delightful contrast to the savory filling. Plus, they are incredibly easy to make! Seriously, even if you’re a beginner in the kitchen, you can whip these up in no time. Why are these Bacon Ranch Roll Ups a must-try? Because they are: * Incredibly delicious and satisfying. * Easy to make with minimal ingredients. * Perfect for any occasion, from casual gatherings to fancy parties. * A guaranteed crowd-pleaser. Looking for some serving suggestions or variations to make these roll ups your own? Here are a few ideas: * Spice it up: Add a pinch of red pepper flakes to the ranch dressing for a little kick. * Cheese, please: Sprinkle some shredded cheddar cheese or Monterey Jack cheese over the bacon before rolling up. * Veggie boost: Add some finely chopped green onions or chives to the ranch dressing for a fresh flavor. * Dipping delights: Serve with extra ranch dressing, blue cheese dressing, or even a spicy sriracha mayo for dipping. * Make it a meal: Serve alongside a salad or soup for a light and satisfying lunch. * Air Fryer Option: For a quicker cook, try air frying these at 350°F (175°C) for about 8-10 minutes, or until golden brown. Keep a close eye on them to prevent burning. I’m confident that you’ll love these Bacon Ranch Roll Ups as much as I do. They’re the perfect combination of savory, creamy, and crispy, and they’re sure to be a hit with everyone who tries them. So, what are you waiting for? Head to the kitchen and give this recipe a try! I promise you won’t be disappointed. And when you do, be sure to share your experience with me. I’d love to hear what you think and see your creations. Tag me in your photos on social media or leave a comment below. I’m always excited to see how you make this recipe your own. Don’t forget to rate this recipe and let me know if you have any questions. Happy baking (or should I say, rolling!) and enjoy your delicious Bacon Ranch Roll Ups! I can’t wait to hear all about it! Print
Bacon Ranch Roll Ups: The Ultimate Party Appetizer Recipe
- Total Time: 35 minutes
- Yield: 8 roll-ups 1x
Description
Creamy, cheesy bacon ranch filling rolled in flaky crescent dough, brushed with garlic butter, and sprinkled with Parmesan. Perfect for parties, appetizers, or a quick snack!
Ingredients
- 1 package (8 ounces) cream cheese, softened
- 1/2 cup mayonnaise
- 1 packet (1 ounce) dry ranch dressing mix
- 1/2 cup shredded cheddar cheese
- 1/4 cup chopped green onions
- 1 pound bacon, cooked and crumbled
- 1 package (11 ounces) refrigerated crescent roll dough
- 1 tablespoon melted butter
- 1 teaspoon garlic powder
- 1/4 cup grated Parmesan cheese
Instructions
- Prepare the Filling: In a large bowl, combine softened cream cheese and mayonnaise until smooth. Mix in ranch dressing mix, cheddar cheese, green onions, and crumbled bacon. Taste and adjust seasonings as needed. Chill for 30 minutes (optional).
- Assemble the Roll-Ups: Preheat oven to 375°F (190°C). Line a baking sheet with parchment paper. Unroll crescent roll dough and separate into triangles.
- Spread 2-3 tablespoons of bacon ranch filling evenly over each triangle, leaving a small border.
- Starting at the wide end, roll up each triangle tightly towards the point. Place on the prepared baking sheet, point-side down.
- Bake and Finish: In a small bowl, combine melted butter and garlic powder. Brush the tops of the roll-ups with the garlic butter mixture. Sprinkle with Parmesan cheese.
- Bake for 12-15 minutes, or until golden brown and the filling is bubbly.
- Cool slightly before serving. Serve warm.
Notes
- For a spicy kick, add a pinch of red pepper flakes to the filling.
- Experiment with different cheeses like Monterey Jack or pepper jack.
- Add chopped vegetables like diced tomatoes or bell peppers to the filling.
- Serve with a side salad or soup for a complete meal.
- Use puff pastry or pizza dough instead of crescent roll dough, adjusting baking time accordingly.
- Assemble ahead of time and refrigerate until ready to bake, adding a few minutes to the baking time.
- Freeze baked roll-ups for up to 2 months. Reheat in a preheated oven at 350°F (175°C) until heated through.
- Prep Time: 20 minutes
- Cook Time: 15 minutes


Leave a Comment