
Blueberry pie bars, a delightful twist on a classic dessert, are about to become your new favorite treat! Imagine the comforting flavors of a traditional blueberry pie, but in a convenient, hand-held form. No forks required! These bars offer the perfect balance of sweet and tart, with a buttery, crumbly crust that melts in your mouth.
While the exact origins of blueberry pie are debated, blueberries themselves have been a staple in North American cuisine for centuries, cherished by indigenous populations long before European settlers arrived. Over time, blueberry pie evolved into a symbol of American comfort food, often associated with home-baked goodness and family gatherings. Blueberry pie bars take that beloved tradition and make it even more accessible for busy modern lives.
What’s not to love? The combination of juicy blueberries bursting with flavor, a hint of lemon zest, and that irresistible buttery crust is simply divine. People adore these bars because they are easy to make, perfect for potlucks, picnics, or a simple weeknight dessert. Plus, they are incredibly satisfying, offering a delightful textural contrast between the soft filling and the crisp, golden crust. Get ready to experience the magic of blueberry pie in a brand new way!

Ingredients:
- For the Crust:
- 2 ½ cups all-purpose flour
- 1 cup (2 sticks) cold unsalted butter, cut into cubes
- ½ cup granulated sugar
- ½ teaspoon salt
- 6-8 tablespoons ice water
- For the Blueberry Filling:
- 6 cups fresh blueberries, rinsed and patted dry
- ¾ cup granulated sugar
- ¼ cup cornstarch
- 2 tablespoons lemon juice
- 1 teaspoon lemon zest
- ¼ teaspoon ground cinnamon
- Pinch of salt
- For the Crumble Topping:
- ¾ cup all-purpose flour
- ½ cup packed light brown sugar
- ½ cup rolled oats
- ½ cup (1 stick) cold unsalted butter, cut into cubes
- ½ teaspoon ground cinnamon
- ¼ teaspoon salt
- Optional:
- 1 tablespoon milk or cream, for brushing the crust
- Turbinado sugar, for sprinkling on top
Preparing the Crust:
- Combine Dry Ingredients: In a large bowl, whisk together the flour, sugar, and salt. This ensures that the salt is evenly distributed throughout the crust, preventing any overly salty bites.
- Cut in the Butter: Add the cold, cubed butter to the flour mixture. Using a pastry blender or your fingertips, cut the butter into the flour until the mixture resembles coarse crumbs. The butter should be in small pieces, about the size of peas. This is crucial for creating a flaky crust. If the butter gets too warm, the crust will be tough.
- Add Ice Water: Gradually add the ice water, one tablespoon at a time, mixing gently after each addition. Continue adding water until the dough just comes together. Be careful not to overmix, as this will develop the gluten in the flour and result in a tough crust. The dough should be slightly shaggy but hold together when pressed.
- Form the Dough: Divide the dough in half. Gently flatten each half into a disc. Wrap each disc tightly in plastic wrap and refrigerate for at least 30 minutes, or up to 2 hours. This chilling time allows the gluten to relax and the butter to firm up, which will result in a flakier crust.
Preparing the Blueberry Filling:
- Combine Filling Ingredients: In a large bowl, gently toss together the blueberries, sugar, cornstarch, lemon juice, lemon zest, cinnamon, and salt. Make sure the blueberries are evenly coated with the sugar and cornstarch mixture. The cornstarch will help to thicken the filling as it bakes.
- Let it Sit: Allow the blueberry mixture to sit for about 15 minutes. This will allow the blueberries to release some of their juices, which will combine with the sugar and cornstarch to create a delicious sauce.
Preparing the Crumble Topping:
- Combine Dry Ingredients: In a medium bowl, whisk together the flour, brown sugar, rolled oats, cinnamon, and salt. The rolled oats add a nice texture and nutty flavor to the crumble topping.
- Cut in the Butter: Add the cold, cubed butter to the flour mixture. Using a pastry blender or your fingertips, cut the butter into the flour until the mixture resembles coarse crumbs. Again, the butter should be in small pieces.
- Mix Until Crumbly: Continue mixing until the mixture is crumbly and the butter is evenly distributed. You can also use a fork to mix the ingredients together.
- Chill (Optional): For best results, chill the crumble topping in the refrigerator for at least 15 minutes while you prepare the crust. This will help the butter stay cold and prevent the topping from spreading too much during baking.
Assembling and Baking the Blueberry Pie Bars:
- Preheat Oven: Preheat your oven to 375°F (190°C). Line a 9×13 inch baking pan with parchment paper, leaving an overhang on the sides. This will make it easy to lift the bars out of the pan after baking.
- Roll Out the First Layer of Crust: On a lightly floured surface, roll out one of the chilled dough discs into a rectangle slightly larger than the 9×13 inch pan. Carefully transfer the dough to the prepared pan and press it into the bottom and up the sides. Trim any excess dough.
- Dock the Crust: Use a fork to prick the bottom of the crust all over. This will prevent the crust from puffing up during baking.
- Blind Bake (Optional): For a crispier crust, you can blind bake the crust for 10-15 minutes before adding the filling. To do this, place a piece of parchment paper over the crust and fill it with pie weights or dried beans. Bake for 10-15 minutes, then remove the parchment paper and weights and bake for another 5 minutes, or until the crust is lightly golden.
- Add the Blueberry Filling: Pour the blueberry filling evenly over the prepared crust.
- Roll Out the Second Layer of Crust (Alternative): You have two options here. You can either roll out the second dough disc and place it over the blueberry filling as a solid top crust (making sure to cut slits to vent steam), or you can use the crumble topping. For these instructions, we’ll use the crumble topping.
- Sprinkle the Crumble Topping: Sprinkle the crumble topping evenly over the blueberry filling. Make sure to cover the entire surface of the filling.
- Brush with Milk (Optional): If desired, brush the top of the crumble topping with milk or cream and sprinkle with turbinado sugar. This will give the topping a nice golden color and a slightly crunchy texture.
- Bake: Bake in the preheated oven for 45-55 minutes, or until the crust is golden brown and the filling is bubbly. If the topping starts to brown too quickly, you can tent the pan with aluminum foil.
- Cool Completely: Let the bars cool completely in the pan before cutting. This is important because the filling will continue to thicken as it cools. Cooling completely will also make the bars easier to cut and serve. I usually let them cool for at least 2-3 hours, or even overnight.
- Cut and Serve: Once the bars are completely cool, lift them out of the pan using the parchment paper overhang. Cut them into squares or rectangles and serve.
Tips for Success:
- Use Cold Ingredients: The key to a flaky crust is to use cold ingredients, especially the butter and water. Cold butter creates pockets of steam in the dough as it bakes, which results in a flaky texture.
- Don’t Overmix the Dough: Overmixing the dough will develop the gluten in the flour, which will result in a tough crust. Mix the dough just until it comes together.
- Chill the Dough: Chilling the dough allows the gluten to relax and the butter to firm up, which will result in a flakier crust.
- Use Fresh Blueberries: Fresh blueberries will give you the best flavor and texture. If you use frozen blueberries, be sure to thaw them completely and drain off any excess liquid before adding them to the filling.
- Adjust Sugar to Taste: The amount of sugar in the filling can be adjusted to your liking. If your blueberries are very sweet, you may want to reduce the amount of sugar.
- Let Cool Completely: It’s tempting to cut into these bars while they’re still warm, but trust me, they’re much better if you let them cool completely. The filling will thicken up and the bars will be easier to cut.
Variations:
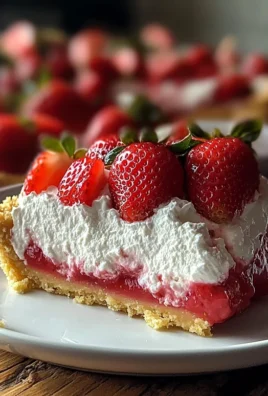
- Other Berries: You can substitute other berries for the blueberries, such as raspberries, blackberries, or strawberries.
- Add Nuts: Add chopped nuts to the crumble topping for extra flavor and texture. Pecans, walnuts, or almonds would all be delicious.
- Lemon Glaze: Drizzle a lemon glaze over the cooled bars for extra flavor and sweetness. To make the glaze, whisk together powdered sugar and lemon juice until smooth.
- Spice it Up: Add a pinch of nutmeg or cardamom to the blueberry filling for a warm, spicy flavor.

Conclusion:
And there you have it! These blueberry pie bars are more than just a dessert; they’re a slice of summer sunshine baked into a convenient, portable package. I truly believe this recipe is a must-try for anyone who loves the classic flavors of blueberry pie but appreciates a quicker, easier, and frankly, more shareable format. The buttery, crumbly crust, the sweet-tart burst of juicy blueberries, and that hint of lemon zest it all comes together in perfect harmony. But why is this recipe a must-try, you ask? Well, beyond the incredible taste, it’s the sheer versatility and ease of preparation. Unlike a traditional pie, these bars require no fancy crimping or blind baking. The press-in crust and simple filling mean you can have these beauties in the oven in under 30 minutes. Plus, they’re naturally portioned, making them ideal for potlucks, picnics, or simply satisfying your own sweet tooth without the temptation of a whole pie staring back at you from the fridge. Looking for serving suggestions? These blueberry pie bars are delightful on their own, but a scoop of vanilla ice cream or a dollop of whipped cream elevates them to a truly decadent treat. A light dusting of powdered sugar adds a touch of elegance, while a drizzle of lemon glaze intensifies the citrus notes. For a more rustic presentation, try serving them warm with a sprinkle of coarse sea salt. And the variations? Oh, the possibilities are endless! Feel free to experiment with different berries raspberries, blackberries, or even a mixed berry medley would work beautifully. You could also add a streusel topping for extra crunch and sweetness. A handful of chopped pecans or walnuts in the crust would provide a nutty contrast to the fruity filling. If you’re feeling adventurous, try incorporating a hint of spice, like cinnamon or nutmeg, into the crust or filling. A little almond extract can also enhance the overall flavor profile. For a vegan version, simply substitute the butter with a vegan butter alternative and ensure your sugar is vegan-friendly. These blueberry pie bars are also incredibly freezer-friendly. Once cooled, cut them into squares and wrap them individually in plastic wrap before placing them in a freezer-safe container. They’ll keep for up to three months, ready to be thawed and enjoyed whenever a craving strikes. This makes them perfect for meal prepping or having a sweet treat on hand for unexpected guests. I’ve poured my heart into perfecting this recipe, and I’m confident that you’ll love it as much as I do. The combination of simplicity, flavor, and versatility makes it a winner in my book. So, gather your ingredients, preheat your oven, and get ready to bake up a batch of these irresistible blueberry pie bars. I’m so excited for you to try this recipe! Once you do, please, please, please share your experience with me! Let me know what you think in the comments below. Did you make any variations? What did your family and friends think? I’m always eager to hear your feedback and see your creations. Happy baking! I can’t wait to see what you come up with. Don’t forget to tag me in your photos on social media I’d love to see your beautiful blueberry pie bars! Print
Blueberry Pie Bars: Easy Recipe & Baking Tips
- Total Time: 150 minutes
- Yield: 12–16 bars 1x
Description
Delicious blueberry pie bars with a buttery crust and a sweet, crumbly topping. Perfect for a summer treat!
Ingredients
- 2 ½ cups all-purpose flour
- 1 cup (2 sticks) cold unsalted butter, cut into cubes
- ½ cup granulated sugar
- ½ teaspoon salt
- 6–8 tablespoons ice water
- 6 cups fresh blueberries, rinsed and patted dry
- ¾ cup granulated sugar
- ¼ cup cornstarch
- 2 tablespoons lemon juice
- 1 teaspoon lemon zest
- ¼ teaspoon ground cinnamon
- Pinch of salt
- ¾ cup all-purpose flour
- ½ cup packed light brown sugar
- ½ cup rolled oats
- ½ cup (1 stick) cold unsalted butter, cut into cubes
- ½ teaspoon ground cinnamon
- ¼ teaspoon salt
- 1 tablespoon milk or cream, for brushing the crust
- Turbinado sugar, for sprinkling on top
Instructions
- In a large bowl, whisk together the flour, sugar, and salt.
- Cut in the cold, cubed butter using a pastry blender or your fingertips until the mixture resembles coarse crumbs.
- Gradually add the ice water, one tablespoon at a time, mixing gently after each addition, until the dough just comes together. Be careful not to overmix.
- Divide the dough in half. Gently flatten each half into a disc. Wrap each disc tightly in plastic wrap and refrigerate for at least 30 minutes, or up to 2 hours.
- In a large bowl, gently toss together the blueberries, sugar, cornstarch, lemon juice, lemon zest, cinnamon, and salt.
- Let the blueberry mixture sit for about 15 minutes.
- In a medium bowl, whisk together the flour, brown sugar, rolled oats, cinnamon, and salt.
- Cut in the cold, cubed butter using a pastry blender or your fingertips until the mixture resembles coarse crumbs.
- Mix until the mixture is crumbly and the butter is evenly distributed.
- Chill the crumble topping in the refrigerator for at least 15 minutes while you prepare the crust (optional).
- Preheat your oven to 375°F (190°C). Line a 9×13 inch baking pan with parchment paper, leaving an overhang on the sides.
- On a lightly floured surface, roll out one of the chilled dough discs into a rectangle slightly larger than the 9×13 inch pan. Carefully transfer the dough to the prepared pan and press it into the bottom and up the sides. Trim any excess dough.
- Use a fork to prick the bottom of the crust all over (dock the crust).
- Blind Bake (Optional): For a crispier crust, you can blind bake the crust for 10-15 minutes before adding the filling. To do this, place a piece of parchment paper over the crust and fill it with pie weights or dried beans. Bake for 10-15 minutes, then remove the parchment paper and weights and bake for another 5 minutes, or until the crust is lightly golden.
- Pour the blueberry filling evenly over the prepared crust.
- Sprinkle the crumble topping evenly over the blueberry filling.
- If desired, brush the top of the crumble topping with milk or cream and sprinkle with turbinado sugar.
- Bake in the preheated oven for 45-55 minutes, or until the crust is golden brown and the filling is bubbly. If the topping starts to brown too quickly, you can tent the pan with aluminum foil.
- Let the bars cool completely in the pan before cutting.
- Once the bars are completely cool, lift them out of the pan using the parchment paper overhang. Cut them into squares or rectangles and serve.
Notes
- Use cold ingredients for a flaky crust.
- Don’t overmix the dough.
- Chill the dough for best results.
- Fresh blueberries are recommended.
- Adjust sugar to taste.
- Let cool completely before cutting.
- Variations: Substitute other berries, add nuts to the crumble, drizzle with lemon glaze, or add spices to the filling.
- Prep Time: 45 minutes
- Cook Time: 45-55 minutes


Leave a Comment