
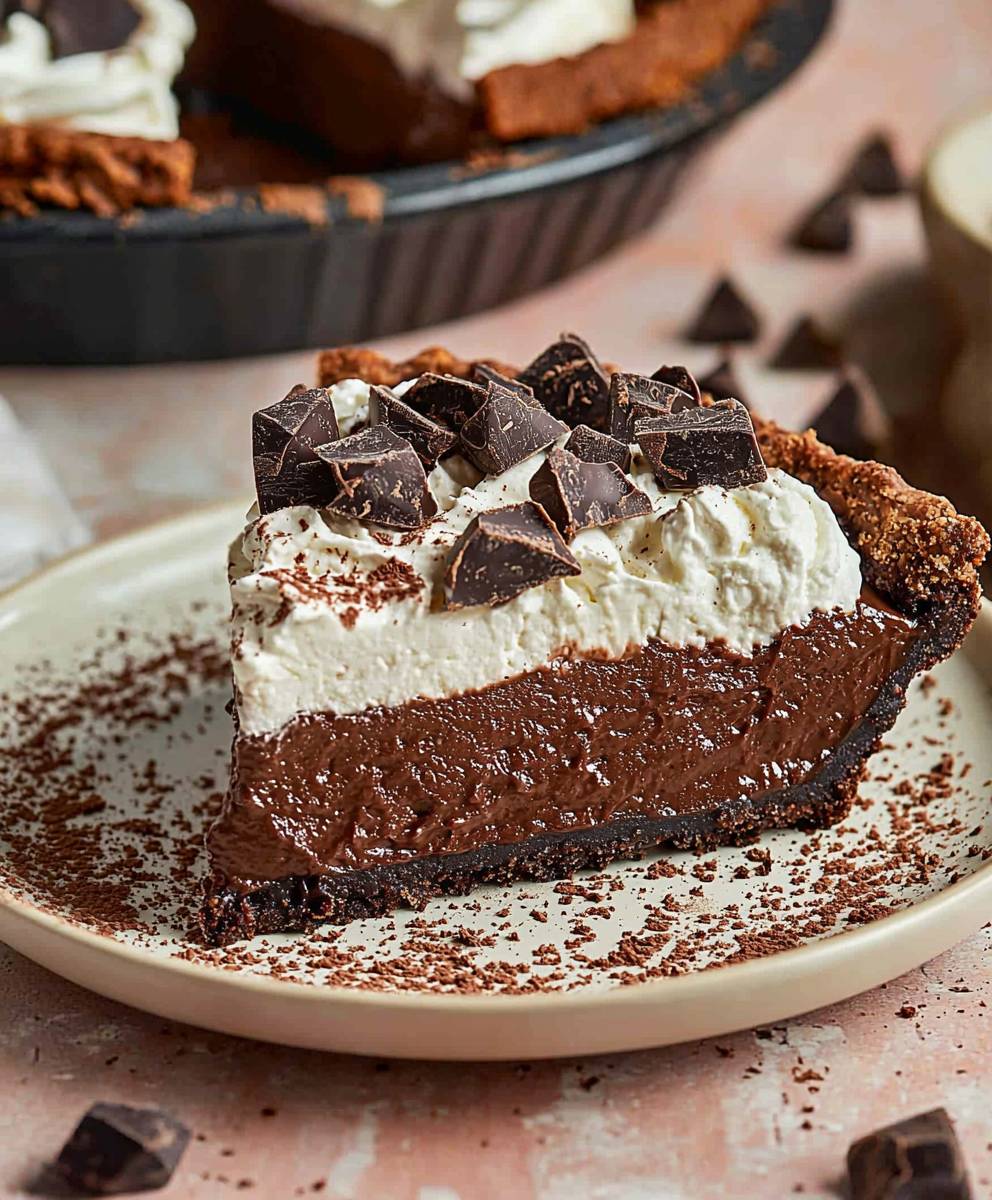
Chocolate pie, oh, where do I even begin? Imagine sinking your fork into a slice of pure chocolate bliss a velvety smooth, rich filling nestled in a flaky, buttery crust. It’s a dessert experience that’s simply irresistible, and today, I’m thrilled to share my foolproof recipe with you!
While the exact origins of chocolate pie are a bit murky, its roots can be traced back to the early days of chocolate making in America. As chocolate became more accessible, creative cooks began experimenting, incorporating it into various desserts, and the chocolate pie was born! It quickly became a staple in Southern cuisine, often gracing tables at family gatherings and holiday celebrations.
But what is it about this decadent dessert that makes it so beloved? For many, it’s the perfect balance of textures: the creamy, melt-in-your-mouth filling contrasted with the satisfying crunch of the crust. The intense chocolate flavor is, of course, a major draw, offering a comforting and indulgent experience with every bite. Plus, while it may seem fancy, a well-made chocolate pie is surprisingly simple to prepare, making it a perfect choice for both special occasions and weeknight treats. So, let’s get baking and create a chocolate pie that will impress everyone!
Ingredients:
- For the Crust:
- 1 ½ cups all-purpose flour
- ½ teaspoon salt
- ½ cup (1 stick) unsalted butter, cold and cut into cubes
- ¼ cup vegetable shortening, cold
- 5-7 tablespoons ice water
- For the Chocolate Filling:
- 1 ½ cups granulated sugar
- ½ cup unsweetened cocoa powder
- ¼ teaspoon salt
- 3 tablespoons cornstarch
- 3 cups whole milk
- 4 large egg yolks, lightly beaten
- 2 tablespoons unsalted butter
- 1 teaspoon vanilla extract
- 6 ounces bittersweet chocolate, chopped
- For the Whipped Cream Topping (Optional):
- 1 ½ cups heavy cream
- 3 tablespoons powdered sugar
- ½ teaspoon vanilla extract
Preparing the Crust:
- Combine Dry Ingredients: In a large bowl, whisk together the flour and salt. This ensures the salt is evenly distributed throughout the crust, which is crucial for flavor.
- Cut in the Fat: Add the cold butter and shortening to the flour mixture. Using a pastry blender or your fingertips (work quickly to keep the fat cold!), cut the fat into the flour until the mixture resembles coarse crumbs. You should still see small pieces of butter and shortening these are what create flaky layers.
- Add Ice Water: Gradually add the ice water, one tablespoon at a time, mixing gently after each addition. Continue adding water until the dough just comes together. Be careful not to overmix, as this will develop the gluten and result in a tough crust. The dough should be slightly shaggy but hold together when pressed.
- Form the Dough: Turn the dough out onto a lightly floured surface. Gently form it into a disc, about 1 inch thick. Wrap the disc tightly in plastic wrap and refrigerate for at least 30 minutes, or up to 2 hours. This allows the gluten to relax, making the dough easier to roll out.
- Roll Out the Dough: On a lightly floured surface, roll out the dough into a circle about 12 inches in diameter. Rotate the dough frequently and add more flour as needed to prevent sticking.
- Transfer to Pie Plate: Carefully transfer the rolled-out dough to a 9-inch pie plate. Gently press the dough into the bottom and up the sides of the plate.
- Trim and Crimp the Edges: Trim any excess dough hanging over the edge of the pie plate. Crimp the edges of the crust using your fingers or a fork to create a decorative border. This also helps to seal the crust and prevent it from shrinking during baking.
- Pre-Bake the Crust (Blind Bake): Preheat your oven to 375°F (190°C). Line the pie crust with parchment paper and fill it with pie weights or dried beans. This prevents the crust from puffing up during baking. Bake for 15-20 minutes, or until the edges are lightly golden brown.
- Remove Weights and Bake Further: Remove the parchment paper and pie weights. Return the crust to the oven and bake for another 5-10 minutes, or until the bottom of the crust is golden brown. This ensures the crust is fully cooked and won’t be soggy when you add the filling.
- Cool the Crust: Let the baked pie crust cool completely on a wire rack before adding the chocolate filling.
Preparing the Chocolate Filling:
- Combine Dry Ingredients: In a medium saucepan, whisk together the granulated sugar, cocoa powder, salt, and cornstarch. This ensures that the cocoa powder and cornstarch are evenly distributed, preventing lumps in the finished filling.
- Whisk in Milk: Gradually whisk in the milk until the mixture is smooth and there are no lumps.
- Add Egg Yolks: In a separate small bowl, lightly beat the egg yolks. Temper the egg yolks by slowly whisking a small amount of the hot milk mixture into the egg yolks. This prevents the eggs from scrambling when added to the hot mixture. Then, pour the tempered egg yolk mixture into the saucepan with the remaining milk mixture.
- Cook the Filling: Cook the mixture over medium heat, stirring constantly with a whisk, until it comes to a simmer and thickens. Continue to cook for 1-2 minutes more, stirring constantly, to ensure the cornstarch is fully cooked and the filling is thick and glossy. Be careful not to let the filling burn on the bottom of the pan.
- Remove from Heat: Remove the saucepan from the heat.
- Add Butter, Vanilla, and Chocolate: Stir in the butter, vanilla extract, and chopped bittersweet chocolate until the butter and chocolate are completely melted and the filling is smooth and glossy. The residual heat from the filling will melt the chocolate and butter.
- Pour into Crust: Pour the hot chocolate filling into the cooled pie crust.
- Smooth the Surface: Smooth the surface of the filling with a spatula.
- Chill the Pie: Cover the pie with plastic wrap, pressing it directly onto the surface of the filling to prevent a skin from forming. Refrigerate for at least 4 hours, or preferably overnight, to allow the filling to set completely.
Preparing the Whipped Cream Topping (Optional):
- Chill the Bowl and Whisk: Place the mixing bowl and whisk attachment in the freezer for at least 15 minutes before making the whipped cream. This helps the cream whip up faster and hold its shape better.
- Combine Ingredients: In the chilled bowl, combine the heavy cream, powdered sugar, and vanilla extract.
- Whip the Cream: Using an electric mixer, whip the cream on medium speed until stiff peaks form. Be careful not to overwhip, as this can turn the cream into butter.
- Decorate the Pie: Once the pie is chilled and set, remove the plastic wrap. Spread the whipped cream evenly over the top of the pie, or pipe it on using a piping bag and tip for a more decorative look.
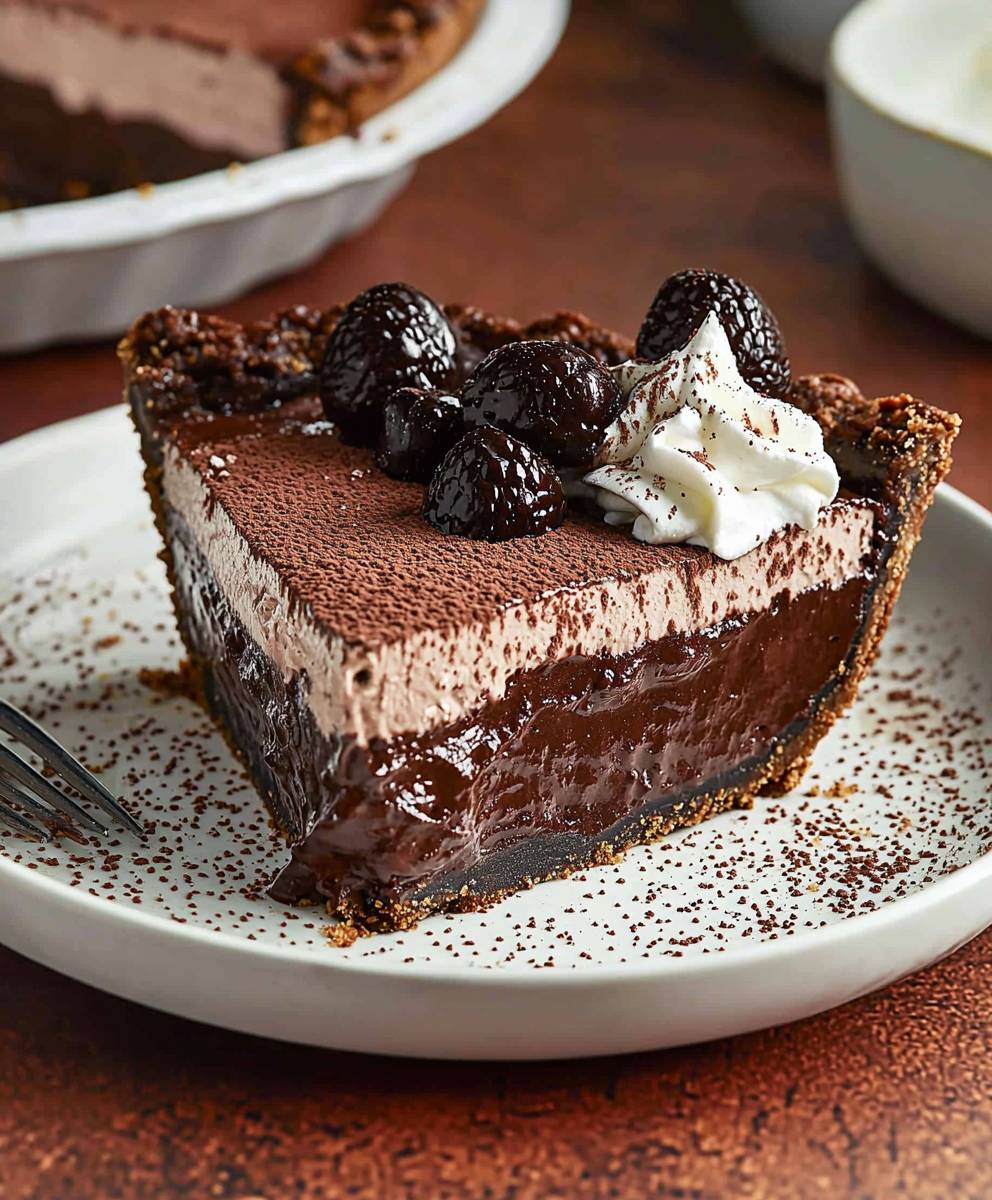
- Garnish (Optional): Garnish the pie with chocolate shavings, cocoa powder, or fresh berries, if desired.
Serving the Pie:
- Slice and Serve: Slice the chilled chocolate pie and serve immediately.
- Storage: Store any leftover pie in the refrigerator, covered, for up to 3 days.
Tips for Success:
- Use Cold Ingredients: For the best pie crust, use cold butter, shortening, and ice water. This helps to create flaky layers.
- Don’t Overmix the Dough: Overmixing the pie dough will develop the gluten and result in a tough crust. Mix just until the dough comes together.
- Blind Bake the Crust: Blind baking the crust prevents it from becoming soggy when you add the filling.
- Temper the Egg Yolks: Tempering the egg yolks prevents them from scrambling when added to the hot milk mixture.
- Chill the Pie Thoroughly: Chilling the pie for at least 4 hours, or preferably overnight, allows the filling to set completely.
- Adjust Sweetness: Adjust the amount of sugar in the filling to your liking. If you prefer a less sweet pie, reduce the sugar by ¼ cup.
- Use High-Quality Chocolate: Using high-quality bittersweet chocolate will result in a richer, more flavorful filling.
- Get Creative with Toppings: Feel free to get creative with the toppings. You can use whipped cream, chocolate shavings, cocoa powder, fresh berries, or any other toppings you like.
Variations:
- Chocolate Peanut Butter Pie: Add ½ cup of peanut butter to the chocolate filling after removing it from the heat.
- Chocolate Mint Pie: Add ½ teaspoon of peppermint extract to the chocolate filling after removing it from the heat. Garnish with crushed peppermint candies.
- Chocolate Raspberry Pie: Top the pie with fresh raspberries before serving.
- Mexican Chocolate Pie: Add ½ teaspoon of cinnamon and a pinch of cayenne pepper to the chocolate filling for a spicy kick.
- Vegan Chocolate Pie: Substitute the butter in the crust with vegan butter and the milk with plant-based milk. Use a vegan chocolate for the filling. You can also use silken tofu to create a creamy vegan filling.
Troubleshooting:
- Soggy Crust: Make sure to blind bake the crust properly and cool it completely before adding the filling. You can also brush the bottom
Conclusion:
This isn’t just another dessert recipe; it’s an invitation to experience pure chocolate bliss. From the rich, decadent filling to the perfectly crisp crust, every element of this chocolate pie is designed to tantalize your taste buds and leave you craving more. I truly believe this recipe is a must-try for any chocolate lover, and here’s why: it’s surprisingly simple to make, uses readily available ingredients, and delivers a flavor profile that rivals even the most expensive bakery creations. But the best part? It’s incredibly versatile! While I personally adore serving it chilled with a dollop of freshly whipped cream and a sprinkle of cocoa powder, the possibilities are endless. For a truly indulgent experience, try pairing it with a scoop of vanilla bean ice cream and a drizzle of warm chocolate sauce. Or, if you’re feeling adventurous, consider adding a hint of espresso powder to the filling for a mocha-inspired twist. A sprinkle of sea salt on top before serving also elevates the chocolate flavor beautifully. Looking for variations? You could easily adapt this recipe to create individual mini pies, perfect for parties or portion control (though, let’s be honest, you’ll probably want more than one!). Another fun idea is to incorporate different types of chocolate dark, milk, or even white chocolate to customize the flavor to your liking. If you’re a fan of nuts, consider adding chopped pecans or walnuts to the crust or sprinkling them on top of the finished pie. And for those who prefer a lighter option, you can use a graham cracker crust instead of a traditional pie crust. The beauty of this chocolate pie lies in its adaptability. It’s a blank canvas for your culinary creativity, so don’t be afraid to experiment and make it your own. Whether you’re a seasoned baker or a complete novice, I’m confident that you’ll be able to create a stunning and delicious dessert that will impress your family and friends. I’ve poured my heart and soul into perfecting this recipe, and I’m so excited for you to try it. I truly believe that this chocolate pie will become a staple in your dessert repertoire. It’s the perfect treat for any occasion, from a casual weeknight dinner to a special celebration. So, what are you waiting for? Gather your ingredients, preheat your oven, and get ready to embark on a chocolatey adventure. I promise you won’t be disappointed. And most importantly, don’t forget to share your experience! I’d love to hear your feedback, see your creations, and learn about any variations you’ve tried. Tag me in your photos on social media, leave a comment below, or simply send me an email. I can’t wait to see what you come up with! Happy baking! Let me know if you have any questions along the way. I’m here to help you create the perfect chocolate pie. Print
Chocolate Pie: The Ultimate Guide to Baking Perfection
- Total Time: 285 minutes
- Yield: 8 servings 1x
Description
Decadent homemade chocolate pie with a flaky crust and rich, creamy chocolate filling. Optional whipped cream topping adds a touch of elegance.
Ingredients
- 1 ½ cups all-purpose flour
- ½ teaspoon salt
- ½ cup (1 stick) unsalted butter, cold and cut into cubes
- ¼ cup vegetable shortening, cold
- 5–7 tablespoons ice water
- 1 ½ cups granulated sugar
- ½ cup unsweetened cocoa powder
- ¼ teaspoon salt
- 3 tablespoons cornstarch
- 3 cups whole milk
- 4 large egg yolks, lightly beaten
- 2 tablespoons unsalted butter
- 1 teaspoon vanilla extract
- 6 ounces semi-sweet chocolate, chopped
- 1 ½ cups heavy cream
- 3 tablespoons powdered sugar
- ½ teaspoon vanilla extract
Instructions
- Combine Dry Ingredients: In a large bowl, whisk together the flour and salt.
- Cut in the Fat: Add the cold butter and vegetable shortening to the flour mixture. Using a pastry blender or your fingertips (work quickly to keep the fat cold!), cut the fat into the flour until the mixture resembles coarse crumbs.
- Add Ice Water: Gradually add the ice water, one tablespoon at a time, mixing gently after each addition. Mix until the dough just comes together. Be careful not to overmix.
- Form the Dough: Gently gather the dough into a disc. Wrap it tightly in plastic wrap and refrigerate for at least 30 minutes, or up to 2 hours.
- Roll Out the Dough: On a lightly floured surface, roll out the dough into a 12-inch circle.
- Transfer to Pie Plate: Carefully transfer the rolled-out dough to a 9-inch pie plate. Gently press the dough into the bottom and up the sides of the plate.
- Crimp the Edges: Crimp the edges of the crust using your fingers or a fork.
- Pre-bake the Crust (Blind Bake): Preheat your oven to 375°F (190°C). Line the crust with parchment paper and fill it with pie weights or dried beans. Bake for 15 minutes.
- Remove Weights and Bake Further: Remove the parchment paper and pie weights. Prick the bottom of the crust with a fork. Bake for another 10-15 minutes, or until the crust is lightly golden brown.
- Cool the Crust: Let the crust cool completely on a wire rack before filling.
- Combine Dry Ingredients: In a medium saucepan, whisk together the granulated sugar, cocoa powder, salt, and cornstarch.
- Add Milk and Egg Yolks: Gradually whisk in the milk until the mixture is smooth. Then, whisk in the lightly beaten egg yolks.
- Cook the Filling: Place the saucepan over medium heat and cook, stirring constantly, until the mixture comes to a simmer and thickens. This will take about 5-7 minutes.
- Remove from Heat: Remove the saucepan from the heat and stir in the butter, vanilla extract, and chopped semi-sweet chocolate. Stir until the butter and chocolate are completely melted and the filling is smooth and glossy.
- Pour into Crust: Pour the hot chocolate filling into the cooled pie crust.
- Cover and Chill: Cover the pie with plastic wrap, pressing it directly onto the surface of the filling to prevent a skin from forming. Refrigerate for at least 4 hours, or preferably overnight, to allow the filling to set completely.
- Chill the Bowl and Whisk: Place the mixing bowl and whisk attachment (or beaters) in the freezer for about 15 minutes.
- Combine Ingredients: In the chilled bowl, combine the heavy cream, powdered sugar, and vanilla extract.
- Whip the Cream: Beat the cream on medium speed until stiff peaks form. Be careful not to overwhip.
- Remove Pie from Refrigerator: Once the chocolate filling is completely set, remove the pie from the refrigerator.
- Add Whipped Cream (Optional): If using, spread the whipped cream evenly over the top of the chocolate filling.
- Garnish (Optional): Garnish the pie with chocolate shavings, cocoa powder, or fresh berries, if desired.
- Slice and Serve: Slice the pie and serve chilled. Enjoy!
Notes
- Use high-quality chocolate for the best flavor.
- Keep butter and shortening cold when making the crust.
- Don’t overmix the dough.
- Blind bake the crust properly.
- Stir constantly when cooking the chocolate filling.
- Chill completely before serving.
- Adjust sweetness to taste.
- Add a pinch of espresso powder to enhance the chocolate flavor.
- Experiment with flavors like peppermint extract, orange zest, or liqueur.
- The pie can be made ahead of time and stored in the refrigerator for up to 3 days.
- Prep Time: 45 minutes
- Cook Time: 30 minutes


Leave a Comment