
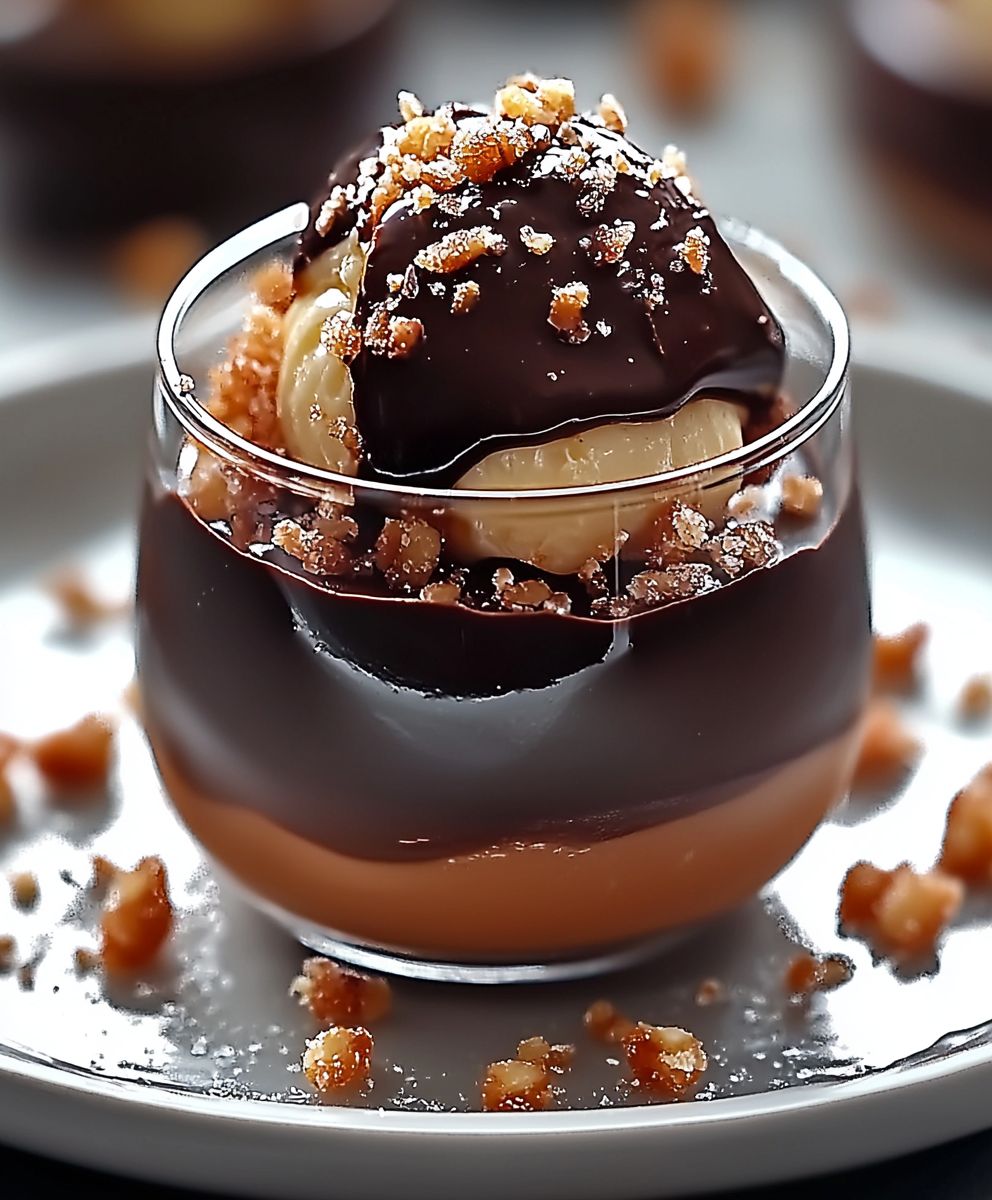
Chocolate Praline: Prepare to be utterly captivated by these decadent, melt-in-your-mouth morsels! Imagine biting into a symphony of rich, dark chocolate enveloping a creamy, nutty praline center. It’s a taste experience that transcends the ordinary, transforming any moment into a special occasion.
The history of the praline is as rich and delightful as the confection itself. Originating in 17th-century France, the praline was initially a whole almond coated in caramelized sugar, named after the Comte du Plessis-Praslin. Over time, the recipe evolved, incorporating nuts like pecans and hazelnuts, and eventually finding its way into the heart of chocolate creations like our featured chocolate praline.
But what is it about these little treasures that makes them so irresistible? Perhaps it’s the contrasting textures the smooth, velvety chocolate against the slightly crunchy, nutty filling. Or maybe it’s the perfect balance of sweet and nutty flavors that dance on your palate. Whatever the reason, chocolate pralines are a universally loved treat, perfect for gifting, indulging, or simply savoring a moment of pure bliss. I know I can’t resist them! So, let’s embark on this culinary adventure together and create these exquisite delights in your own kitchen.

Ingredients:
- For the Praline Paste:
- 1 cup (200g) granulated sugar
- 1/2 cup (120ml) water
- 2 cups (250g) blanched hazelnuts, toasted
- 1/4 teaspoon sea salt
- For the Chocolate Ganache:
- 1 cup (240ml) heavy cream
- 8 ounces (225g) bittersweet chocolate, finely chopped (60-70% cacao)
- 2 tablespoons unsalted butter, softened
- 1 tablespoon light corn syrup (optional, for shine)
- For the Chocolate Coating:
- 12 ounces (340g) tempered dark chocolate (55-65% cacao), for dipping
- Optional: Chopped toasted hazelnuts, sea salt flakes, or cocoa powder for decoration
Making the Praline Paste:
Okay, let’s start with the heart of our praline the praline paste itself! This is where the magic happens, and it’s surprisingly simple, I promise.
- Prepare the Caramel: In a medium-sized heavy-bottomed saucepan, combine the granulated sugar and water. Place the saucepan over medium heat. Stir gently until the sugar dissolves completely. Once dissolved, stop stirring! This is crucial. Any stirring after this point can cause the sugar to crystallize.
- Cook the Caramel: Let the mixture cook undisturbed, watching carefully. The sugar will begin to bubble and turn a light golden color. Continue cooking until it reaches a deep amber color. This takes patience, so don’t rush it. A candy thermometer should read around 340°F (170°C). Be very careful, as hot sugar can cause severe burns.
- Add the Hazelnuts: Once the caramel is a deep amber color, immediately remove the saucepan from the heat and pour in the toasted hazelnuts. Stir quickly and thoroughly to coat all the hazelnuts evenly with the caramel. Work fast, as the caramel will start to harden quickly.
- Cool and Harden: Pour the caramelized hazelnuts onto a parchment-lined baking sheet. Spread them out into a single layer. Let them cool completely and harden. This usually takes about 30-45 minutes. You want them to be completely solid.
- Break into Pieces: Once the caramelized hazelnuts are completely cool and hardened, break them into smaller pieces. This will make it easier for your food processor to handle. I usually just whack the baking sheet against the counter a few times.
- Process into Paste: Place the broken caramelized hazelnuts into a high-powered food processor. Process continuously, scraping down the sides as needed. At first, the mixture will turn into a coarse powder. Keep processing! Eventually, the oils from the hazelnuts will release, and the mixture will transform into a smooth, creamy paste. This can take anywhere from 5 to 15 minutes, depending on the power of your food processor. Be patient! You’ll know it’s ready when it’s smooth and spreadable.
- Add Salt: Once the praline paste is smooth, add the sea salt and process for another few seconds to incorporate it evenly.
- Store: Transfer the praline paste to an airtight container. It can be stored at room temperature for up to 2 weeks.
Making the Chocolate Ganache:
Next up, the luscious chocolate ganache! This is what makes the praline so incredibly decadent. It’s super easy, and the result is pure chocolate heaven.
- Heat the Cream: In a small saucepan, heat the heavy cream over medium heat until it just begins to simmer. Do not boil! You’ll see small bubbles forming around the edges of the pan.
- Pour over Chocolate: Place the finely chopped bittersweet chocolate in a heatproof bowl. Pour the hot cream over the chocolate. Let it sit for about 1 minute to allow the heat to melt the chocolate.
- Whisk Until Smooth: After 1 minute, gently whisk the cream and chocolate together, starting from the center and working your way outwards. Continue whisking until the chocolate is completely melted and the ganache is smooth and glossy.
- Add Butter and Corn Syrup: Add the softened butter and light corn syrup (if using) to the ganache. Whisk until the butter is fully incorporated and the ganache is even smoother and shinier. The corn syrup adds a nice sheen, but it’s optional.
- Cool Slightly: Let the ganache cool slightly at room temperature for about 30 minutes. This will allow it to thicken slightly, making it easier to work with. You want it to be spreadable but not too runny.
Assembling the Pralines:
Now for the fun part putting it all together! This is where your creativity can shine. You can make these pralines any shape or size you like.
- Combine Praline Paste and Ganache: In a medium-sized bowl, combine the praline paste and the slightly cooled chocolate ganache. Gently fold them together until they are evenly combined. Be careful not to overmix, as this can cause the ganache to seize.
- Chill the Mixture: Cover the bowl with plastic wrap, pressing the plastic wrap directly onto the surface of the mixture to prevent a skin from forming. Refrigerate for at least 2 hours, or preferably overnight, until the mixture is firm enough to handle. This is crucial for shaping the pralines.
- Shape the Pralines: Once the mixture is firm, remove it from the refrigerator. Using a small spoon or a melon baller, scoop out small portions of the praline mixture. Roll each portion between your palms to form a ball or any shape you desire. You can also use a small cookie scoop for more uniform pralines.
- Place on Baking Sheet: Place the shaped pralines on a parchment-lined baking sheet.
- Chill Again: Return the baking sheet with the shaped pralines to the refrigerator for another 30 minutes to an hour to firm them up even more before dipping. This will make the dipping process much easier.
Coating the Pralines:
Almost there! The final step is coating these little gems in tempered chocolate. This gives them that beautiful shine and satisfying snap.
- Temper the Chocolate: Tempering chocolate is essential for achieving a smooth, glossy finish and a crisp snap. There are several methods for tempering chocolate, but I prefer the seeding method. Chop the chocolate into small pieces. Melt about two-thirds of the chocolate in a double boiler or in the microwave in 30-second intervals, stirring in between, until it reaches a temperature of 115-120°F (46-49°C). Remove from the heat and add the remaining one-third of the chopped chocolate. Stir continuously until all the chocolate is melted and the temperature drops to 88-90°F (31-32°C). This is the ideal temperature for dipping dark chocolate.
- Dipping the Pralines: Using dipping tools (or a fork), carefully dip each chilled praline into the tempered chocolate, ensuring it is completely coated. Gently tap off any excess chocolate.
- Decorate (Optional): While the chocolate is still wet, you can decorate the pralines with chopped toasted hazelnuts, sea salt flakes, or a dusting of cocoa powder. Get creative!
- Set the Chocolate: Place the dipped and decorated pralines back on the parchment-lined baking sheet. Let the chocolate set completely at room temperature, or you can speed up the process by placing them in the refrigerator for a few minutes.
- Store: Once the chocolate is set, store the chocolate pralines in an airtight container in a cool, dry place. They can be stored at room temperature for up to a week, or in the refrigerator for up to two weeks.
Conclusion:
And there you have it! This Chocolate Praline recipe isn’t just another dessert; it’s an experience. It’s the perfect blend of rich, decadent chocolate and the satisfying crunch of perfectly caramelized pralines, creating a symphony of textures and flavors that will leave you craving more. Trust me, once you taste these, you’ll understand why I’m so excited to share them with you. Why is this a must-try? Well, beyond the sheer deliciousness, it’s surprisingly simple to make. You don’t need to be a professional pastry chef to whip up a batch of these delightful treats. The ingredients are readily available, and the steps are straightforward, making it a fantastic option for both seasoned bakers and those just starting their culinary journey. Plus, the “wow” factor is incredibly high. Imagine serving these at your next dinner party or gifting them to friends and family. You’re guaranteed to impress! But the best part? The versatility! While the recipe as written is absolutely divine, there’s plenty of room for customization. Feeling adventurous? Try adding a pinch of sea salt to the praline for a salted caramel effect. Or, incorporate a hint of espresso powder into the chocolate for a mocha-inspired twist. For a truly decadent experience, drizzle melted white chocolate over the finished pralines and sprinkle with chopped pistachios. Serving suggestions are endless. These Chocolate Pralines are perfect on their own as an after-dinner treat, but they also pair beautifully with a scoop of vanilla ice cream or a dollop of whipped cream. Crumble them over a warm brownie for an extra layer of indulgence, or use them to decorate a chocolate cake for a show-stopping centerpiece. They’re also fantastic with a cup of strong coffee or a glass of dessert wine. Don’t be intimidated by the word “praline.” It sounds fancy, but it’s really just caramelized nuts, and the process is much easier than you might think. The key is to keep a close eye on the sugar as it melts and to stir frequently to prevent burning. Once you master the praline, the rest is a breeze! I truly believe that this recipe will become a staple in your baking repertoire. It’s the kind of treat that you’ll find yourself making again and again, not just for special occasions, but also for those moments when you simply need a little bit of chocolatey happiness in your life. So, what are you waiting for? Gather your ingredients, preheat your oven, and get ready to embark on a delicious adventure. I’m confident that you’ll love these Chocolate Pralines as much as I do. And now, for the most important part: I want to hear from you! Once you’ve tried the recipe, please come back and share your experience in the comments below. Did you make any variations? What did you think of the flavor and texture? Any tips or tricks to share with other readers? Your feedback is invaluable, and I can’t wait to see your creations! Happy baking! Let me know if you need any help along the way. I’m always here to answer your questions and offer support. Enjoy! Print
Chocolate Praline: A Decadent Guide to Making Perfect Pralines
- Total Time: 180 minutes
- Yield: 24–30 pralines 1x
Description
Decadent homemade chocolate pralines filled with creamy hazelnut praline paste and rich chocolate ganache, coated in tempered dark chocolate.
Ingredients
- 1 cup (200g) granulated sugar
- 1/2 cup (120ml) water
- 2 cups (250g) blanched hazelnuts, toasted
- 1/4 teaspoon sea salt
- 1 cup (240ml) heavy cream
- 8 ounces (225g) bittersweet chocolate, finely chopped (60-70% cacao)
- 2 tablespoons unsalted butter, softened
- 1 tablespoon light corn syrup (optional, for shine)
- 12 ounces (340g) tempered dark chocolate (55-65% cacao), for dipping
- Optional: Chopped toasted hazelnuts, sea salt flakes, or cocoa powder for decoration
Instructions
- Prepare the Caramel: In a medium-sized heavy-bottomed saucepan, combine the granulated sugar and water. Place the saucepan over medium heat. Stir gently until the sugar dissolves completely. Once dissolved, stop stirring!
- Cook the Caramel: Let the mixture cook undisturbed, watching carefully. The sugar will begin to bubble and turn a light golden color. Continue cooking until it reaches a deep amber color. A candy thermometer should read around 340°F (170°C). Be very careful, as hot sugar can cause severe burns.
- Add the Hazelnuts: Once the caramel is a deep amber color, immediately remove the saucepan from the heat and pour in the toasted hazelnuts. Stir quickly and thoroughly to coat all the hazelnuts evenly with the caramel. Work fast, as the caramel will start to harden quickly.
- Cool and Harden: Pour the caramelized hazelnuts onto a parchment-lined baking sheet. Spread them out into a single layer. Let them cool completely and harden. This usually takes about 30-45 minutes.
- Break into Pieces: Once the caramelized hazelnuts are completely cool and hardened, break them into smaller pieces.
- Process into Paste: Place the broken caramelized hazelnuts into a high-powered food processor. Process continuously, scraping down the sides as needed. At first, the mixture will turn into a coarse powder. Keep processing! Eventually, the oils from the hazelnuts will release, and the mixture will transform into a smooth, creamy paste. This can take anywhere from 5 to 15 minutes, depending on the power of your food processor.
- Add Salt: Once the praline paste is smooth, add the sea salt and process for another few seconds to incorporate it evenly.
- Store: Transfer the praline paste to an airtight container. It can be stored at room temperature for up to 2 weeks.
- Heat the Cream: In a small saucepan, heat the heavy cream over medium heat until it just begins to simmer. Do not boil!
- Pour over Chocolate: Place the finely chopped bittersweet chocolate in a heatproof bowl. Pour the hot cream over the chocolate. Let it sit for about 1 minute to allow the heat to melt the chocolate.
- Whisk Until Smooth: After 1 minute, gently whisk the cream and chocolate together, starting from the center and working your way outwards. Continue whisking until the chocolate is completely melted and the ganache is smooth and glossy.
- Add Butter and Corn Syrup: Add the softened butter and light corn syrup (if using) to the ganache. Whisk until the butter is fully incorporated and the ganache is even smoother and shinier. The corn syrup adds a nice sheen, but it’s optional.
- Cool Slightly: Let the ganache cool slightly at room temperature for about 30 minutes. This will allow it to thicken slightly, making it easier to work with.
- Combine Praline Paste and Ganache: In a medium-sized bowl, combine the praline paste and the slightly cooled chocolate ganache. Gently fold them together until they are evenly combined. Be careful not to overmix, as this can cause the ganache to seize.
- Chill the Mixture: Cover the bowl with plastic wrap, pressing the plastic wrap directly onto the surface of the mixture to prevent a skin from forming. Refrigerate for at least 2 hours, or preferably overnight, until the mixture is firm enough to handle.
- Shape the Pralines: Once the mixture is firm, remove it from the refrigerator. Using a small spoon or a melon baller, scoop out small portions of the praline mixture. Roll each portion between your palms to form a ball or any shape you desire.
- Place on Baking Sheet: Place the shaped pralines on a parchment-lined baking sheet.
- Chill Again: Return the baking sheet with the shaped pralines to the refrigerator for another 30 minutes to an hour to firm them up even more before dipping.
- Temper the Chocolate: Tempering chocolate is essential for achieving a smooth, glossy finish and a crisp snap. Chop the chocolate into small pieces. Melt about two-thirds of the chocolate in a double boiler or in the microwave in 30-second intervals, stirring in between, until it reaches a temperature of 115-120°F (46-49°C). Remove from the heat and add the remaining one-third of the chopped chocolate. Stir continuously until all the chocolate is melted and the temperature drops to 88-90°F (31-32°C). This is the ideal temperature for dipping dark chocolate.
- Dipping the Pralines: Using dipping tools (or a fork), carefully dip each chilled praline into the tempered chocolate, ensuring it is completely coated. Gently tap off any excess chocolate.
- Decorate (Optional): While the chocolate is still wet, you can decorate the pralines with chopped toasted hazelnuts, sea salt flakes, or a dusting of cocoa powder.
- Set the Chocolate: Place the dipped and decorated pralines back on the parchment-lined baking sheet. Let the chocolate set completely at room temperature, or you can speed up the process by placing them in the refrigerator for a few minutes.
- Store: Once the chocolate is set, store the chocolate pralines in an airtight container in a cool, dry place. They can be stored at room temperature for up to a week, or in the refrigerator for up to two weeks.
Notes
- Tempering chocolate is crucial for a professional-looking finish. If you’re not familiar with tempering, there are many online resources and tutorials available.
- Be patient when making the praline paste. It takes time for the hazelnuts to release their oils and form a smooth paste.
- Chilling the praline mixture thoroughly is essential for shaping the pralines easily.
- You can customize the flavor of the ganache by adding extracts, spices, or liqueurs.
- Get creative with your decorations!
- Prep Time: 45 minutes
- Cook Time: 30 minutes

Leave a Comment