
Chocolate Ricotta Tiramisu: Prepare to experience a decadent twist on a beloved Italian classic! Forget everything you thought you knew about traditional tiramisu because this version is about to blow your mind. Imagine layers of espresso-soaked ladyfingers, a creamy, dreamy filling made with rich ricotta cheese and decadent chocolate, all dusted with a generous layer of cocoa powder. Are you drooling yet?
Tiramisu, meaning “pick me up” or “cheer me up” in Italian, has a relatively recent history, believed to have originated in the Veneto region of Italy in the latter half of the 20th century. While the exact origins are debated, its popularity quickly spread worldwide, becoming a staple dessert in Italian restaurants and homes alike. This Chocolate Ricotta Tiramisu takes the essence of that comforting classic and elevates it with the irresistible allure of chocolate.
People adore tiramisu for its delightful combination of textures and flavors. The soft, coffee-infused ladyfingers provide a delicate base, while the creamy mascarpone filling offers a luxurious richness. This version, however, substitutes mascarpone with ricotta, creating a lighter, tangier profile that perfectly complements the intense chocolate flavor. The addition of chocolate not only enhances the taste but also adds a touch of elegance, making it perfect for special occasions or simply indulging in a well-deserved treat. It’s easy to assemble, requires no baking, and is guaranteed to impress!

Ingredients:
- For the Espresso Syrup:
- 1 cup freshly brewed strong espresso
- 1/2 cup granulated sugar
- 1/4 cup coffee liqueur (such as Kahlua or Tia Maria), optional
- For the Chocolate Ricotta Cream:
- 1 (15 ounce) container whole milk ricotta cheese, drained well
- 1 cup heavy cream
- 1/2 cup powdered sugar
- 1 teaspoon vanilla extract
- 1/4 cup unsweetened cocoa powder, sifted
- 1/4 cup mini chocolate chips, plus more for garnish
- For the Assembly:
- 1 (7 ounce) package ladyfingers (savoiardi biscuits)
- Unsweetened cocoa powder, for dusting
- Chocolate shavings or curls, for garnish (optional)
Preparing the Espresso Syrup
- In a small saucepan, combine the freshly brewed espresso and granulated sugar.
- Place the saucepan over medium heat and bring to a simmer, stirring constantly until the sugar is completely dissolved. This usually takes about 3-5 minutes.
- Once the sugar is dissolved, remove the saucepan from the heat and stir in the coffee liqueur (if using). The liqueur adds a lovely depth of flavor, but it’s perfectly fine to omit it if you prefer a non-alcoholic version.
- Allow the espresso syrup to cool completely before using. This is important because you don’t want to soak the ladyfingers with hot liquid, which will make them too soggy. You can speed up the cooling process by transferring the syrup to a shallow dish.
Making the Chocolate Ricotta Cream
- Drain the Ricotta: This is a crucial step! Ricotta cheese can be quite watery, and excess moisture will ruin the texture of your cream. Place the ricotta in a fine-mesh sieve lined with cheesecloth or a paper towel. Set the sieve over a bowl and let the ricotta drain in the refrigerator for at least 30 minutes, or even better, for an hour or two. The longer it drains, the thicker and creamier your final product will be.
- In a large bowl, combine the drained ricotta cheese, heavy cream, powdered sugar, and vanilla extract.
- Using an electric mixer (either a stand mixer or a hand mixer), beat the ingredients together on medium speed until smooth and creamy. Be careful not to overbeat, as this can cause the cream to become grainy. You’re looking for a soft, whipped consistency.
- Sift the unsweetened cocoa powder into the ricotta cream mixture. Sifting is important to prevent any lumps of cocoa powder from forming in the cream.
- Gently fold the cocoa powder into the cream until it is evenly distributed and the cream is a beautiful chocolate color.
- Finally, fold in the mini chocolate chips. These add a delightful little burst of chocolate in every bite.
- Cover the chocolate ricotta cream and refrigerate it for at least 30 minutes to allow the flavors to meld and the cream to firm up slightly. This will also make it easier to spread when you’re assembling the tiramisu.
Assembling the Chocolate Ricotta Tiramisu
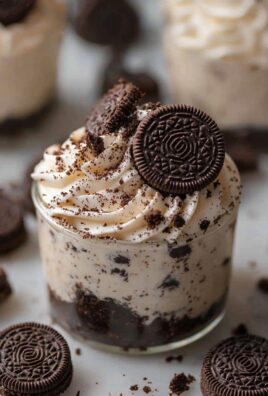
- Choose your serving dish. A 9×13 inch baking dish works well, but you can also use a trifle bowl or individual serving glasses for a more elegant presentation.
- Lightly dip each ladyfinger into the cooled espresso syrup. Don’t soak them completely! You want them to be moistened but not soggy. A quick dip of about 2-3 seconds per side is usually sufficient.
- Arrange the dipped ladyfingers in a single layer on the bottom of your serving dish. You may need to break some of the ladyfingers to fit them snugly.
- Spread half of the chocolate ricotta cream evenly over the layer of ladyfingers.
- Repeat the process: Dip the remaining ladyfingers in the espresso syrup and arrange them in a second layer over the cream.
- Spread the remaining chocolate ricotta cream evenly over the second layer of ladyfingers.
- Cover the tiramisu tightly with plastic wrap and refrigerate it for at least 4 hours, or preferably overnight. This allows the flavors to meld together and the ladyfingers to soften.
- Before serving, dust the top of the tiramisu generously with unsweetened cocoa powder.
- Garnish with chocolate shavings or curls, if desired.
- Slice and serve! Enjoy your decadent Chocolate Ricotta Tiramisu.
Tips for Success:
- Use high-quality ingredients: The better the quality of your ingredients, the better your tiramisu will taste. Use good quality espresso, ricotta cheese, and cocoa powder.
- Don’t oversoak the ladyfingers: Soggy ladyfingers are the enemy of a good tiramisu. Dip them quickly and lightly.
- Chill the tiramisu for long enough: This is essential for the flavors to meld and the ladyfingers to soften. Don’t rush the chilling process.
- Drain the ricotta cheese well: This will prevent your cream from being watery.
- Sift the cocoa powder: This will prevent lumps from forming in the cream.
- Adjust the sweetness to your liking: If you prefer a less sweet tiramisu, you can reduce the amount of powdered sugar in the cream.
- Add a touch of salt: A pinch of salt in the cream can help to balance the sweetness and enhance the other flavors.
- Get creative with the garnish: You can garnish your tiramisu with chocolate shavings, curls, cocoa nibs, or even fresh berries.
Variations:
- Add a layer of chocolate ganache: For an extra decadent treat, spread a layer of chocolate ganache between the ladyfingers and the cream.
- Use different liqueurs: Experiment with different liqueurs, such as amaretto or Frangelico, to add a unique flavor to your tiramisu.
- Add nuts: Sprinkle chopped nuts, such as almonds or hazelnuts, between the layers for added texture and flavor.
- Make it gluten-free: Use gluten-free ladyfingers to make this tiramisu gluten-free.
- Make it vegan: Substitute the ricotta cheese and heavy cream with vegan alternatives to make this tiramisu vegan.
Storage Instructions:
Store leftover Chocolate Ricotta Tiramisu in an airtight container in the refrigerator for up to 3 days. The ladyfingers will continue to soften over time, so it’s best enjoyed within a day or two of making it.
Why this recipe works:
This Chocolate Ricotta Tiramisu recipe is a delightful twist on the classic Italian dessert. The ricotta cheese adds a creamy and slightly tangy flavor that complements the rich chocolate and coffee flavors perfectly. The use of espresso syrup ensures that the ladyfingers are properly moistened without becoming soggy, and the chilling time allows the flavors to meld together beautifully. The addition of mini chocolate chips provides a delightful burst of chocolate in every bite, and the cocoa powder dusting adds a touch of elegance. This recipe is easy to follow and yields a delicious and impressive dessert that is sure to impress your friends and family.

Conclusion:
This Chocolate Ricotta Tiramisu isn’t just another dessert; it’s an experience. The creamy ricotta filling, infused with the rich decadence of chocolate, perfectly complements the coffee-soaked ladyfingers, creating a symphony of flavors and textures that will leave you wanting more. Trust me, once you take that first bite, you’ll understand why I’m so passionate about this recipe. It’s the kind of dessert that makes any occasion feel special, and it’s surprisingly easy to put together, making it a winner in my book! Why is this a must-try? Because it’s a delightful twist on a classic, offering a lighter, yet equally satisfying, alternative to traditional mascarpone-based tiramisu. The ricotta cheese provides a subtle tang that balances the sweetness of the chocolate and coffee, preventing it from becoming overly rich. Plus, the addition of cocoa powder to the ricotta mixture elevates the chocolate flavor, creating a truly unforgettable dessert. It’s the perfect balance of indulgence and simplicity.Serving Suggestions and Variations:
The possibilities are endless when it comes to serving and customizing this Chocolate Ricotta Tiramisu. For a truly elegant presentation, serve individual portions in stemmed glasses or small ramekins. Dust the top generously with cocoa powder just before serving for a beautiful finish. If you’re looking to add a little extra something, consider drizzling a bit of chocolate sauce or a coffee liqueur over the ladyfingers before assembling the tiramisu. A sprinkle of shaved chocolate or chopped nuts (like hazelnuts or almonds) on top also adds a delightful textural element. For a boozy twist, you can substitute some of the coffee with a coffee liqueur like Kahlua or Tia Maria. Just be mindful of the alcohol content if you’re serving it to children or those who prefer to avoid alcohol. Another fun variation is to add a layer of fresh berries, such as raspberries or strawberries, between the ladyfingers and the ricotta filling. The tartness of the berries will complement the richness of the chocolate and coffee beautifully. If you’re not a fan of coffee, you can substitute it with hot chocolate or even a flavored syrup like hazelnut or vanilla. Just make sure to adjust the sweetness accordingly. For a truly decadent experience, try adding a layer of Nutella between the ladyfingers and the ricotta filling. The combination of chocolate, hazelnut, and ricotta is simply divine! And if you’re feeling adventurous, you can even experiment with different types of chocolate. Try using dark chocolate for a more intense flavor, or white chocolate for a sweeter, more delicate taste.I Can’t Wait to Hear What You Think!
Now it’s your turn! I wholeheartedly encourage you to give this Chocolate Ricotta Tiramisu recipe a try. I’m confident that you’ll love it as much as I do. It’s the perfect dessert for any occasion, from a casual weeknight treat to a special celebration. Once you’ve made it, please come back and share your experience in the comments below. I’d love to hear what you think, what variations you tried, and any tips or tricks you discovered along the way. Your feedback is invaluable and helps me to continue creating recipes that you’ll love. So, gather your ingredients, put on your apron, and get ready to create a truly unforgettable dessert. Happy baking! And don’t forget to tag me in your photos on social media I can’t wait to see your creations! Let’s spread the joy of this amazing Chocolate Ricotta Tiramisu together! Print
Chocolate Ricotta Tiramisu: A Decadent Twist on a Classic
- Total Time: 275 minutes
- Yield: 8–12 servings 1x
Description
A decadent twist on classic tiramisu, featuring creamy chocolate ricotta, espresso-soaked ladyfingers, and a dusting of cocoa.
Ingredients
- 1 cup freshly brewed strong espresso
- 1/2 cup granulated sugar
- 1/4 cup coffee liqueur (such as Kahlua or Tia Maria), optional
- 1 (15 ounce) container whole milk ricotta cheese, drained well
- 1 cup heavy cream
- 1/2 cup powdered sugar
- 1 teaspoon vanilla extract
- 1/4 cup unsweetened cocoa powder, sifted
- 1/4 cup mini chocolate chips, plus more for garnish
- 1 (7 ounce) package ladyfingers (savoiardi biscuits)
- Unsweetened cocoa powder, for dusting
- Chocolate shavings or curls, for garnish (optional)
Instructions
- Prepare the Espresso Syrup: In a small saucepan, combine espresso and sugar. Heat over medium, stirring until sugar dissolves (3-5 minutes). Remove from heat, stir in liqueur (if using), and let cool completely.
- Make the Chocolate Ricotta Cream:
- Drain the ricotta in a fine-mesh sieve lined with cheesecloth or paper towel for at least 30 minutes (or up to 2 hours) in the refrigerator.
- In a large bowl, combine drained ricotta, heavy cream, powdered sugar, and vanilla extract. Beat with an electric mixer on medium speed until smooth and creamy. Do not overbeat.
- Sift cocoa powder into the ricotta cream mixture and gently fold until evenly distributed.
- Fold in mini chocolate chips.
- Cover and refrigerate for at least 30 minutes to allow the flavors to meld and the cream to firm up slightly.
- Assemble the Tiramisu:
- Choose your serving dish (9×13 inch baking dish, trifle bowl, or individual glasses).
- Lightly dip each ladyfinger into the cooled espresso syrup (2-3 seconds per side).
- Arrange dipped ladyfingers in a single layer on the bottom of the dish, breaking them to fit if needed.
- Spread half of the chocolate ricotta cream evenly over the ladyfingers.
- Repeat: Dip remaining ladyfingers, arrange in a second layer, and spread with remaining cream.
- Cover tightly with plastic wrap and refrigerate for at least 4 hours, or preferably overnight.
- Before serving, dust the top generously with unsweetened cocoa powder.
- Garnish with chocolate shavings or curls, if desired.
- Slice and serve.
Notes
- Use high-quality ingredients: The better the quality of your ingredients, the better your tiramisu will taste. Use good quality espresso, ricotta cheese, and cocoa powder.
- Don’t oversoak the ladyfingers: Soggy ladyfingers are the enemy of a good tiramisu. Dip them quickly and lightly.
- Chill the tiramisu for long enough: This is essential for the flavors to meld and the ladyfingers to soften. Don’t rush the chilling process.
- Drain the ricotta cheese well: This will prevent your cream from being watery.
- Sift the cocoa powder: This will prevent lumps from forming in the cream.
- Adjust the sweetness to your liking: If you prefer a less sweet tiramisu, you can reduce the amount of powdered sugar in the cream.
- Add a touch of salt: A pinch of salt in the cream can help to balance the sweetness and enhance the other flavors.
- Get creative with the garnish: You can garnish your tiramisu with chocolate shavings, curls, cocoa nibs, or even fresh berries.
- Prep Time: 30 minutes
- Cook Time: 5 minutes


Leave a Comment