
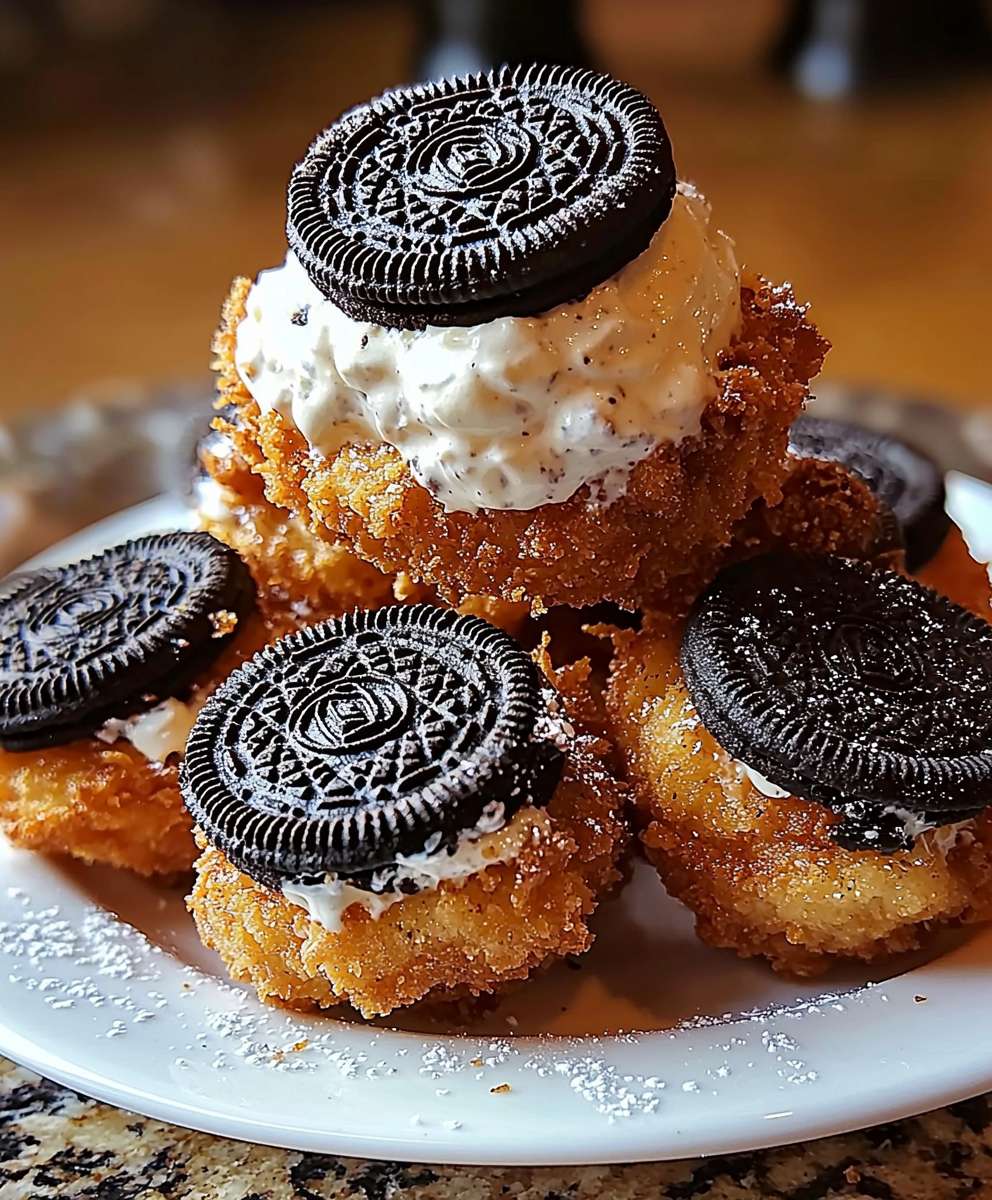
Deep Fried Oreos: Prepare to indulge in a carnival classic that’s surprisingly easy to make at home! Imagine biting into a warm, golden-brown, crispy exterior that gives way to a gooey, melted Oreo center. It’s an explosion of textures and flavors that will transport you straight to the fairgrounds, no ticket required.
While the exact origins of the Deep Fried Oreos are debated, they gained immense popularity in the early 2000s at state fairs across the United States. It’s a testament to American ingenuity taking a beloved cookie and elevating it to a whole new level of decadence. This treat quickly became a must-have for fairgoers, and its appeal has only grown since.
What makes Deep Fried Oreos so irresistible? It’s the perfect combination of contrasts. The crispy, slightly savory batter complements the sweet, creamy filling of the Oreo. The warmth enhances the chocolate flavor, creating a truly unforgettable experience. Plus, they’re incredibly fun to eat! Whether you’re looking for a unique dessert to impress your friends or simply craving a nostalgic treat, Deep Fried Oreos are guaranteed to satisfy your sweet tooth. So, let’s get frying!
Ingredients:
- 1 package (14.3 ounces) Oreo cookies
- 1 cup all-purpose flour
- 1/4 cup granulated sugar
- 2 teaspoons baking powder
- 1/4 teaspoon salt
- 1 cup milk (whole milk recommended for richer flavor)
- 1 large egg
- 1 teaspoon vanilla extract
- Vegetable oil, for frying (about 4-6 cups, depending on your pot)
- Powdered sugar, for dusting (optional)
Preparing the Batter:
Alright, let’s get started by making the batter. This is the key to that crispy, golden-brown coating that makes deep-fried Oreos so irresistible. Trust me, a well-made batter is half the battle!
- Combine Dry Ingredients: In a medium-sized bowl, whisk together the flour, sugar, baking powder, and salt. Make sure everything is evenly distributed. This ensures that the baking powder works its magic and gives the batter a nice lift.
- Add Wet Ingredients: In a separate bowl, whisk together the milk, egg, and vanilla extract. Whisk until the egg is fully incorporated and the mixture is smooth.
- Combine Wet and Dry: Gradually pour the wet ingredients into the dry ingredients, whisking constantly. Be careful not to overmix! Overmixing can develop the gluten in the flour, resulting in a tough batter. You want a batter that’s smooth but still slightly thick. It should be able to coat the Oreos without being too runny. A few small lumps are okay, but try to get rid of any large clumps of flour.
- Rest the Batter (Optional but Recommended): Cover the bowl with plastic wrap and let the batter rest in the refrigerator for at least 30 minutes. This allows the gluten to relax, resulting in a more tender and less chewy coating. It also helps the baking powder to fully activate, giving you a lighter and crispier fried Oreo. If you’re short on time, you can skip this step, but I highly recommend it if you can spare the time.
Preparing for Frying:
Now that our batter is resting (or ready to go!), let’s get our frying station set up. Safety first! Frying can be a little intimidating, but with a few precautions, it’s totally manageable.
- Choose Your Frying Vessel: Select a deep, heavy-bottomed pot or a deep fryer. A heavy-bottomed pot will help to distribute the heat evenly and prevent hot spots. Make sure the pot is large enough to hold the oil without overflowing when you add the Oreos.
- Add the Oil: Pour the vegetable oil into the pot, filling it to a depth of about 2-3 inches. You want enough oil to fully submerge the Oreos, but not so much that it’s close to the top of the pot.
- Heat the Oil: Place the pot over medium-high heat and heat the oil to 350-375°F (175-190°C). Use a deep-fry thermometer to monitor the temperature. This is crucial! If the oil is too cold, the Oreos will absorb too much oil and become greasy. If the oil is too hot, they’ll burn on the outside before the inside is heated through. If you don’t have a thermometer, you can test the oil by dropping a small piece of batter into it. If the batter sizzles and turns golden brown in about 30-60 seconds, the oil is ready.
- Prepare Your Work Station: Line a plate with paper towels. This is where you’ll place the fried Oreos to drain off any excess oil. Have your batter and Oreos within easy reach of the stove.
Frying the Oreos:
Here comes the fun part! Let’s get those Oreos nice and crispy.
- Dip the Oreos: One at a time, dip each Oreo into the batter, making sure it’s completely coated. Use a fork or tongs to lift the Oreo out of the batter, allowing any excess batter to drip back into the bowl.
- Carefully Place in Oil: Gently lower the battered Oreo into the hot oil. Don’t overcrowd the pot! Fry only 2-3 Oreos at a time to prevent the oil temperature from dropping too much. Overcrowding can also cause the Oreos to stick together.
- Fry Until Golden Brown: Fry the Oreos for about 2-3 minutes per side, or until they are golden brown and crispy. Use tongs to flip them over halfway through cooking to ensure even browning. Keep a close eye on them, as they can burn quickly!
- Remove and Drain: Once the Oreos are golden brown, carefully remove them from the oil with tongs or a slotted spoon and place them on the prepared plate lined with paper towels to drain.
- Repeat: Repeat the dipping and frying process with the remaining Oreos. Make sure to monitor the oil temperature and adjust the heat as needed to maintain a consistent temperature. If the oil starts to smoke, reduce the heat immediately.
Serving and Enjoying:
Almost there! Now for the best part devouring these delicious treats!
- Dust with Powdered Sugar (Optional): While the fried Oreos are still warm, dust them generously with powdered sugar. This adds a touch of sweetness and makes them look even more appealing.
- Serve Immediately: Deep-fried Oreos are best served immediately while they are still warm and crispy. They tend to lose their crispness as they cool down.
- Enjoy Responsibly: These are a decadent treat, so enjoy them in moderation! They’re perfect for parties, special occasions, or just a fun weekend indulgence.
Tips and Variations:
- Batter Consistency: The batter should be thick enough to coat the Oreos without being too runny. If it’s too thick, add a little more milk. If it’s too thin, add a little more flour.
- Oil Temperature: Maintaining the correct oil temperature is crucial for achieving perfectly fried Oreos. Use a deep-fry thermometer to monitor the temperature and adjust the heat as needed.
- Don’t Overcrowd: Fry only a few Oreos at a time to prevent the oil temperature from dropping too much.
- Variations: Get creative with your batter! You can add a pinch of cinnamon, nutmeg, or cocoa powder to the batter for a different flavor. You can also use different extracts, such as almond or peppermint.
- Dipping Sauces: Serve the fried Oreos with dipping sauces like chocolate sauce, caramel sauce, or whipped cream.
- Different Oreos: Try using different flavors of Oreos, such as Golden Oreos, Mint Oreos, or Peanut Butter Oreos.
- Air Fryer Option: While not *exactly* the same, you can achieve a similar result in an air fryer. Lightly spray the battered Oreos with oil and air fry at 350°F (175°C) for 6-8 minutes, flipping halfway through. They won’t be as deeply golden or have the same “fried” texture, but it’s a healthier alternative.
- Storage: While best enjoyed immediately, leftover fried Oreos can be stored in an airtight container at room temperature for up to 24 hours. However, they will lose their crispness. You can try reheating them in a toaster oven or air fryer to crisp them up a bit, but they won’t be quite the same as freshly fried.
Safety First!
Frying involves hot oil, so please be careful! Never leave hot oil unattended. Keep a close eye on the oil temperature and adjust the heat as needed. If the oil starts to smoke, reduce the heat immediately. Have a fire extinguisher nearby in case of emergencies. And most importantly, be careful when handling hot oil and fried Oreos to avoid burns.
Enjoy!
There you have it! Deep-fried Oreos are a fun and delicious treat that’s sure to impress. So gather your ingredients, follow these steps, and get ready to enjoy a truly unforgettable dessert. Happy frying!
Conclusion:
So there you have it! Deep Fried Oreos, a carnival classic brought right to your kitchen. I know, I know, it sounds a little crazy, but trust me on this one. The combination of the warm, gooey Oreo filling with the crispy, golden batter is simply irresistible. It’s a textural and flavor explosion that will have you reaching for another one before you even realize it. This isn’t just a dessert; it’s an experience, a little bit of pure, unadulterated joy on a plate. Why is this a must-try? Because it’s fun, it’s easy, and it’s absolutely delicious! It’s the perfect treat for a special occasion, a movie night, or just when you need a little pick-me-up. Plus, it’s a guaranteed crowd-pleaser. Imagine the look on your friends’ and family’s faces when you present them with a plate of these golden-brown beauties. They’ll be amazed, delighted, and instantly hooked. But the fun doesn’t stop there! There are so many ways to customize your deep fried Oreos and make them your own.Serving Suggestions and Variations:
* Classic Style: Dust them with powdered sugar while they’re still warm. The sweetness of the sugar complements the richness of the Oreo perfectly. * Chocolate Lover’s Dream: Drizzle them with melted chocolate (milk, dark, or white the choice is yours!). You can even add a sprinkle of chocolate shavings for extra decadence. * Caramel Craze: Drizzle with warm caramel sauce and a sprinkle of sea salt for a sweet and salty treat. * Ice Cream Sundae Upgrade: Serve them alongside a scoop of your favorite ice cream. Vanilla, chocolate, or even cookies and cream would be amazing. * Fruity Fun: Top them with fresh berries and a dollop of whipped cream for a lighter, more refreshing twist. * Spice it Up: Add a pinch of cinnamon or nutmeg to the batter for a warm, comforting flavor. * Different Oreos: Experiment with different Oreo flavors! Golden Oreos, Mint Oreos, Peanut Butter Oreos the possibilities are endless. * Batter Up: Try using different types of batter. Pancake batter, funnel cake batter, or even a simple beer batter can all work well. Don’t be afraid to get creative and experiment with different toppings and flavors. The most important thing is to have fun and enjoy the process! I truly believe that everyone should experience the magic of deep fried Oreos at least once in their life. It’s a simple pleasure that can bring a smile to your face and make any day a little bit brighter. So, gather your ingredients, fire up your fryer (or your pot of oil), and get ready to indulge in this irresistible treat. I’m so excited for you to try this recipe! Once you do, I would absolutely love to hear about your experience. Did you try any of the variations I suggested? Did you come up with your own unique twist? What did your friends and family think? Share your photos and stories in the comments below! Let’s spread the deep fried Oreo love and inspire others to try this amazing recipe. Happy frying! Print
Deep Fried Oreos: The Ultimate Guide to Making Them at Home
- Total Time: 55 minutes
- Yield: 14–16 fried Oreos 1x
Description
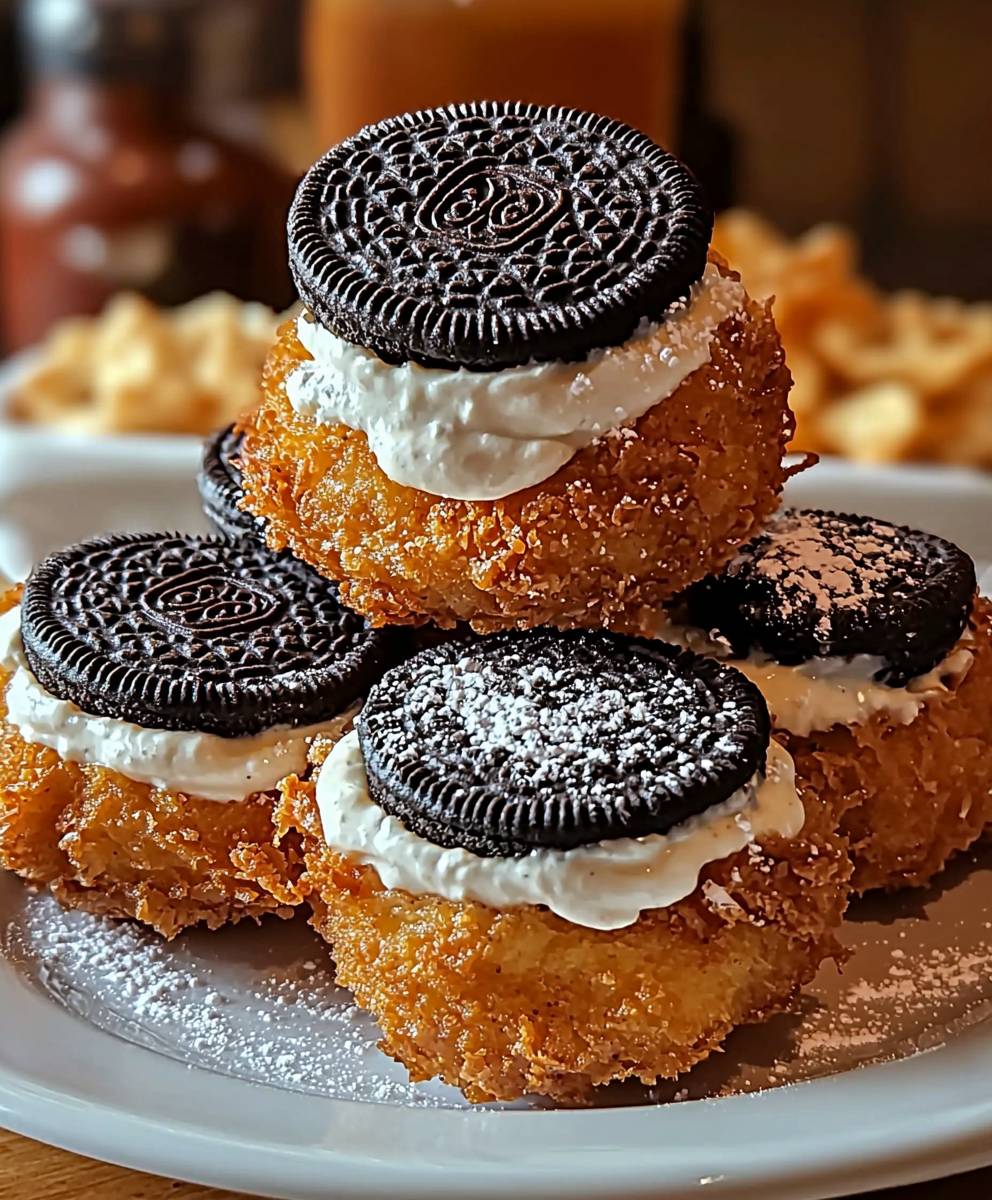
Crispy, warm, and gooey deep-fried Oreos dusted with powdered sugar the ultimate fair food indulgence!
Ingredients
- 1 package (14.3 ounces) Oreo cookies
- 1 cup all-purpose flour
- 1/4 cup granulated sugar
- 2 teaspoons baking powder
- 1/4 teaspoon salt
- 1 cup milk (whole milk recommended for richer flavor)
- 1 large egg
- 1 teaspoon vanilla extract
- Vegetable oil, for frying (about 4-6 cups, depending on your pot)
- Powdered sugar, for dusting (optional)
Instructions
- In a medium-sized bowl, whisk together the flour, sugar, baking powder, and salt until evenly distributed.
- In a separate bowl, whisk together the milk, egg, and vanilla extract until smooth.
- Gradually pour the wet ingredients into the dry ingredients, whisking constantly until just combined. Be careful not to overmix. The batter should be smooth but slightly thick.
- Cover the bowl with plastic wrap and let the batter rest in the refrigerator for at least 30 minutes.
- Select a deep, heavy-bottomed pot or a deep fryer.
- Pour the vegetable oil into the pot, filling it to a depth of about 2-3 inches.
- Place the pot over medium-high heat and heat the oil to 350-375°F (175-190°C). Use a deep-fry thermometer to monitor the temperature.
- Line a plate with paper towels. Have your batter and Oreos within easy reach of the stove.
- One at a time, dip each Oreo into the batter, making sure it’s completely coated. Use a fork or tongs to lift the Oreo out of the batter, allowing any excess batter to drip back into the bowl.
- Gently lower the battered Oreo into the hot oil. Don’t overcrowd the pot! Fry only 2-3 Oreos at a time.
- Fry the Oreos for about 2-3 minutes per side, or until they are golden brown and crispy. Use tongs to flip them over halfway through cooking to ensure even browning.
- Once the Oreos are golden brown, carefully remove them from the oil with tongs or a slotted spoon and place them on the prepared plate lined with paper towels to drain.
- Repeat the dipping and frying process with the remaining Oreos. Make sure to monitor the oil temperature and adjust the heat as needed to maintain a consistent temperature. If the oil starts to smoke, reduce the heat immediately.
- While the fried Oreos are still warm, dust them generously with powdered sugar.
- Deep-fried Oreos are best served immediately while they are still warm and crispy.
- These are a decadent treat, so enjoy them in moderation!
Notes
- Batter Consistency: If the batter is too thick, add a little more milk. If it’s too thin, add a little more flour.
- Oil Temperature: Maintaining the correct oil temperature is crucial.
- Don’t Overcrowd: Fry only a few Oreos at a time.
- Variations: Add a pinch of cinnamon, nutmeg, or cocoa powder to the batter for a different flavor. Use different extracts, such as almond or peppermint.
- Dipping Sauces: Serve with chocolate sauce, caramel sauce, or whipped cream.
- Different Oreos: Try using different flavors of Oreos.
- Air Fryer Option: Lightly spray the battered Oreos with oil and air fry at 350°F (175°C) for 6-8 minutes, flipping halfway through.
- Storage: Leftover fried Oreos can be stored in an airtight container at room temperature for up to 24 hours, but they will lose their crispness.
- Safety First! Never leave hot oil unattended. Keep a close eye on the oil temperature. Have a fire extinguisher nearby. Be careful when handling hot oil and fried Oreos to avoid burns.
- Prep Time: 20 minutes
- Cook Time: 15 minutes

Leave a Comment