
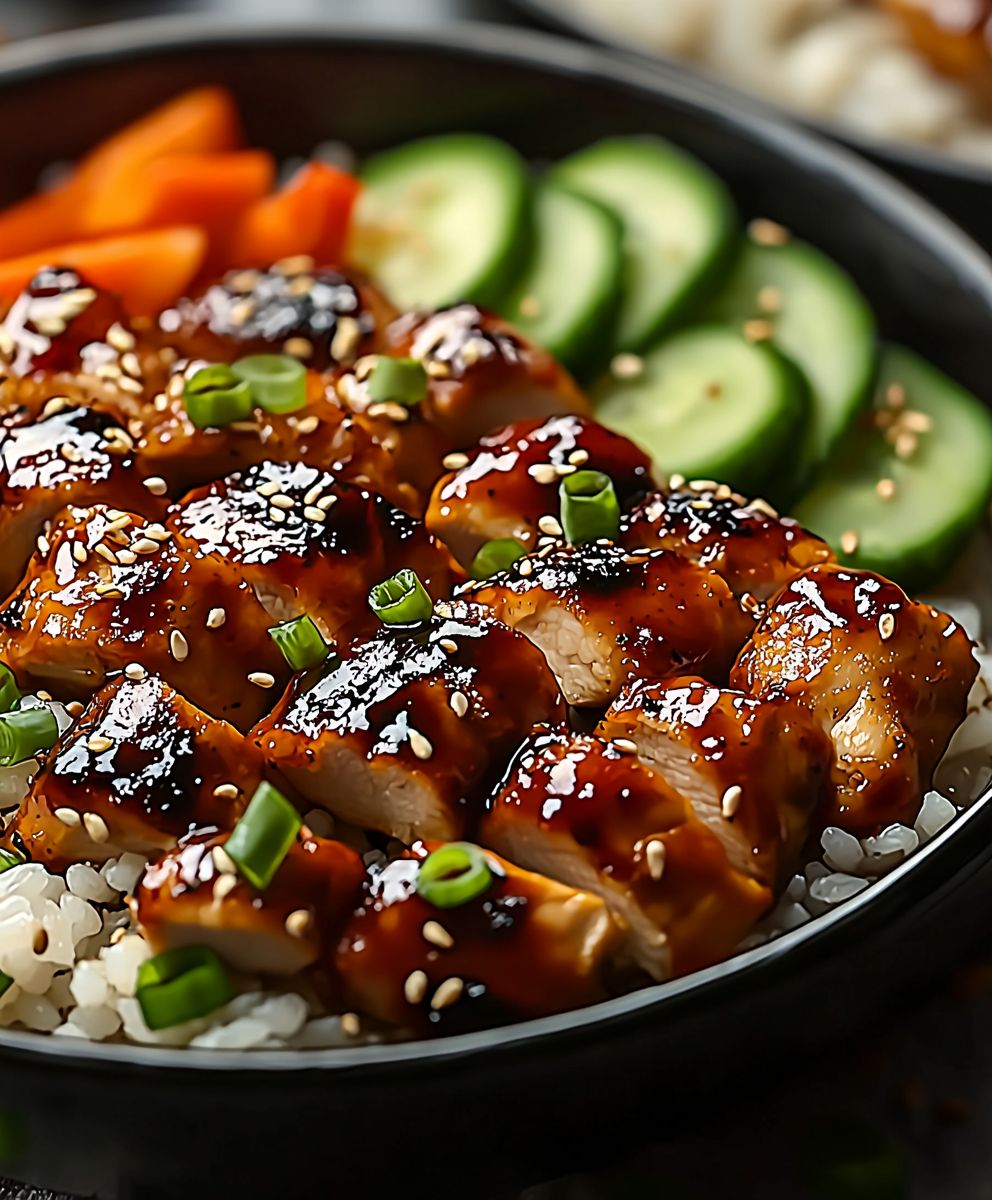
Hibachi Chicken: The sizzling sound, the tantalizing aroma, the perfectly cooked chicken who can resist the allure of a classic hibachi meal? I know I can’t! There’s something truly special about watching a skilled chef prepare your food right before your eyes, creating a culinary performance that’s as entertaining as it is delicious. But what if I told you that you could recreate that same magic in your own kitchen?
Hibachi, meaning “fire bowl” in Japanese, has a fascinating history. While often associated with Japanese steakhouses in the West, the term technically refers to a traditional heating device. The cooking style we know and love, featuring teppanyaki grills, gained popularity after World War II as a way to entertain American GIs and showcase Japanese cuisine. It quickly became a beloved dining experience, known for its interactive nature and flavorful food.
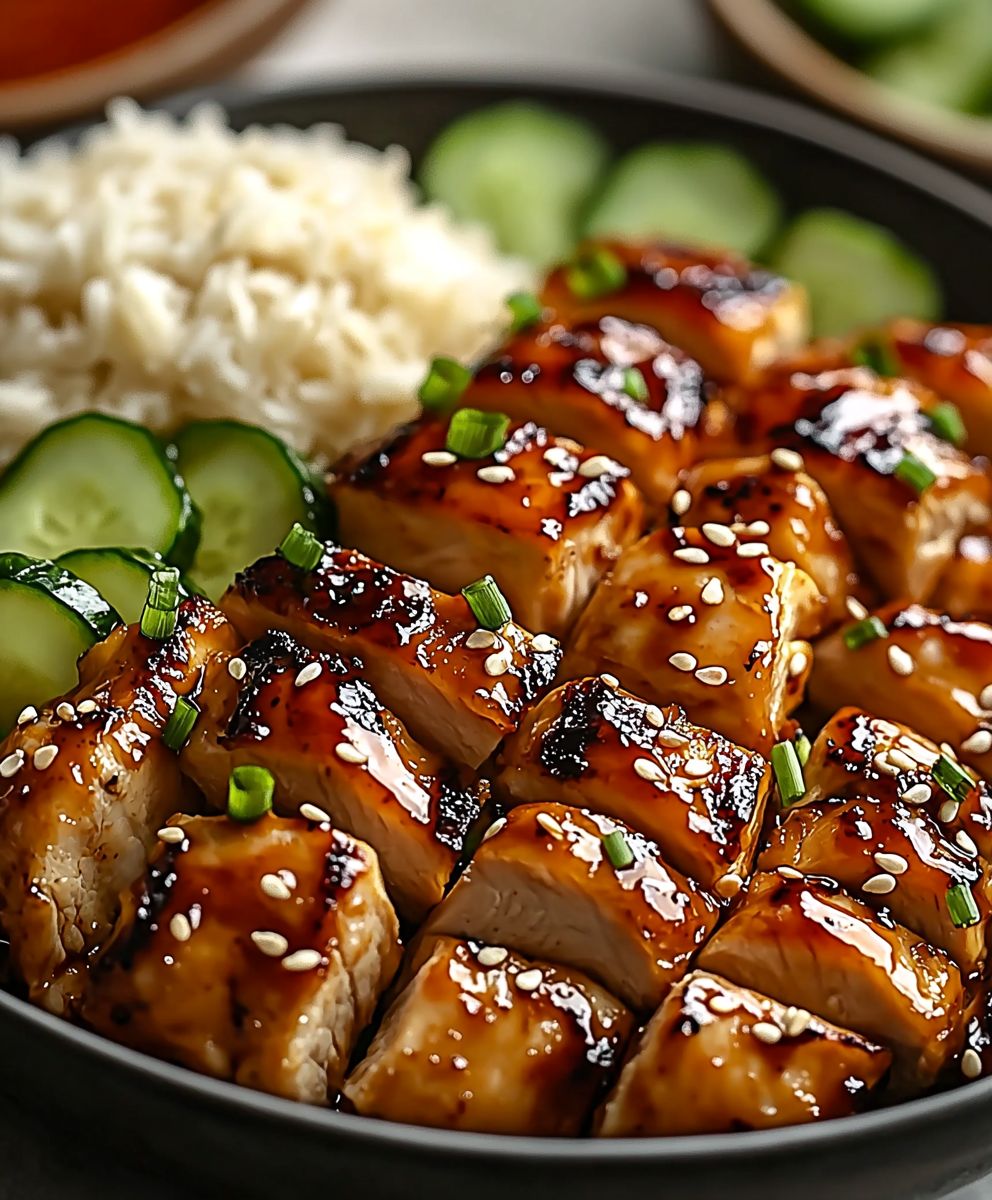
So, why is Hibachi Chicken such a crowd-pleaser? It’s a symphony of flavors and textures. The chicken is incredibly tender and juicy, thanks to the high heat and quick cooking time. The savory-sweet sauce, often a blend of soy sauce, mirin, and ginger, caramelizes beautifully, creating a delectable glaze. Plus, it’s incredibly versatile! Serve it with fried rice, noodles, or grilled vegetables for a complete and satisfying meal. Get ready to impress your family and friends with this easy-to-follow recipe that brings the hibachi experience home!
Ingredients:
- For the Chicken:
- 2 lbs boneless, skinless chicken thighs, cut into 1-inch cubes
- 2 tablespoons soy sauce
- 1 tablespoon sake (or dry sherry)
- 1 tablespoon sesame oil
- 1 teaspoon ground ginger
- 1/2 teaspoon garlic powder
- 1/4 teaspoon black pepper
- For the Vegetables:
- 1 large onion, cut into 1-inch pieces
- 2 bell peppers (any color), cut into 1-inch pieces
- 2 zucchini, cut into 1/2-inch thick rounds
- 8 oz cremini mushrooms, halved or quartered if large
- 2 tablespoons vegetable oil
- For the Hibachi Fried Rice (Optional):
- 4 cups cooked rice (preferably day-old, long-grain)
- 2 tablespoons soy sauce
- 1 tablespoon sesame oil
- 1/2 cup frozen peas and carrots
- 1 egg, lightly beaten
- 1/4 cup chopped green onions
- For the Yum Yum Sauce:
- 1 cup mayonnaise
- 2 tablespoons tomato paste
- 1 tablespoon melted butter
- 1 teaspoon garlic powder
- 1 teaspoon paprika
- 1/2 teaspoon sugar
- 1/4 teaspoon cayenne pepper (optional, for a little kick!)
- 1 tablespoon water (or milk, for desired consistency)
Preparing the Chicken:
- In a medium bowl, combine the cubed chicken thighs with soy sauce, sake (or dry sherry), sesame oil, ground ginger, garlic powder, and black pepper.
- Mix well to ensure all the chicken pieces are evenly coated with the marinade.
- Cover the bowl with plastic wrap and refrigerate for at least 30 minutes, or up to 2 hours. The longer it marinates, the more flavorful it will be!
Preparing the Vegetables:
- Wash and chop all the vegetables according to the ingredient list. I like to have everything prepped and ready to go before I start cooking, it makes the whole process much smoother.
- Place the chopped onion, bell peppers, zucchini, and mushrooms in a separate bowl. You can toss them with a little bit of vegetable oil and a pinch of salt and pepper if you like, but it’s not strictly necessary.
Cooking the Hibachi Chicken and Vegetables:
- Heat 1 tablespoon of vegetable oil in a large skillet or wok over medium-high heat. If you have a hibachi grill, even better!
- Add the marinated chicken to the hot skillet in a single layer. Avoid overcrowding the pan, as this will lower the temperature and cause the chicken to steam instead of sear. If necessary, cook the chicken in batches.
- Cook the chicken for about 5-7 minutes, or until it’s cooked through and nicely browned on all sides. Stir occasionally to ensure even cooking. Remove the cooked chicken from the skillet and set aside.
- Add the remaining 1 tablespoon of vegetable oil to the skillet.
- Add the chopped vegetables to the skillet and cook for about 5-7 minutes, or until they are tender-crisp. Stir frequently to prevent burning. You want them to be slightly softened but still have a bit of a bite.
- Return the cooked chicken to the skillet with the vegetables.
- Stir everything together and cook for another 1-2 minutes, allowing the flavors to meld.
- Remove from heat and serve immediately.
Making the Yum Yum Sauce:
- In a medium bowl, whisk together the mayonnaise, tomato paste, melted butter, garlic powder, paprika, sugar, and cayenne pepper (if using).
- Add water (or milk) one tablespoon at a time, whisking until the sauce reaches your desired consistency. I prefer mine to be slightly thinner, but it’s all a matter of personal preference.
- Taste and adjust the seasonings as needed. You might want to add a little more sugar for sweetness, or a pinch of salt to balance the flavors.
- Cover and refrigerate the Yum Yum sauce for at least 30 minutes to allow the flavors to meld. This will also help it thicken up a bit.
Optional: Hibachi Fried Rice:
- If you’re making the fried rice, start by heating 1 tablespoon of sesame oil in a large skillet or wok over medium-high heat.
- Pour the lightly beaten egg into the skillet and cook, stirring constantly, until it’s scrambled. Remove the scrambled egg from the skillet and set aside.
- Add the remaining 1 tablespoon of sesame oil to the skillet.
- Add the frozen peas and carrots to the skillet and cook for about 2-3 minutes, or until they are heated through.
- Add the cooked rice to the skillet and break it up with a spatula.
- Pour the soy sauce over the rice and stir well to combine.
- Cook the rice for about 5-7 minutes, stirring frequently, until it’s heated through and slightly crispy.
- Return the scrambled egg to the skillet with the rice.
- Stir in the chopped green onions.
- Cook for another minute, stirring constantly, until everything is well combined.
- Remove from heat and serve alongside the Hibachi Chicken and Vegetables.
Serving Suggestions:
Serve the Hibachi Chicken and Vegetables hot, drizzled with plenty of Yum Yum sauce. The Hibachi Fried Rice is a great addition to the meal, but it’s also delicious on its own. You can also serve it with a side of steamed white rice or brown rice. For a complete hibachi experience, consider adding a simple green salad or a bowl of miso soup.
Tips and Variations:
- Chicken: You can use chicken breasts instead of chicken thighs, but be careful not to overcook them, as they can become dry. Cut the chicken breasts into 1-inch cubes as well.
- Vegetables: Feel free to use any vegetables you like in your hibachi. Other good options include broccoli florets, snap peas, asparagus, and sweet potatoes.
- Sauce: If you don’t have sake or dry sherry, you can substitute it with chicken broth or water.
- Spice: For a spicier dish, add a pinch of red pepper flakes to the chicken marinade or the vegetables.
- Yum Yum Sauce: If you don’t have tomato paste, you can use ketchup instead. You can also add a little bit of lemon juice or rice vinegar to the Yum Yum sauce for a tangy flavor. Some people also like to add a little bit of honey for extra sweetness.
- Make Ahead: You can marinate the chicken and chop the vegetables ahead of time. Store them separately in the refrigerator until you’re ready to cook. The Yum Yum sauce can also be made ahead of time and stored in the refrigerator for up to a week.
- Grilling: If you have a grill, you can grill the chicken and vegetables instead of cooking them in a skillet. Thread the chicken and vegetables onto skewers and grill them over medium heat until they are cooked through.
Enjoy your homemade Hibachi Chicken!
Conclusion:
And there you have it! This Hibachi Chicken recipe isn’t just another weeknight dinner; it’s a passport to a delicious, restaurant-quality experience right in your own kitchen. I truly believe this is a must-try for anyone looking to add a little excitement and flavor to their meals. The combination of tender, juicy chicken, the savory-sweet sauce, and the vibrant vegetables creates a symphony of tastes that will leave you wanting more. But why is this recipe so special? It’s all about the simplicity and the impact. The ingredients are readily available, the steps are straightforward, and the results are consistently fantastic. You don’t need to be a master chef to achieve Hibachi perfection. The key is in the quality of the ingredients and the attention to detail in the cooking process. Trust me, even if you’re a beginner cook, you can absolutely nail this recipe. Now, let’s talk about serving suggestions and variations, because the possibilities are endless! The classic way to enjoy this Hibachi Chicken is, of course, with a side of fluffy white rice or flavorful fried rice. But don’t stop there! You can also serve it with noodles, quinoa, or even cauliflower rice for a healthier option. For a complete Hibachi experience, consider adding some grilled vegetables like zucchini, onions, and bell peppers. A side of Yum Yum sauce is an absolute must its creamy, tangy flavor perfectly complements the savory chicken. And if you’re feeling adventurous, try adding a sprinkle of sesame seeds or a dash of chili flakes for an extra kick. Want to switch things up a bit? Here are a few variations to try: * Hibachi Shrimp: Simply substitute the chicken with shrimp for a delicious seafood twist. * Hibachi Steak: Use thinly sliced steak instead of chicken for a heartier meal. * Vegetarian Hibachi: Replace the chicken with tofu or tempeh for a plant-based option. * Spicy Hibachi: Add a pinch of cayenne pepper or a drizzle of sriracha to the sauce for a fiery flavor. No matter how you choose to serve it, this Hibachi Chicken is guaranteed to be a crowd-pleaser. It’s perfect for a quick weeknight dinner, a casual weekend gathering, or even a special occasion. The vibrant colors and enticing aromas will make it a feast for the senses. I’m so excited for you to try this recipe and experience the magic of Hibachi cooking at home. I’ve poured my heart and soul into perfecting this recipe, and I’m confident that you’ll love it as much as I do. So, what are you waiting for? Grab your ingredients, fire up your stove, and get ready to create a culinary masterpiece. And most importantly, don’t forget to have fun! Cooking should be an enjoyable experience, so relax, experiment, and let your creativity shine. Once you’ve tried this recipe, I would absolutely love to hear about your experience. Share your photos, your tips, and your variations in the comments below. Let’s create a community of Hibachi enthusiasts and inspire each other to cook delicious and memorable meals. I can’t wait to see what you create! Happy cooking! Print
Hibachi Chicken: The Ultimate Guide to Cooking at Home
- Total Time: 60 minutes
- Yield: 4–6 servings 1x
Description
Easy homemade Hibachi Chicken and Fried Rice! Tender chicken and crisp-tender vegetables are stir-fried to perfection and served over flavorful fried rice with a creamy Yum Yum sauce.
Ingredients
- 2 lbs boneless, skinless chicken thighs, cut into 1-inch cubes
- 2 tablespoons soy sauce
- 1 tablespoon sake (or dry sherry)
- 1 tablespoon sesame oil
- 1 teaspoon grated ginger
- 1/2 teaspoon garlic powder
- 1/4 teaspoon black pepper
- 1 large onion, cut into 1-inch pieces
- 2 bell peppers (any color), cut into 1-inch pieces
- 2 zucchini, cut into 1/2-inch thick rounds
- 8 oz mushrooms, sliced
- 2 tablespoons vegetable oil
- 4 cups cooked and cooled rice (preferably day-old)
- 2 tablespoons soy sauce
- 1 tablespoon sesame oil
- 1/2 cup frozen peas and carrots
- 2 eggs, lightly beaten
- 1/4 cup chopped green onions
- 1 cup mayonnaise
- 2 tablespoons tomato paste
- 1 tablespoon melted butter
- 1 tablespoon paprika
- 1 teaspoon garlic powder
- 1/2 teaspoon onion powder
- 1/4 teaspoon cayenne pepper (optional)
- 1 tablespoon water (or milk, for desired consistency)
- 1/2 teaspoon sugar
Instructions
- In a medium bowl, combine the chicken cubes, soy sauce, sake (or dry sherry), sesame oil, grated ginger, garlic powder, and black pepper. Mix well to ensure all the chicken pieces are coated evenly with the marinade. Cover the bowl with plastic wrap and refrigerate for at least 30 minutes, or up to 4 hours.
- While the chicken is marinating, prepare your vegetables. Wash and dry all the vegetables thoroughly. Cut the onion into 1-inch pieces. Cut the bell peppers into 1-inch pieces as well. Remove the seeds and membranes before cutting. Slice the zucchini into 1/2-inch thick rounds. Slice the mushrooms. Set the prepared vegetables aside in a bowl.
- In a medium bowl, whisk together the mayonnaise, tomato paste, melted butter, paprika, garlic powder, onion powder, cayenne pepper (if using), water (or milk), and sugar. Whisk until all the ingredients are well combined and the sauce is smooth and creamy. Taste the sauce and adjust the seasonings as needed. Cover the bowl and refrigerate the Yum Yum sauce until ready to serve.
- Heat 1 tablespoon of vegetable oil in a large skillet or wok over medium-high heat. Add the marinated chicken to the hot skillet in a single layer. Avoid overcrowding the pan, as this will cause the chicken to steam instead of sear. If necessary, cook the chicken in batches. Cook the chicken for about 5-7 minutes, or until it is cooked through and lightly browned on all sides. Make sure the internal temperature reaches 165°F (74°C). Remove the cooked chicken from the skillet and set aside. Add the remaining 1 tablespoon of vegetable oil to the skillet. Add the onion, bell peppers, zucchini, and mushrooms to the skillet. Cook the vegetables for about 5-7 minutes, or until they are tender-crisp. Stir frequently to prevent them from burning. Return the cooked chicken to the skillet with the vegetables. Stir everything together and cook for another minute or two, until the chicken and vegetables are heated through.
- Heat 1 tablespoon of sesame oil in a large skillet or wok over medium heat. Pour the lightly beaten eggs into the skillet and cook, stirring constantly, until they are scrambled. Remove the scrambled eggs from the skillet and set aside. Add the remaining 1 tablespoon of sesame oil to the skillet. Add the cooked and cooled rice to the skillet. Break up any clumps of rice with a spatula. Stir-fry the rice for about 3-4 minutes, or until it is heated through. Add the soy sauce and frozen peas and carrots to the rice. Stir-fry for another 2-3 minutes, until the peas and carrots are heated through. Return the scrambled eggs to the skillet with the rice. Stir everything together and cook for another minute, until the eggs are heated through. Stir in the chopped green onions.
- Serve the hibachi chicken and vegetables over a bed of hibachi fried rice. Drizzle generously with Yum Yum sauce. Garnish with extra chopped green onions, if desired.
Notes
- Use day-old rice for the fried rice. This will help prevent the rice from becoming mushy.
- Don’t overcrowd the pan when cooking the chicken and vegetables. Cook them in batches if necessary.
- Adjust the seasonings to your liking. Feel free to add more or less soy sauce, sesame oil, or spices.
- Make the Yum Yum sauce ahead of time. This will give the flavors a chance to meld together.
- Get creative with the vegetables. You can use any vegetables you like in this recipe. Some other good options include broccoli, asparagus, and snap peas.
- Prep Time: 30 minutes
- Cook Time: 30 minutes

Leave a Comment