
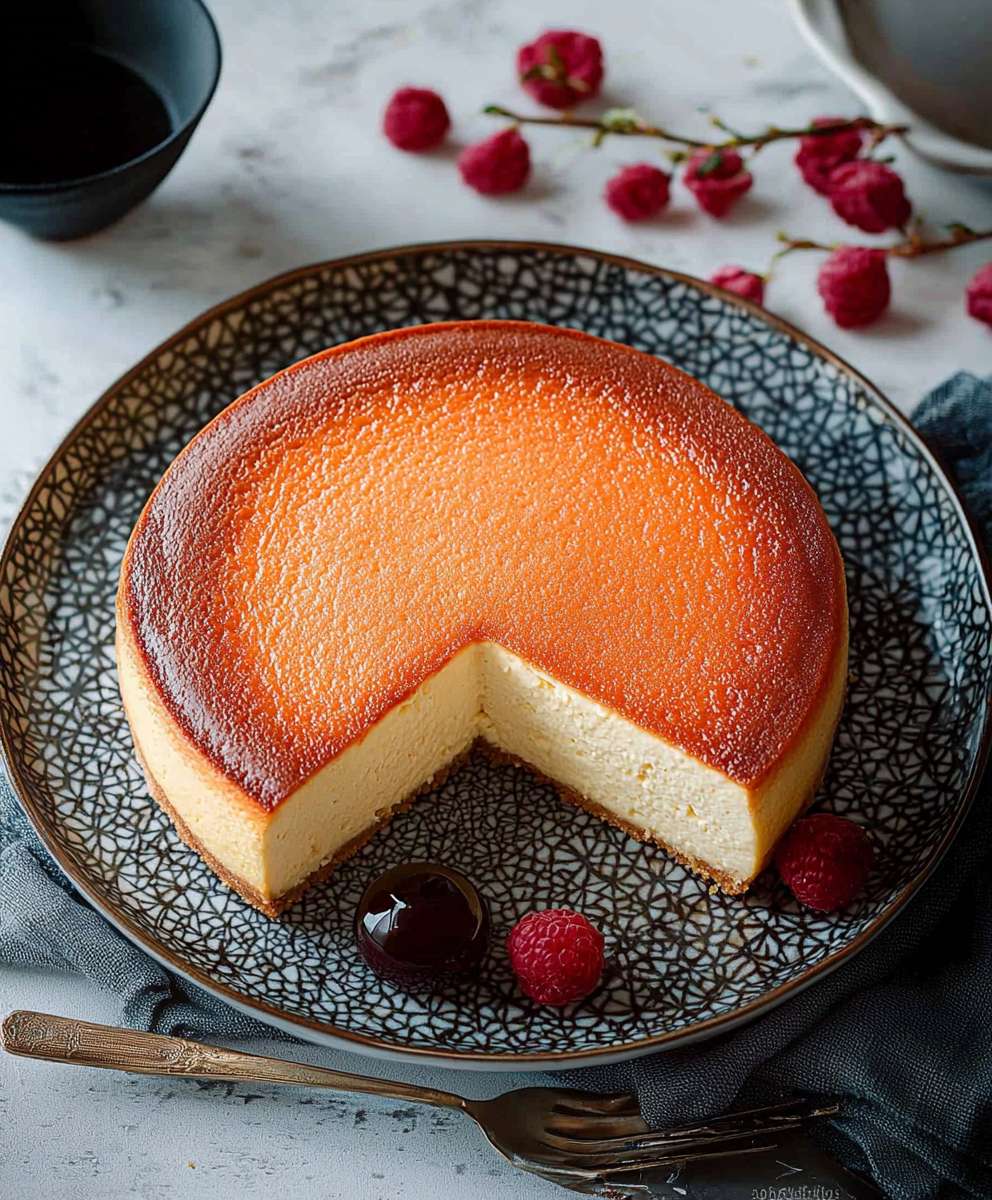
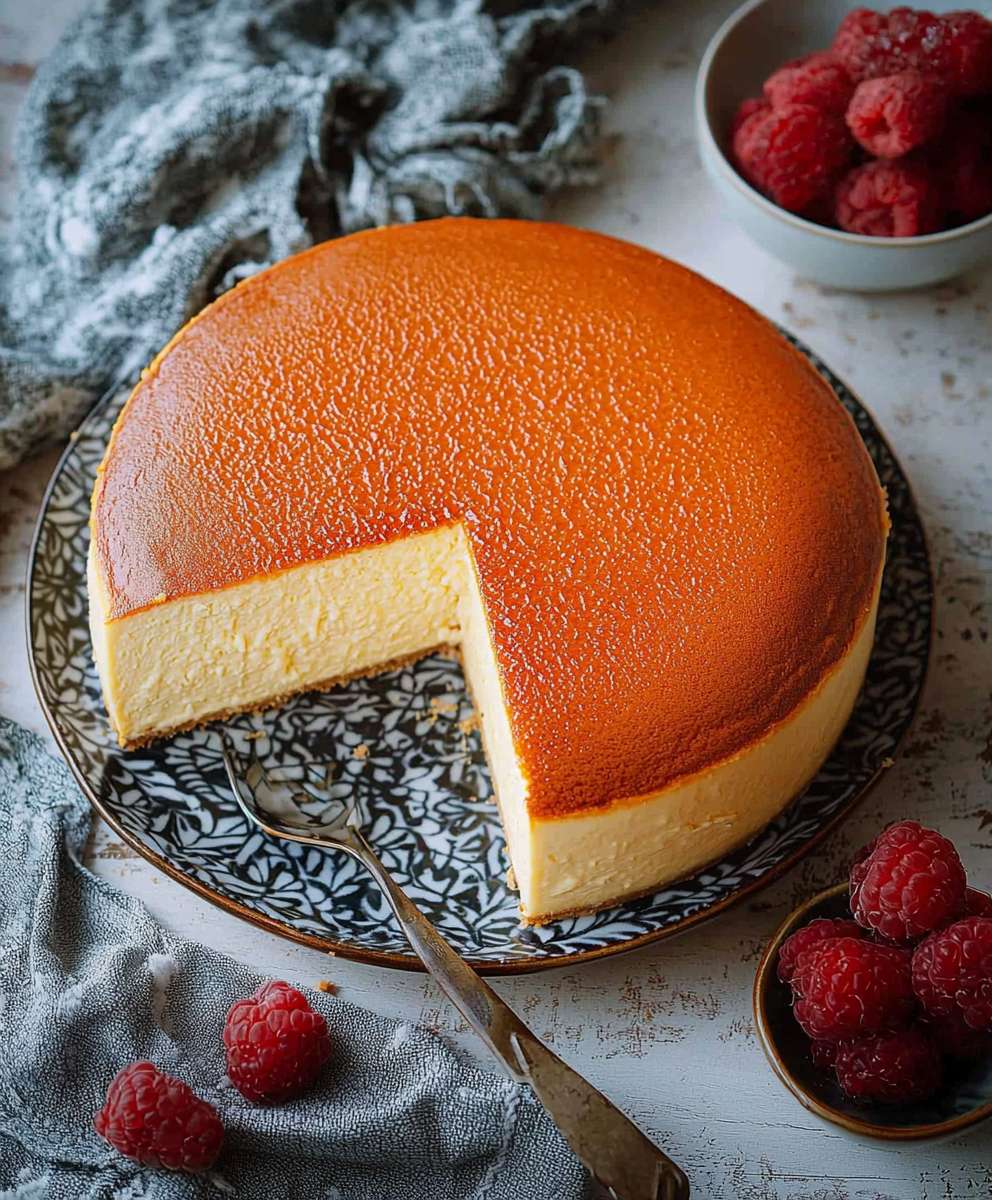
Japanese Cheesecake: Prepare to be amazed by a dessert that defies gravity and melts in your mouth! Have you ever dreamt of a cheesecake so light and airy it practically floats off your plate? This isn’t your average dense, New York-style cheesecake. We’re talking about a cloud-like confection that will redefine your understanding of what cheesecake can be.
The history of Japanese Cheesecake, also known as soufflé cheesecake, is relatively recent, emerging in Japan as a lighter, fluffier alternative to the richer Western versions. It quickly gained popularity for its unique texture and delicate flavor profile. Its a testament to Japanese culinary innovation, taking a beloved classic and transforming it into something entirely new and captivating.
What makes this dessert so irresistible? It’s the ethereal texture, a delightful combination of creamy richness and airy lightness. The subtle sweetness and hint of citrus create a flavor that’s both comforting and sophisticated. Plus, while it might look intimidating, this recipe is surprisingly straightforward, making it a perfect project for both experienced bakers and adventurous beginners. Get ready to impress your friends and family with this show-stopping dessert that’s guaranteed to be a crowd-pleaser!
Ingredients:
- Cream Cheese: 8 oz (227g), softened to room temperature. This is the foundation of our cheesecake, so make sure it’s nice and soft for a smooth batter.
- Eggs: 3 large, separated. We’ll be whipping the egg whites for that signature airy texture.
- Granulated Sugar: ½ cup (100g), divided. We’ll use some in the yolk mixture and some to make a meringue with the egg whites.
- Heavy Cream: ½ cup (120ml). This adds richness and moisture to the cheesecake.
- Lemon Juice: 1 tablespoon. A touch of acidity brightens the flavors.
- Cornstarch: 2 tablespoons. This helps stabilize the cheesecake and gives it that delicate, melt-in-your-mouth texture.
- Unsalted Butter: 2 tablespoons (30g), melted. For greasing the pan.
- Milk: ¼ cup (60ml). Adds moisture and helps create a smooth batter.
- All-Purpose Flour: 2 tablespoons. Just a little bit to provide some structure.
- Optional: Powdered sugar for dusting. For a beautiful finishing touch.
Preparing the Cheesecake Batter:
- Preheat your oven to 325°F (160°C). This lower temperature is crucial for baking the cheesecake gently and preventing cracks.
- Prepare a water bath. This is essential for achieving that incredibly moist and delicate texture. Wrap the bottom of a 6-inch springform pan tightly with aluminum foil (double layer is best!) to prevent water from seeping in. Place the wrapped pan inside a larger baking pan.
- Grease the springform pan. Generously grease the inside of the springform pan with melted butter. Then, line the bottom with a circle of parchment paper. This will ensure the cheesecake releases easily after baking.
- Beat the cream cheese. In a large bowl, beat the softened cream cheese with an electric mixer until it’s completely smooth and creamy. There should be no lumps! This is a critical step for a smooth cheesecake.
- Add the sugar (part 1). Gradually add ¼ cup (50g) of the granulated sugar to the cream cheese and continue beating until well combined.
- Incorporate the egg yolks. Add the egg yolks one at a time, beating well after each addition. Make sure each yolk is fully incorporated before adding the next.
- Add the heavy cream and milk. Pour in the heavy cream and milk and mix until just combined. Don’t overmix at this stage.
- Add the lemon juice. Stir in the lemon juice.
- Sift in the flour and cornstarch. Sift the all-purpose flour and cornstarch into the batter. This prevents lumps and ensures a smooth texture. Gently fold the dry ingredients into the wet ingredients until just combined. Be careful not to overmix.
Making the Meringue:
- Beat the egg whites. In a clean, dry bowl, beat the egg whites with an electric mixer until soft peaks form. Make sure your bowl and beaters are completely clean and free of any grease, as this will prevent the egg whites from whipping properly.
- Gradually add the sugar (part 2). Gradually add the remaining ¼ cup (50g) of granulated sugar to the egg whites, beating continuously until stiff, glossy peaks form. The meringue should be firm enough to hold its shape but not dry.
Combining the Batter and Meringue:
- Fold in the meringue (part 1). Gently fold about one-third of the meringue into the cream cheese batter. This will lighten the batter and make it easier to incorporate the remaining meringue.
- Fold in the meringue (part 2). Gently fold in the remaining meringue in two additions, being careful not to deflate the egg whites. Use a light hand and fold until just combined. Overmixing will result in a dense cheesecake.
Baking the Cheesecake:
- Pour the batter into the prepared pan. Pour the cheesecake batter into the prepared springform pan. Gently tap the pan on the counter a few times to release any air bubbles.
- Add hot water to the water bath. Carefully pour hot water into the larger baking pan, filling it about halfway up the sides of the springform pan.
- Bake the cheesecake. Bake in the preheated oven for 60-75 minutes, or until the top is lightly golden and the cheesecake is set around the edges but still slightly jiggly in the center. The baking time may vary depending on your oven.
- Turn off the oven and let the cheesecake cool. Turn off the oven and crack the oven door slightly. Let the cheesecake cool in the oven for 1 hour. This gradual cooling process helps prevent cracking.
- Remove from the water bath. Carefully remove the cheesecake from the water bath and let it cool completely on a wire rack.
- Chill the cheesecake. Cover the cheesecake with plastic wrap and refrigerate for at least 4 hours, or preferably overnight. This allows the cheesecake to fully set and develop its flavor.
Serving the Cheesecake:
- Release the cheesecake. Run a thin knife around the edge of the cheesecake to loosen it from the pan. Carefully release the sides of the springform pan.
- Dust with powdered sugar (optional). Dust the top of the cheesecake with powdered sugar before serving, if desired.
- Slice and serve. Slice the cheesecake with a sharp knife and serve. Enjoy! This cheesecake is best served chilled.

Leave a Comment