
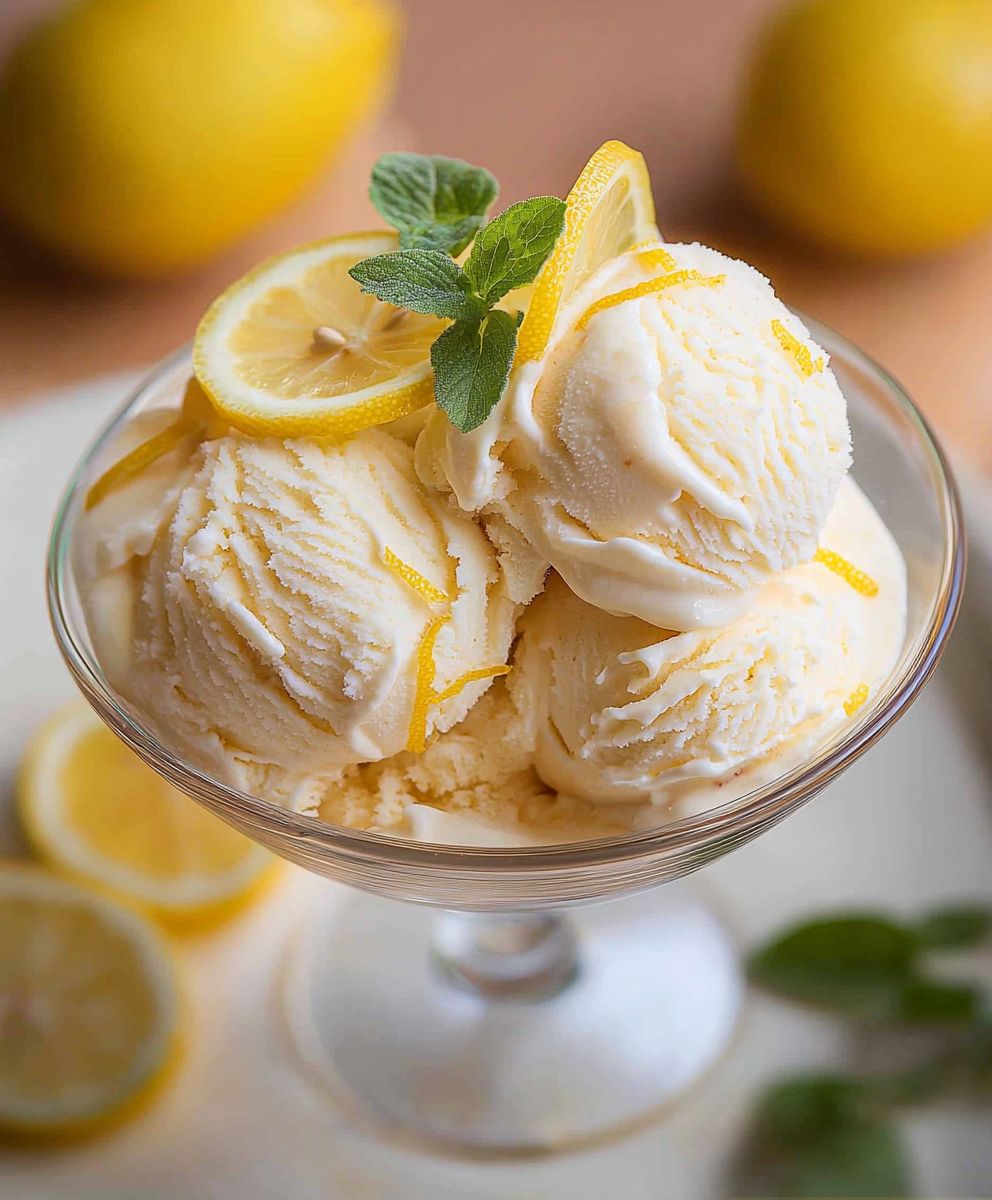
Lemon no churn ice cream: prepare to be amazed! Imagine a dessert so bright, so refreshing, and so incredibly easy to make that you’ll wonder why you ever bothered with store-bought ice cream again. This isn’t just any frozen treat; it’s a burst of sunshine in every spoonful, a creamy, tangy delight that will tantalize your taste buds and leave you craving more.
While the exact origins of lemon ice cream are somewhat shrouded in mystery, lemons themselves have a rich history, traveling from Asia to the Mediterranean and eventually becoming a staple in European cuisine. The concept of combining citrus with frozen desserts dates back centuries, with variations appearing in royal courts and humble kitchens alike. Our modern take on lemon no churn ice cream simplifies the process, making it accessible to everyone, regardless of their ice cream-making experience.
So, why do people adore this particular dessert? It’s a symphony of flavors and textures. The vibrant acidity of the lemon cuts through the richness of the cream, creating a perfectly balanced taste. The “no churn” method means no fancy equipment is needed, and the resulting texture is surprisingly smooth and decadent. Plus, it’s incredibly convenient! With just a few simple ingredients and minimal effort, you can whip up a batch of this irresistible treat in no time. Get ready to experience the magic of homemade ice cream without the fuss!
Ingredients:
- 1 (14 ounce) can sweetened condensed milk
- 2 cups heavy cream, cold
- ¾ cup lemon juice, freshly squeezed (from about 4-6 lemons)
- 2 tablespoons lemon zest, finely grated
- 1 teaspoon vanilla extract
- Pinch of salt
- Optional: ¼ cup Limoncello liqueur (for extra lemon flavor and to help prevent ice crystals)
Preparing the Lemon Base:
- First, let’s get our lemon base ready. In a large bowl, pour in the entire can of sweetened condensed milk. This is the key to our no-churn ice cream’s creamy texture, so make sure you get every last drop!
- Now, for the star of the show: lemon juice! Squeeze those lemons until you have ¾ cup of fresh juice. Freshly squeezed is crucial here; it provides the brightest, most vibrant lemon flavor. Bottled lemon juice just won’t cut it. Strain the juice through a fine-mesh sieve to remove any seeds or pulp. We want a smooth, silky ice cream.
- Add the lemon juice to the sweetened condensed milk. Don’t be alarmed if the mixture thickens slightly; that’s the acid in the lemon juice reacting with the milk. This is perfectly normal and helps create a lovely, creamy base.
- Next, add the lemon zest. This is where we get that intense lemon aroma and flavor. Make sure you only zest the yellow part of the lemon peel, avoiding the white pith underneath, which can be bitter. Two tablespoons of finely grated zest should do the trick. Add it to the bowl with the condensed milk and lemon juice.
- Stir in the vanilla extract. A teaspoon of vanilla extract enhances the lemon flavor and adds a touch of warmth to the ice cream.
- Finally, add a pinch of salt. Salt might seem counterintuitive in ice cream, but it actually balances the sweetness and enhances the other flavors. A small pinch is all you need.
- If you’re using Limoncello, now’s the time to add it. The alcohol in the liqueur helps prevent ice crystals from forming, resulting in a smoother ice cream. Plus, it adds an extra boost of lemon flavor! Stir it in gently.
- Whisk all the ingredients together until they are well combined and the mixture is smooth. Set this lemon base aside for now.
Whipping the Cream:
- Now, let’s move on to whipping the heavy cream. This is what gives our ice cream its light and airy texture. Make sure your heavy cream is very cold. I even like to chill my mixing bowl and whisk attachment in the freezer for about 15 minutes before I start. This helps the cream whip up faster and hold its shape better.
- Pour the cold heavy cream into your chilled mixing bowl. Using an electric mixer (either a stand mixer or a hand mixer), begin whipping the cream on medium speed.
- As the cream whips, it will start to thicken. Keep whipping until stiff peaks form. This means that when you lift the whisk out of the cream, the peaks will stand up straight and hold their shape. Be careful not to overwhip the cream, or it will turn into butter!
Combining and Freezing:
- Now comes the fun part: combining the lemon base and the whipped cream! Gently fold the whipped cream into the lemon base. It’s important to fold, not stir, to avoid deflating the whipped cream. Use a rubber spatula and gently cut down through the center of the mixture, then fold the bottom up and over the top. Rotate the bowl and repeat until the mixture is just combined. You should still see some streaks of whipped cream.
- Once the mixture is combined, pour it into a freezer-safe container. I like to use a loaf pan, but any container with a lid will work.
- Smooth the top of the ice cream with a spatula.
- Cover the container tightly with a lid or plastic wrap. If using plastic wrap, press it directly onto the surface of the ice cream to prevent ice crystals from forming.
- Place the container in the freezer and freeze for at least 6 hours, or preferably overnight. This will allow the ice cream to fully set and develop its flavor.
Serving:
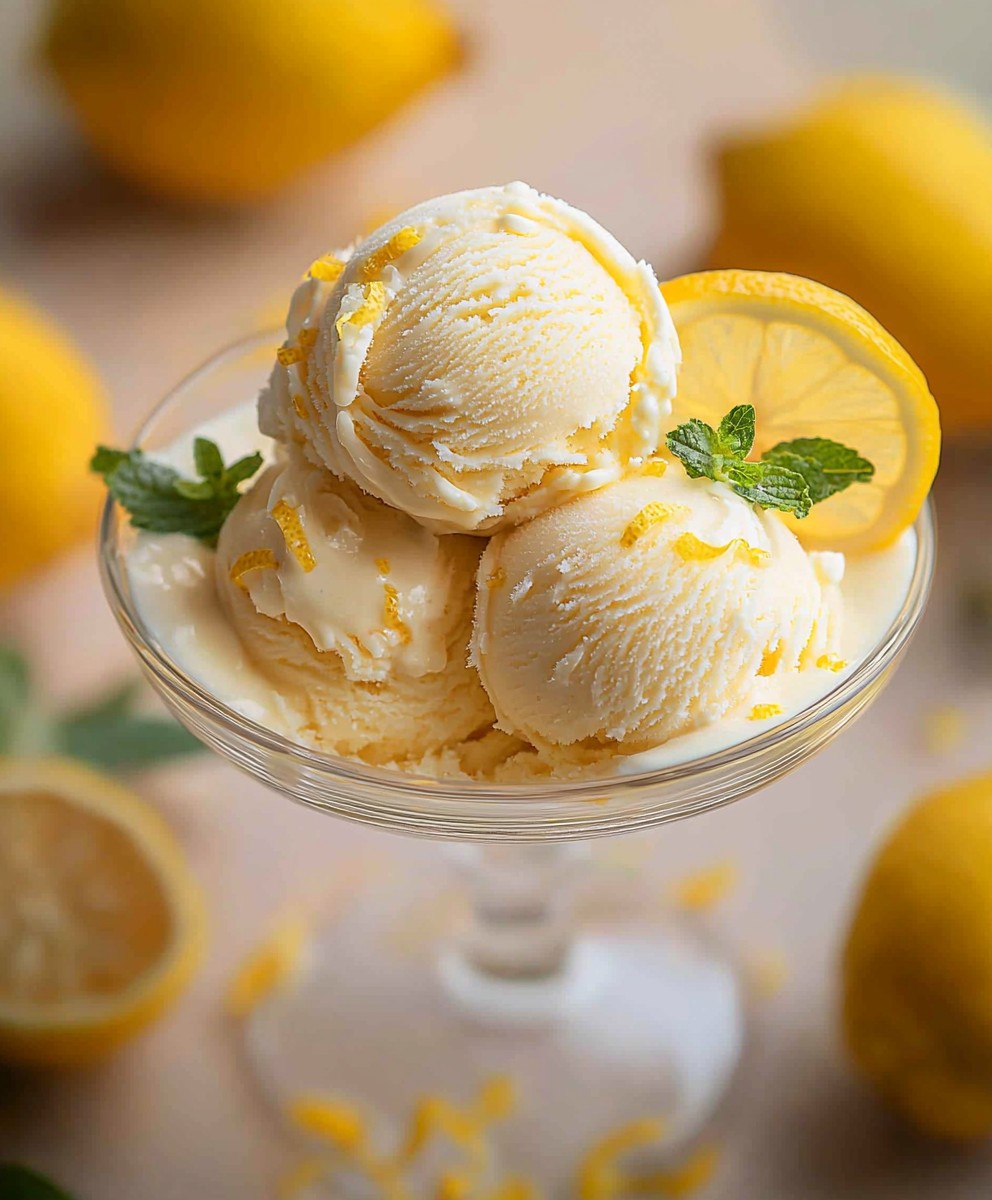
- When you’re ready to serve, remove the ice cream from the freezer and let it sit at room temperature for about 5-10 minutes to soften slightly. This will make it easier to scoop.
- Scoop the ice cream into bowls or cones and enjoy!
- Optional: Garnish with fresh berries, lemon slices, or a sprinkle of lemon zest.
Tips for the Best No-Churn Lemon Ice Cream:
- Use fresh lemon juice: As mentioned earlier, fresh lemon juice is essential for the best flavor.
- Don’t overwhip the cream: Overwhipped cream can result in a grainy texture. Whip until stiff peaks form, but no further.
- Freeze for at least 6 hours: This ensures that the ice cream is fully set and scoopable.
- Add Limoncello: If you want an extra boost of lemon flavor and a smoother texture, add a little Limoncello liqueur.
- Store properly: Store the ice cream in a tightly sealed container in the freezer to prevent freezer burn.
Variations:
- Lemon Blueberry: Fold in fresh or frozen blueberries before freezing.
- Lemon Raspberry: Fold in fresh or frozen raspberries before freezing.
- Lemon Poppy Seed: Add 2 tablespoons of poppy seeds to the lemon base.
- Lemon Meringue Pie: Crumble meringue cookies into the ice cream before freezing.
Conclusion:
This lemon no churn ice cream is truly a must-try, and I’m not just saying that! Its the perfect balance of tangy and sweet, incredibly easy to make, and requires absolutely no special equipment. Forget complicated ice cream makers and lengthy churning processes; this recipe delivers creamy, dreamy lemon ice cream with minimal effort. The bright, refreshing flavor is ideal for a hot summer day, a sophisticated dessert after a dinner party, or simply a little pick-me-up whenever you need a burst of sunshine. What makes this recipe so special is its simplicity. You’re essentially combining a few key ingredients sweetened condensed milk, heavy cream, lemon juice, and lemon zest and letting the freezer do all the work. The sweetened condensed milk provides the sweetness and a wonderfully smooth texture, while the heavy cream whips up into a light and airy base. The lemon juice and zest, of course, are the stars of the show, infusing every bite with that unmistakable citrusy zing. It’s a symphony of flavors and textures that will leave you wanting more. But the best part? This recipe is incredibly versatile! Feel free to experiment with different variations to suit your taste. For a richer, more decadent treat, try adding a splash of limoncello. If you prefer a slightly sweeter ice cream, increase the amount of sweetened condensed milk. You could also incorporate other citrus fruits, such as orange or grapefruit, for a unique twist. Imagine a lemon-orange swirl, or a tangy grapefruit ice cream with a hint of lemon! The possibilities are endless. Serving suggestions are just as exciting. This lemon no churn ice cream is delicious on its own, but it also pairs beautifully with a variety of desserts. Try serving it alongside a warm slice of lemon poppy seed cake, a crispy waffle cone, or a buttery shortbread cookie. For a more sophisticated presentation, scoop it into martini glasses and garnish with fresh mint leaves or a lemon twist. You could even use it to make ice cream sandwiches with graham crackers or chocolate wafers. And for a truly indulgent treat, drizzle it with a homemade raspberry sauce or a dollop of whipped cream. Don’t be intimidated by the thought of making homemade ice cream. This recipe is foolproof, even for beginner cooks. Just follow the simple instructions, and you’ll be rewarded with a delicious, creamy, and refreshing dessert that everyone will love. I promise, once you try this lemon no churn ice cream, you’ll never go back to store-bought again! So, what are you waiting for? Gather your ingredients, grab your mixing bowl, and get ready to create some magic in your kitchen. I’m confident that this recipe will become a new favorite in your household. And when you do try it, please, please, please share your experience! I’d love to hear your feedback, your variations, and your serving suggestions. Tag me in your photos on social media, or leave a comment below. Let’s spread the joy of homemade ice cream together! I can’t wait to see what you create! Happy ice cream making! Print
Lemon No Churn Ice Cream: Easy Homemade Recipe
- Total Time: 375 minutes
- Yield: 6 servings 1x
Description
Easy, refreshing no-churn lemon ice cream! Combines sweetened condensed milk, heavy cream, and fresh lemon for a bright and creamy homemade treat.
Ingredients
- 1 (14 ounce) can sweetened condensed milk
- 2 cups (1 pint) heavy cream, cold
- 1/2 cup lemon juice, freshly squeezed (from about 3–4 lemons)
- 2 tablespoons lemon zest, finely grated
- 1 teaspoon vanilla extract
- Pinch of salt
- Optional: 1/4 cup Limoncello liqueur (for extra lemon flavor and to help prevent ice crystals)
Instructions
- Prepare the Lemon Base: In a large bowl, combine sweetened condensed milk, lemon juice, lemon zest, vanilla extract, and salt. Whisk until smooth and well combined. If using Limoncello, stir it in gently. Taste and adjust lemon zest if needed. Set aside.
- Whip the Cream: In a separate large bowl (or stand mixer bowl), pour in cold heavy cream. Using an electric mixer, whip on medium speed until stiff peaks form. Be careful not to overwhip.
- Combine and Freeze: Gently fold the lemon mixture into the whipped cream until evenly distributed. Do not overmix. Pour the mixture into a freezer-safe container. Cover tightly with a lid or plastic wrap (pressing it onto the surface).
- Freeze: Place the container in the freezer and freeze for at least 6 hours, or preferably overnight, until solid.
- Serve: Remove from freezer and let sit at room temperature for a few minutes to soften slightly. Scoop into bowls or cones. Garnish with extra lemon zest, fresh berries, or a drizzle of honey, if desired.
Notes
- Use high-quality ingredients for the best flavor.
- Don’t skip the lemon zest!
- Ensure the heavy cream is very cold for proper whipping.
- Be gentle when folding the lemon mixture into the whipped cream to maintain airiness.
- Freezing for at least 6 hours is crucial for the ice cream to set properly.
- For a smoother texture, add 1 tablespoon of vodka or other clear alcohol before freezing.
- Store in an airtight container in the freezer for up to 2 weeks.
- If the ice cream is too tart, add more sweetened condensed milk. If it’s too sweet, add more lemon juice.
- Prep Time: 15 minutes
- Cook Time: 0 minutes

Leave a Comment