
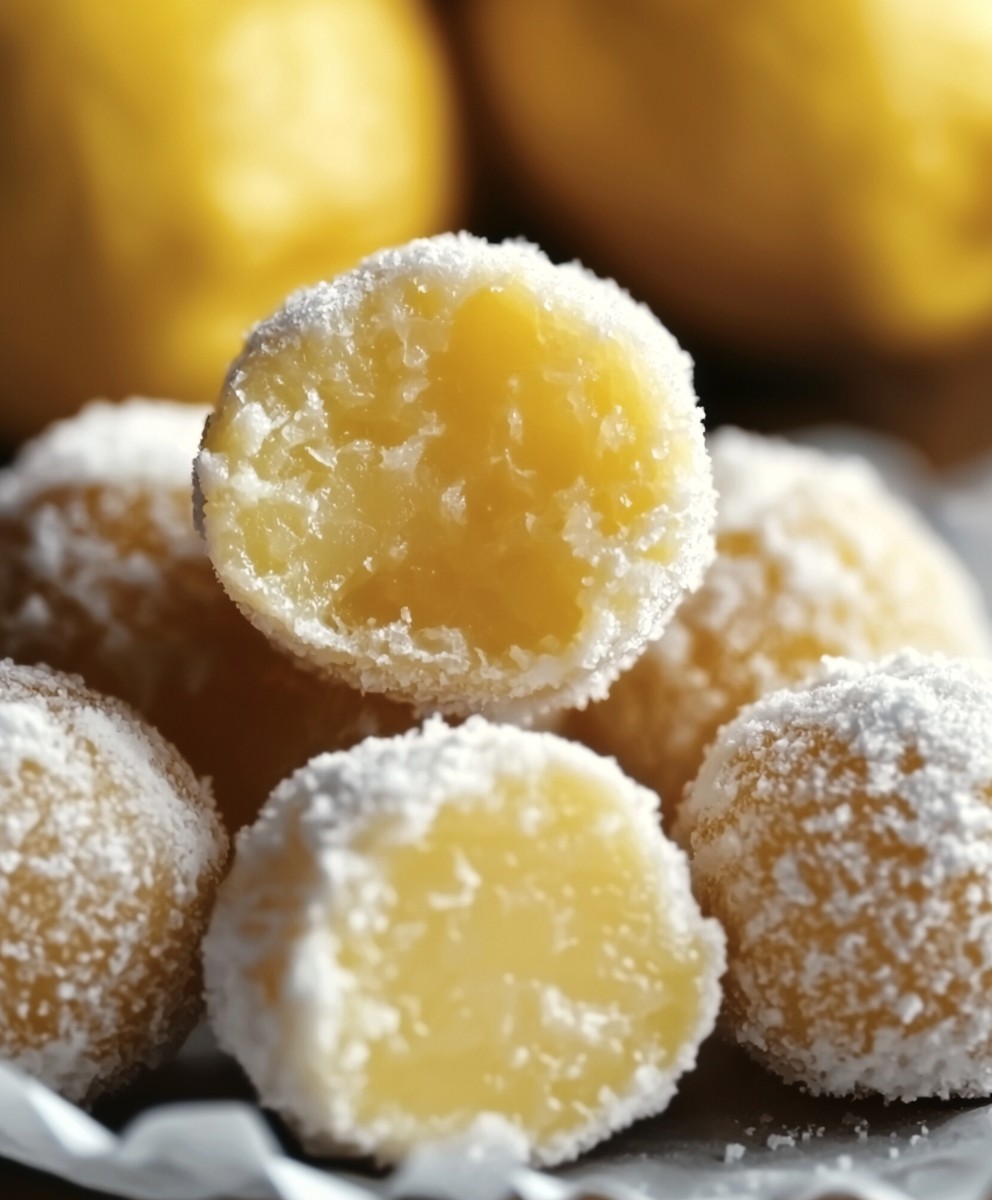
Lemon Truffles: Prepare to be captivated by these tiny spheres of sunshine! Imagine a burst of bright, tangy lemon flavor melting in your mouth, followed by a creamy, decadent sweetness. These aren’t just any ordinary treat; they’re a sophisticated indulgence that’s surprisingly easy to make.
While the exact origins of truffles are debated, these delightful Lemon Truffles draw inspiration from classic French confectionery techniques, adapted for the modern palate. The concept of transforming simple ingredients into elegant, bite-sized desserts has been a culinary tradition for centuries, and these lemon truffles are a testament to that enduring appeal.
What makes these little gems so irresistible? It’s the perfect balance of flavors and textures. The zesty lemon cuts through the richness of the white chocolate, creating a harmonious blend that’s both refreshing and satisfying. People adore them because they’re incredibly versatile perfect for a sophisticated dessert after dinner, a delightful addition to a party platter, or simply a little pick-me-up during the day. Plus, they require no baking, making them a convenient and impressive treat to whip up anytime!
Ingredients:
- 1 cup (2 sticks) unsalted butter, softened
- 4 ounces cream cheese, softened
- 4 cups powdered sugar, sifted
- 1/4 cup freshly squeezed lemon juice
- 2 tablespoons lemon zest
- 1 teaspoon vanilla extract
- 1/4 teaspoon salt
- 12 ounces white chocolate, finely chopped
- 1/4 cup heavy cream
- Additional powdered sugar, for rolling
- Optional: Yellow food coloring (gel)
Making the Lemon Truffle Filling:
Okay, let’s get started! First, we’re going to make the creamy, lemony filling that makes these truffles so irresistible. This is the heart and soul of our little treats, so pay close attention!
- Cream the Butter and Cream Cheese: In a large bowl (or the bowl of your stand mixer), beat the softened butter and cream cheese together until they are light and fluffy. This usually takes about 3-5 minutes. Make sure there are no lumps! We want a perfectly smooth base for our truffles. Scrape down the sides of the bowl occasionally to ensure everything is evenly mixed.
- Add the Powdered Sugar: Gradually add the sifted powdered sugar to the butter and cream cheese mixture, beating on low speed until combined. It’s crucial to add the powdered sugar slowly to prevent a huge cloud of sugar from exploding all over your kitchen. Trust me, I’ve been there! Once all the powdered sugar is incorporated, increase the speed to medium and beat for another 2-3 minutes until the mixture is light and airy.
- Incorporate the Lemon Goodness: Now for the star of the show the lemon! Add the fresh lemon juice, lemon zest, vanilla extract, and salt to the mixture. Beat until everything is well combined. The zest is really important here, as it provides a concentrated lemon flavor that you just can’t get from the juice alone.
- Adjust the Consistency: At this point, you might need to adjust the consistency of the filling. If it seems too soft, add a little more powdered sugar, a tablespoon at a time, until it reaches a firmer, more manageable consistency. If it’s too stiff, add a tiny splash of lemon juice or heavy cream. Remember, we want a filling that’s firm enough to roll into balls but still melts in your mouth.
- Chill the Filling: Cover the bowl with plastic wrap, pressing the wrap directly onto the surface of the filling to prevent a skin from forming. Refrigerate for at least 2 hours, or preferably overnight. This chilling time is essential! It allows the filling to firm up properly, making it much easier to roll into truffles. Don’t skip this step!
Preparing the White Chocolate Coating:
While the filling is chilling, let’s get ready to make the white chocolate coating. A smooth, glossy coating is key to a professional-looking truffle, so we’ll take our time and do it right.
- Melt the White Chocolate: Place the finely chopped white chocolate in a heatproof bowl set over a saucepan of simmering water (double boiler). Make sure the bottom of the bowl doesn’t touch the water. Stir the chocolate frequently until it is completely melted and smooth. Be patient! White chocolate can be finicky and can seize up if overheated. If you prefer, you can melt the chocolate in the microwave in 30-second intervals, stirring well after each interval, until melted.
- Add Heavy Cream: Once the white chocolate is melted, stir in the heavy cream until the mixture is smooth and glossy. The heavy cream helps to thin out the chocolate slightly, making it easier to coat the truffles.
- Optional: Add Food Coloring: If you want to give your truffles a beautiful, subtle yellow hue, add a tiny drop of yellow gel food coloring to the melted white chocolate. Stir well until the color is evenly distributed. Be careful not to add too much, as it can affect the consistency of the chocolate.
- Maintain the Temperature: Keep the melted white chocolate warm while you’re rolling and dipping the truffles. If it starts to cool and thicken, you can gently reheat it over the double boiler or in the microwave in short bursts.
Assembling and Finishing the Lemon Truffles:
Now for the fun part putting it all together! This is where your patience and attention to detail will really pay off. Get ready to create some beautiful and delicious lemon truffles!
- Shape the Truffles: Remove the chilled lemon truffle filling from the refrigerator. Using a small cookie scoop or a spoon, scoop out portions of the filling and roll them into small, even balls. Aim for about 1-inch in diameter. Place the rolled truffles on a baking sheet lined with parchment paper.
- Chill the Truffles Again: Place the baking sheet with the rolled truffles back in the refrigerator for another 30 minutes. This will help them firm up even more, making them easier to dip in the white chocolate.
- Dip the Truffles: Using a fork or dipping tools, carefully dip each truffle into the melted white chocolate, making sure it’s completely coated. Gently tap off any excess chocolate.
- Decorate (Optional): Before the chocolate sets, you can sprinkle the truffles with additional lemon zest, a dusting of powdered sugar, or even edible glitter for a festive touch. Get creative!
- Set the Chocolate: Place the dipped truffles back on the parchment-lined baking sheet and let them set completely. This usually takes about 30-60 minutes at room temperature, or you can speed up the process by placing them in the refrigerator for a shorter time.
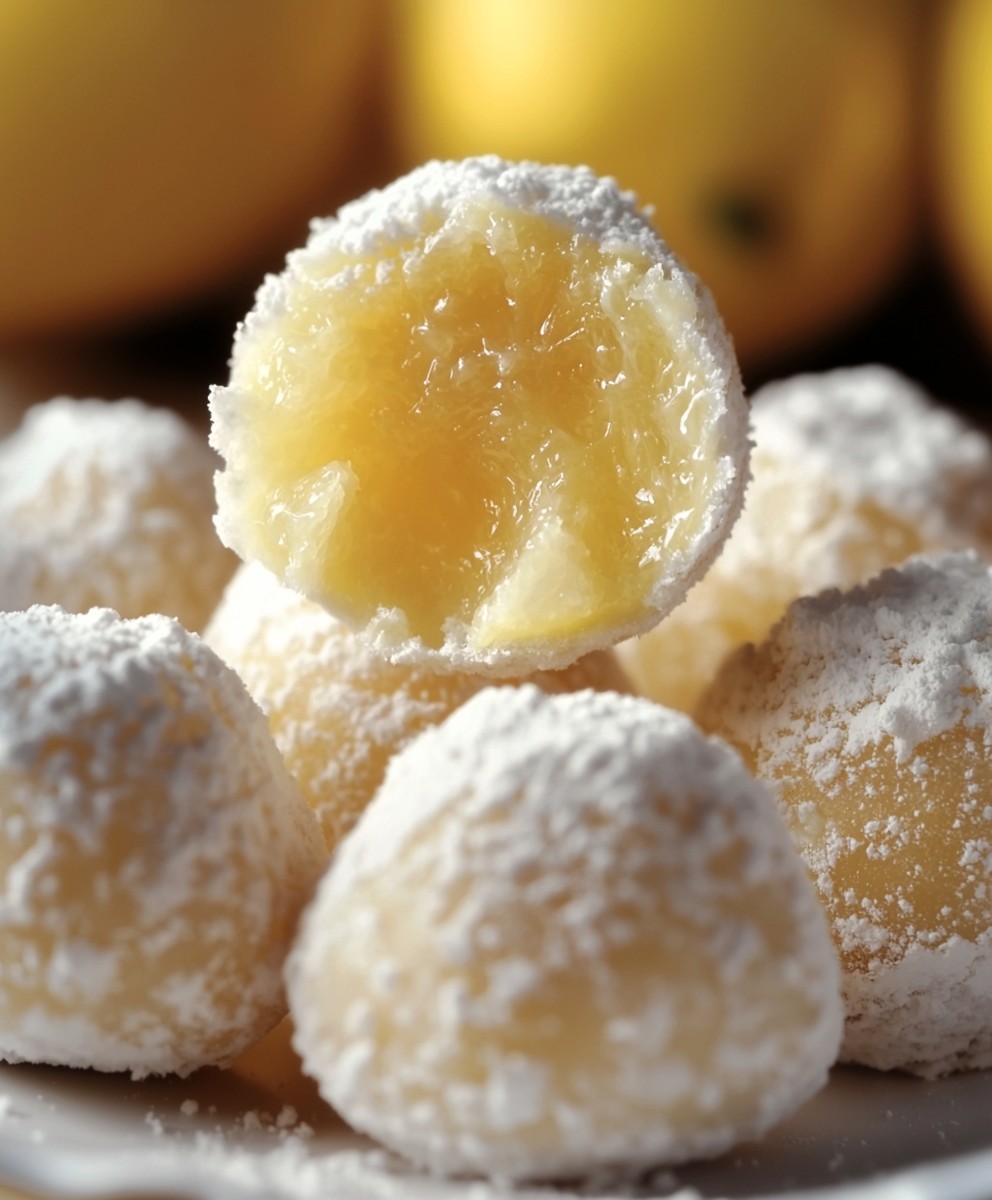
- Roll in Powdered Sugar: Once the chocolate is set, gently roll each truffle in powdered sugar to create a beautiful, matte finish. This also helps to prevent the truffles from sticking together.
- Store Properly: Store the finished lemon truffles in an airtight container in the refrigerator for up to a week. They are best enjoyed cold!
Tips for Success:
- Use High-Quality Ingredients: The better the ingredients, the better the truffles will taste. Use good quality white chocolate and fresh lemons for the best results.
- Don’t Overheat the White Chocolate: White chocolate is delicate and can easily seize up if overheated. Be patient and melt it slowly and gently.
- Chill, Chill, Chill: Chilling the filling and the rolled truffles is crucial for achieving the right consistency and making them easier to work with.
- Get Creative with Decorations: Don’t be afraid to experiment with different decorations to make your truffles unique and beautiful.
Troubleshooting:
- Filling Too Soft: If the filling is too soft to roll, add more powdered sugar, a tablespoon at a time, until it reaches the desired consistency.
- Chocolate Too Thick: If the melted white chocolate is too thick, add a little more heavy cream, a teaspoon at a time, until it thins out.
- Chocolate Seized: If the white chocolate seizes up, try adding a tablespoon of vegetable oil or shortening and stirring vigorously. This can sometimes help to bring it back to a smooth consistency.
Enjoy your homemade Lemon Truffles! I hope you love them as much as I do!
Conclusion:
And there you have it! These Lemon Truffles are truly a must-try for anyone who loves a burst of citrusy sunshine in every bite. The combination of the creamy white chocolate, the tangy lemon zest, and that hint of almond extract creates a flavor profile that’s both sophisticated and utterly addictive. I know I’ve already made several batches, and they disappear faster than I can say “lemon!” What makes this recipe so special is its simplicity. You don’t need any fancy equipment or complicated techniques. Just a few ingredients, a little patience, and you’ll be rewarded with these delightful little treats. They’re perfect for any occasion, from a casual afternoon tea to an elegant dessert spread. But the best part? They’re incredibly versatile! Feel free to experiment with different variations to suit your own taste. For a richer, more decadent truffle, try using a higher quality white chocolate with a higher cocoa butter content. You could also add a tablespoon or two of lemon liqueur for an extra kick of citrus flavor. If you’re not a fan of almond extract, vanilla extract works just as well. Looking for serving suggestions? These Lemon Truffles are divine on their own, but they also pair beautifully with a cup of strong coffee or a glass of chilled Prosecco. You can also crumble them over ice cream or use them to decorate a lemon cake. For a truly elegant presentation, arrange them on a pretty platter and dust them with a light coating of powdered sugar or edible gold glitter. If you’re feeling adventurous, you could even try dipping them in melted dark chocolate for a contrasting flavor combination. The bitterness of the dark chocolate will balance out the sweetness of the white chocolate and the tanginess of the lemon, creating a truly unforgettable treat. Another fun variation is to roll the truffles in chopped nuts, such as pistachios or almonds, for added texture and flavor. I’m absolutely confident that you’ll love these Lemon Truffles as much as I do. They’re the perfect balance of sweet, tart, and creamy, and they’re guaranteed to brighten up your day. So, what are you waiting for? Gather your ingredients, put on your apron, and get ready to create some magic in the kitchen! I’m so excited for you to try this recipe! And I’d absolutely love to hear about your experience. Did you make any variations? What did you think of the flavor? What occasion did you make them for? Please, share your thoughts and photos in the comments below. Your feedback is invaluable, and it helps me to create even better recipes in the future. Don’t be shy let me know what you think! Happy truffle-making! I hope these little bites of sunshine bring you as much joy as they bring me. Remember to store them in an airtight container in the refrigerator for optimal freshness. They’ll keep for up to a week, but I doubt they’ll last that long! Enjoy! Print
Lemon Truffles: A Zesty & Delicious Dessert Recipe
- Total Time: 165 minutes
- Yield: 30–36 truffles 1x
Description
Creamy lemon truffles with a tangy filling and smooth white chocolate coating. Perfect for gifting or a sweet citrusy treat.
Ingredients
- 1 cup (2 sticks) unsalted butter, softened
- 4 ounces cream cheese, softened
- 4 cups powdered sugar, sifted
- 1/4 cup freshly squeezed lemon juice
- 2 tablespoons lemon zest
- 1 teaspoon vanilla extract
- 1/4 teaspoon salt
- 12 ounces white chocolate, finely chopped
- 1/4 cup heavy cream
- Additional powdered sugar, for rolling
- Optional: Yellow food coloring (gel)
Instructions
- Cream the Butter and Cream Cheese: In a large bowl (or the bowl of your stand mixer), beat the softened butter and cream cheese together until they are light and fluffy. This usually takes about 3-5 minutes. Make sure there are no lumps! Scrape down the sides of the bowl occasionally to ensure everything is evenly mixed.
- Add the Powdered Sugar: Gradually add the sifted powdered sugar to the butter and cream cheese mixture, beating on low speed until combined. Once all the powdered sugar is incorporated, increase the speed to medium and beat for another 2-3 minutes until the mixture is light and airy.
- Incorporate the Lemon Goodness: Add the fresh lemon juice, lemon zest, vanilla extract, and salt to the mixture. Beat until everything is well combined.
- Adjust the Consistency: If the filling seems too soft, add a little more powdered sugar, a tablespoon at a time, until it reaches a firmer consistency. If it’s too stiff, add a tiny splash of lemon juice or heavy cream.
- Chill the Filling: Cover the bowl with plastic wrap, pressing the wrap directly onto the surface of the filling. Refrigerate for at least 2 hours, or preferably overnight.
- Melt the White Chocolate: Place the finely chopped white chocolate in a heatproof bowl set over a saucepan of simmering water (double boiler). Make sure the bottom of the bowl doesn’t touch the water. Stir the chocolate frequently until it is completely melted and smooth. Alternatively, melt in the microwave in 30-second intervals, stirring well after each interval.
- Add Heavy Cream: Once the white chocolate is melted, stir in the heavy cream until the mixture is smooth and glossy.
- Optional: Add Food Coloring: If desired, add a tiny drop of yellow gel food coloring to the melted white chocolate. Stir well until the color is evenly distributed.
- Maintain the Temperature: Keep the melted white chocolate warm while you’re rolling and dipping the truffles. If it starts to cool and thicken, you can gently reheat it over the double boiler or in the microwave in short bursts.
- Shape the Truffles: Remove the chilled lemon truffle filling from the refrigerator. Using a small cookie scoop or a spoon, scoop out portions of the filling and roll them into small, even balls (about 1-inch in diameter). Place the rolled truffles on a baking sheet lined with parchment paper.
- Chill the Truffles Again: Place the baking sheet with the rolled truffles back in the refrigerator for another 30 minutes.
- Dip the Truffles: Using a fork or dipping tools, carefully dip each truffle into the melted white chocolate, making sure it’s completely coated. Gently tap off any excess chocolate.
- Decorate (Optional): Before the chocolate sets, you can sprinkle the truffles with additional lemon zest, a dusting of powdered sugar, or even edible glitter.
- Set the Chocolate: Place the dipped truffles back on the parchment-lined baking sheet and let them set completely. This usually takes about 30-60 minutes at room temperature, or you can speed up the process by placing them in the refrigerator for a shorter time.
- Roll in Powdered Sugar: Once the chocolate is set, gently roll each truffle in powdered sugar to create a matte finish.
- Store Properly: Store the finished lemon truffles in an airtight container in the refrigerator for up to a week.
Notes
- Use high-quality ingredients for the best flavor.
- Be careful not to overheat the white chocolate.
- Chilling the filling and rolled truffles is essential.
- Get creative with decorations!
- If the filling is too soft, add more powdered sugar.
- If the chocolate is too thick, add a little more heavy cream.
- If the white chocolate seizes up, try adding a tablespoon of vegetable oil or shortening and stirring vigorously.
- Prep Time: 30 minutes
- Cook Time: 15 minutes


Leave a Comment