
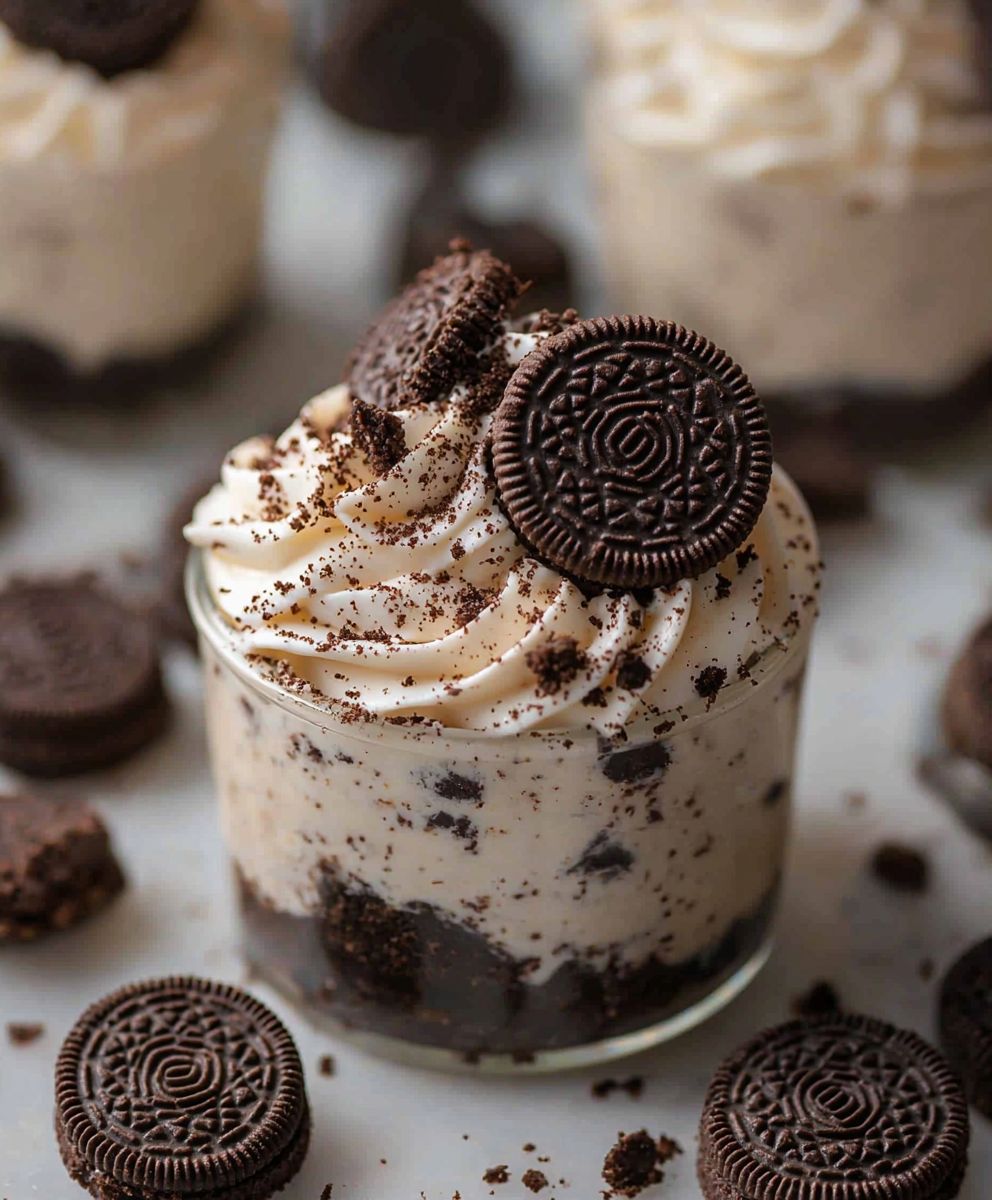
Oreo Cheesecake Cups: Prepare to be amazed by the easiest, most decadent dessert you’ll make all year! Imagine the creamy, dreamy texture of classic cheesecake, perfectly portioned and infused with the irresistible crunch of Oreo cookies. These delightful little cups are not only incredibly simple to whip up, but they are also guaranteed to be a crowd-pleaser at any gathering.
While cheesecake itself has a rich history dating back to ancient Greece, the addition of Oreo cookies is a distinctly modern and American twist. Oreos, with their iconic chocolate wafers and sweet cream filling, have become a beloved treat worldwide. Combining them with cheesecake creates a symphony of textures and flavors that’s simply irresistible.
What makes these Oreo Cheesecake Cups so popular? It’s the perfect balance of creamy and crunchy, rich and satisfying. The individual portions make them ideal for parties, potlucks, or even a simple weeknight treat. Plus, they require no baking, making them a fantastic option for those hot summer months or when you’re short on time. The combination of the smooth cheesecake filling and the distinct Oreo flavor is a match made in dessert heaven. Get ready to experience a taste sensation that will have everyone begging for more!
Ingredients:
- For the Oreo Crust:
- 36 Oreo cookies (about 1 package), finely crushed
- 6 tablespoons (3 ounces) unsalted butter, melted
- For the Cheesecake Filling:
- 24 ounces (3 packages) cream cheese, softened to room temperature
- 1 cup granulated sugar
- 1 teaspoon vanilla extract
- 2 large eggs
- 1/4 cup heavy cream
- 12 Oreo cookies, coarsely chopped
- For the Topping (Optional):
- Whipped cream
- Mini Oreo cookies
- Chocolate shavings
Preparing the Oreo Crust:
Okay, let’s start with the foundation of our delicious Oreo cheesecake cups the crust! This is super easy and sets the stage for all the creamy goodness to come.
- Crush the Oreos: The first step is to crush those Oreos! You can use a food processor for this just pulse them until they’re finely ground. If you don’t have a food processor, no worries! Place the Oreos in a large zip-top bag, seal it tightly, and use a rolling pin to crush them into fine crumbs. Make sure there aren’t any big chunks left; we want a nice, even crust.
- Melt the Butter: Next, melt the butter. You can do this in the microwave in 30-second intervals, stirring in between, or in a small saucepan over low heat. Just make sure it’s completely melted but not browned.
- Combine the Crumbs and Butter: In a medium bowl, combine the crushed Oreo crumbs and the melted butter. Mix well until the crumbs are evenly moistened. The mixture should resemble wet sand. This is what will hold our crust together.
- Press into Cupcake Liners: Now, line a 12-cup muffin tin with cupcake liners. Spoon about 2 tablespoons of the Oreo crumb mixture into each liner. Use the bottom of a measuring cup or a small glass to firmly press the crumbs into an even layer at the bottom of each liner. This is important to create a solid base for the cheesecake filling.
- Chill the Crust: Place the muffin tin with the prepared crusts in the refrigerator for at least 30 minutes. This will help the crusts set and prevent them from crumbling when we add the filling. You can even chill them for longer, up to a couple of hours, if you have the time.
Making the Cheesecake Filling:
Now for the star of the show the creamy, dreamy cheesecake filling! This part is also pretty straightforward, but it’s important to follow the steps carefully to ensure a smooth and lump-free filling.
- Soften the Cream Cheese: This is crucial! Make sure your cream cheese is completely softened to room temperature before you start. This will prevent lumps in your filling. If you’re short on time, you can microwave the cream cheese in 15-second intervals, but be very careful not to melt it.
- Cream the Cream Cheese and Sugar: In a large bowl, using an electric mixer (either a stand mixer or a hand mixer), beat the softened cream cheese and granulated sugar together until smooth and creamy. This should take about 2-3 minutes. Make sure to scrape down the sides of the bowl occasionally to ensure everything is evenly mixed.
- Add Vanilla Extract: Add the vanilla extract and mix until combined. Vanilla extract enhances the flavor of the cheesecake and adds a touch of warmth.
- Incorporate the Eggs: Add the eggs one at a time, mixing well after each addition. Be careful not to overmix at this stage, as overmixing can incorporate too much air into the batter, which can cause the cheesecake to crack during baking.
- Add Heavy Cream: Pour in the heavy cream and mix until just combined. The heavy cream adds richness and helps to create a smooth and creamy texture.
- Fold in Chopped Oreos: Gently fold in the coarsely chopped Oreo cookies. Be careful not to overmix, as you want to keep the Oreo pieces intact. These Oreo chunks add a delightful texture and flavor to the cheesecake filling.
Baking the Oreo Cheesecake Cups:
Almost there! Now it’s time to bake our cheesecake cups to perfection. A low and slow bake is key to preventing cracks and ensuring a creamy texture.
- Preheat the Oven: Preheat your oven to 325°F (160°C).
- Fill the Cupcake Liners: Remove the muffin tin with the chilled crusts from the refrigerator. Spoon the cheesecake filling into each liner, filling them almost to the top. Try to distribute the Oreo pieces evenly among the cups.
- Bake: Bake for 20-25 minutes, or until the edges are set and the center is just slightly jiggly. The cheesecakes should be lightly golden on top.
- Cool in the Oven: Turn off the oven and crack the oven door slightly. Let the cheesecakes cool in the oven for about 1 hour. This gradual cooling process helps to prevent cracking.
- Chill in the Refrigerator: Remove the muffin tin from the oven and let the cheesecakes cool completely at room temperature. Then, cover the muffin tin with plastic wrap and refrigerate for at least 4 hours, or preferably overnight. This chilling time is essential for the cheesecakes to set properly and develop their full flavor.
Serving and Topping (Optional):
The final touch! Now for the fun part decorating and enjoying your delicious Oreo cheesecake cups.
- Remove from Muffin Tin: Gently remove the cheesecake cups from the muffin tin. The cupcake liners should peel away easily.
- Add Toppings (Optional): If desired, top the cheesecake cups with whipped cream, mini Oreo cookies, and chocolate shavings. You can get creative with your toppings and add whatever you like! A drizzle of chocolate sauce or a sprinkle of Oreo crumbs would also be delicious.
- Serve and Enjoy: Serve the Oreo cheesecake cups chilled and enjoy! These are perfect for parties, potlucks, or just a special treat for yourself.
Tips for Success:
- Room Temperature Ingredients: Using room temperature cream cheese and eggs is crucial for a smooth and lump-free cheesecake filling.
- Don’t Overmix: Overmixing the batter can incorporate too much air, leading to cracks during baking. Mix until just combined.
- Low and Slow Baking: Baking at a low temperature for a longer time helps to prevent cracks and ensures a creamy texture.
- Cooling Process: The gradual cooling process in the oven and then in the refrigerator is essential for preventing cracks and allowing the cheesecakes to set properly.
- Storage: Store leftover Oreo cheesecake cups in an airtight container in the refrigerator for up to 3-4 days.
Variations:
- Different Oreo Flavors: Experiment with different Oreo flavors, such as Golden Oreos, Mint Oreos, or Peanut Butter Oreos, to create unique variations of this recipe.
- Chocolate Crust: For a richer chocolate flavor, add a tablespoon of cocoa powder to the Oreo crumb mixture for the crust.
- Oreo Swirl: Before baking, swirl a spoonful of melted chocolate or Oreo cream into the cheesecake filling for a marbled effect.
- Individual Cheesecakes: Instead of making individual cups, you can also bake this recipe in a small springform pan for a larger cheesecake. Just adjust the baking time accordingly.

Conclusion:
And there you have it! These Oreo cheesecake cups are truly a must-try for anyone who loves a quick, easy, and utterly delicious dessert. From the satisfying crunch of the Oreo crust to the creamy, dreamy cheesecake filling, every bite is a little piece of heaven. I know, I know, I’m biased, but I genuinely believe this recipe is a winner. Why is it a must-try? Well, beyond the incredible flavor profile, it’s the sheer simplicity that makes these cups so appealing. You don’t need to be a master baker to whip these up. The ingredient list is short and sweet, the instructions are straightforward, and the results are consistently impressive. Plus, they’re perfect for any occasion! Need a last-minute dessert for a potluck? These Oreo cheesecake cups are your answer. Craving something sweet after dinner? These cups are portion-controlled perfection. Want to impress your friends and family? These cups will do the trick! But the fun doesn’t stop there! Feel free to get creative with your serving suggestions and variations. For an extra touch of elegance, top each cup with a dollop of whipped cream and a sprinkle of crushed Oreos. Or, if you’re feeling adventurous, drizzle some chocolate sauce or caramel over the top. For a seasonal twist, consider adding a few fresh berries, like strawberries or raspberries, for a burst of fruity flavor. If you’re looking to experiment with the filling, you could try adding a teaspoon of vanilla extract for a richer flavor, or a pinch of sea salt to enhance the sweetness. For a chocolate lover’s dream, fold in some mini chocolate chips into the cheesecake batter. And if you’re feeling really decadent, you could even swirl in some Nutella! The possibilities are endless. These Oreo cheesecake cups are also incredibly versatile when it comes to serving. They’re perfect as individual desserts, but you could also arrange them on a platter for a more impressive presentation. They’re also great for parties, picnics, and potlucks. And if you have any leftovers (which I highly doubt!), they can be stored in the refrigerator for up to three days. I truly believe that this recipe will become a staple in your dessert repertoire. It’s quick, easy, delicious, and endlessly customizable. What more could you ask for? So, what are you waiting for? Grab your ingredients, preheat your oven, and get ready to create some magic in the kitchen. I promise you won’t be disappointed. And most importantly, I want to hear about your experience! Did you try the recipe? Did you make any variations? What did you think? Share your photos and comments on social media using #OreoCheesecakeCups or tag me in your posts. I can’t wait to see your creations and hear your feedback. Happy baking! I am confident that you will enjoy this Oreo cheesecake cups recipe. Print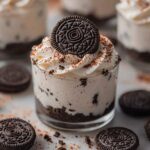
Oreo Cheesecake Cups: The Ultimate No-Bake Dessert Recipe
- Total Time: 355 minutes
- Yield: 12 cheesecake cups 1x
Description
Delicious and easy Oreo cheesecake cups with a rich Oreo crust and creamy cheesecake filling, topped with whipped cream and mini Oreos.
Ingredients
- 36 Oreo cookies, finely crushed (about 3 cups of crumbs)
- 6 tablespoons (3 ounces) unsalted butter, melted
- 24 ounces cream cheese, softened to room temperature
- 1 cup granulated sugar
- 1 teaspoon vanilla extract
- 2 large eggs
- 1/4 cup heavy cream
- 12 Oreo cookies, coarsely chopped
- Whipped cream
- Mini Oreo cookies
- Chocolate shavings
Instructions
- Prepare the Oreo Crust: Crush the Oreos into fine crumbs using a food processor or rolling pin. Combine the crumbs with melted butter in a bowl until evenly moistened.
- Line a 12-cup muffin tin with cupcake liners. Press about 2 tablespoons of the Oreo crumb mixture into each liner, creating an even layer.
- (Optional) Pre-bake the crust in a preheated oven at 350°F (175°C) for 5-7 minutes for a firmer crust. Let cool completely.
- Make the Cheesecake Filling: In a large bowl, beat the softened cream cheese until smooth and creamy.
- Gradually add the granulated sugar, beating until well combined. Add the vanilla extract and beat until incorporated.
- Add the eggs one at a time, beating well after each addition. Be careful not to overmix.
- Pour in the heavy cream and beat until the mixture is smooth and creamy.
- Gently fold in the coarsely chopped Oreo cookies.
- Assemble and Bake: Spoon the cheesecake filling into the prepared cupcake liners, filling each liner almost to the top.
- Bake in a preheated oven at 325°F (160°C) for 20-25 minutes, or until the edges are set and the centers are just slightly jiggly.
- Cooling Process: Turn off the oven and crack the oven door slightly. Let the cheesecakes cool in the oven for about 1 hour.
- Remove the muffin tin and let the cheesecakes cool completely at room temperature. Then, cover the muffin tin with plastic wrap and refrigerate for at least 4 hours, or preferably overnight.
- Serving: Gently remove the cheesecake cups from the muffin tin. Add your favorite toppings, such as whipped cream, mini Oreo cookies, and chocolate shavings. Serve chilled.
- Storing: Store leftover cheesecake cups in an airtight container in the refrigerator for up to 3-4 days. For longer storage, freeze individually wrapped cheesecake cups for up to 2-3 months. Thaw in the refrigerator overnight before serving.
Notes
- Make sure the cream cheese is softened to room temperature for a smooth filling.
- Be careful not to overmix the batter after adding the eggs to prevent cracking.
- The gradual cooling process in the oven helps prevent cracking.
- Refrigerating the cheesecakes for at least 4 hours is essential for them to fully set.
- Pre-baking the crust is optional but recommended for a firmer texture.
- Prep Time: 30 minutes
- Cook Time: 25 minutes


Leave a Comment