
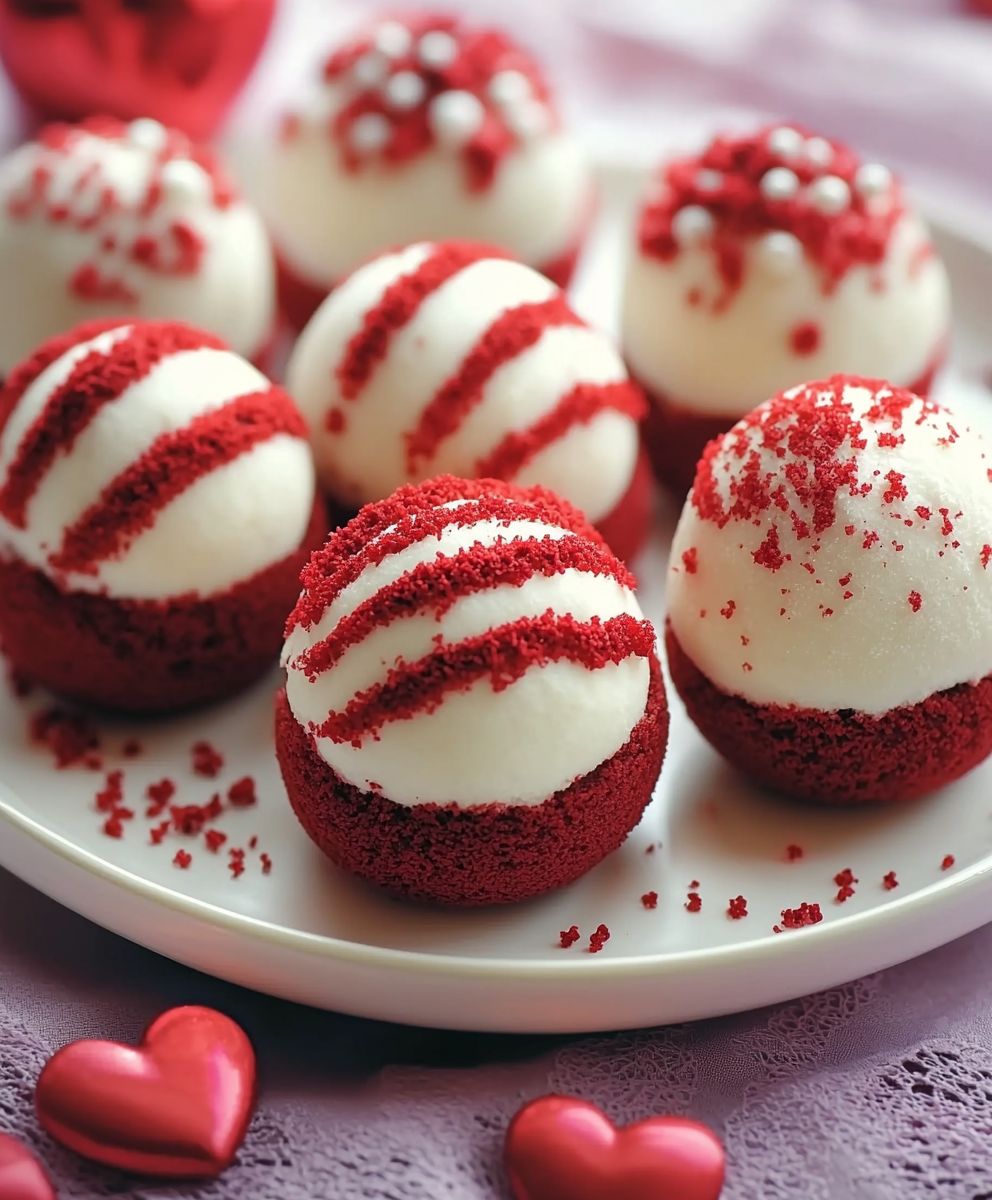
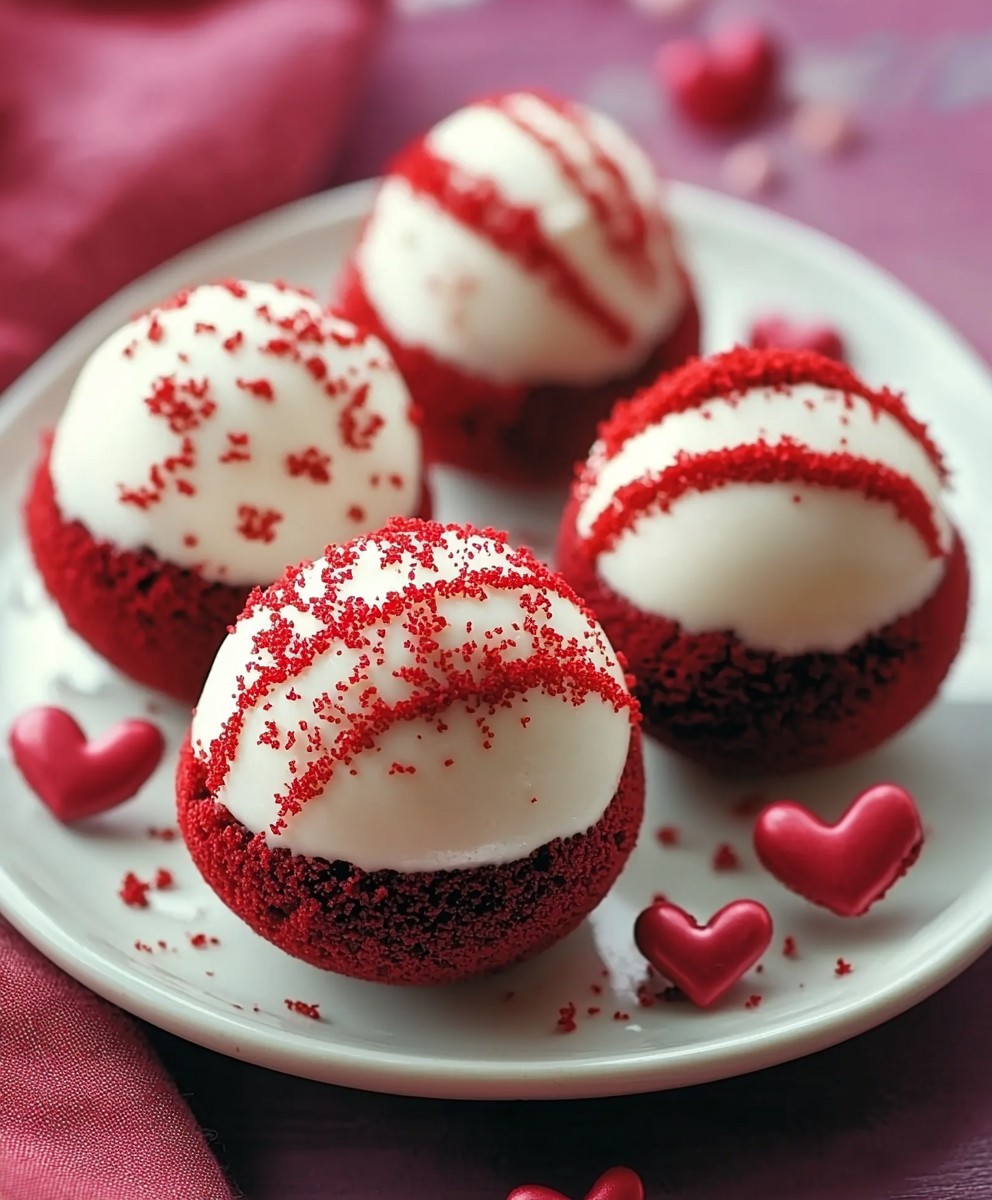
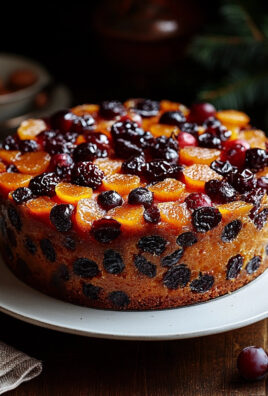
Valentines Day Red Velvet Balls: Prepare to fall in love with the most decadent, delightful, and utterly irresistible treat perfect for celebrating romance! Imagine biting into a moist, fudgy sphere of red velvet cake, enrobed in a luscious coating of creamy white chocolate. These aren’t just any cake pops; they’re a miniature explosion of Valentine’s Day joy, guaranteed to make hearts flutter.
Red velvet, with its intriguing history, has long been associated with elegance and indulgence. Some believe its origins trace back to the Victorian era, where bakers used cocoa powder to soften the harshness of flour, resulting in a velvety texture. Others claim it emerged during the Depression era as a way to make cakes more appealing with the addition of beet juice for color and moisture. Regardless of its exact beginnings, red velvet has become a symbol of celebration, particularly around Valentine’s Day.
What makes these Valentines Day Red Velvet Balls so incredibly popular? It’s the perfect combination of textures and flavors. The slight tang of the buttermilk in the cake, the rich cocoa notes, and the sweet, smooth white chocolate create a symphony of sensations. Plus, they’re incredibly convenient! No forks or plates required just pure, unadulterated bliss in every bite. Whether you’re surprising your sweetheart, hosting a Galentine’s gathering, or simply treating yourself, these little bites of heaven are the perfect way to spread the love.
Ingredients:
- For the Red Velvet Cake:
- 2 ½ cups all-purpose flour
- 2 cups granulated sugar
- 1 teaspoon baking soda
- 1 teaspoon baking powder
- 1 teaspoon salt
- 1 cup buttermilk
- 1 cup vegetable oil
- 2 large eggs
- 2 tablespoons unsweetened cocoa powder
- 1 ounce (2 tablespoons) red food coloring
- 1 teaspoon vanilla extract
- 1 teaspoon white vinegar
- For the Cream Cheese Frosting:
- 8 ounces cream cheese, softened
- ½ cup (1 stick) unsalted butter, softened
- 4 cups powdered sugar
- 1 teaspoon vanilla extract
- 2-4 tablespoons milk or heavy cream (optional, for desired consistency)
- For Coating:
- 12 ounces white chocolate, finely chopped
- 1 tablespoon vegetable shortening (optional, for smoother melting)
- Red, pink, and white sprinkles, for decoration
Preparing the Red Velvet Cake:
- Preheat and Prep: First things first, let’s get our oven ready! Preheat it to 350°F (175°C). Grease and flour a 9×13 inch baking pan. This will prevent the cake from sticking and make it easy to remove later. You can also line the pan with parchment paper, leaving an overhang on the sides, for super easy removal.
- Dry Ingredients: In a large bowl, whisk together the flour, sugar, baking soda, baking powder, salt, and cocoa powder. Make sure everything is well combined. This ensures even distribution of the leavening agents and cocoa, giving us a consistent texture and flavor.
- Wet Ingredients: In a separate bowl, whisk together the buttermilk, oil, eggs, red food coloring, and vanilla extract. Don’t worry if the color looks intense it will mellow out during baking.
- Combine Wet and Dry: Gradually add the wet ingredients to the dry ingredients, mixing on low speed until just combined. Be careful not to overmix! Overmixing can lead to a tough cake.
- The Secret Ingredient: In a small bowl, combine the vinegar and baking soda. It will fizz! Quickly add this mixture to the batter and stir until just combined. This reaction helps create a light and airy texture.
- Bake: Pour the batter into the prepared pan and spread evenly. Bake for 25-30 minutes, or until a toothpick inserted into the center comes out clean. Keep an eye on it baking times can vary depending on your oven.
- Cool Completely: Let the cake cool in the pan for 10 minutes before inverting it onto a wire rack to cool completely. This is crucial! We need the cake to be completely cool before we can crumble it.
Making the Cream Cheese Frosting:
- Cream Cheese and Butter: In a large bowl, beat the softened cream cheese and butter together until smooth and creamy. Make sure both are at room temperature for the best results. Lumps are not our friends!
- Add Powdered Sugar: Gradually add the powdered sugar, one cup at a time, beating on low speed until combined. This prevents a powdered sugar cloud from erupting in your kitchen.
- Vanilla Extract: Stir in the vanilla extract.
- Adjust Consistency: If the frosting is too thick, add milk or heavy cream, one tablespoon at a time, until you reach your desired consistency. You want it to be spreadable but not too runny.
Creating the Red Velvet Balls:
- Crumble the Cake: Once the cake is completely cool, crumble it into a large bowl. You can use your hands or a fork to do this. Make sure there are no large chunks remaining.
- Add Frosting: Add the cream cheese frosting to the crumbled cake and mix well until everything is evenly combined. The mixture should be moist and hold its shape when pressed together.
- Chill the Mixture: Cover the bowl with plastic wrap and refrigerate for at least 30 minutes, or up to an hour. This will make it easier to roll the mixture into balls. Chilling firms up the mixture, preventing it from being too sticky.
- Roll into Balls: Remove the mixture from the refrigerator and roll it into 1-inch balls. Place the balls on a baking sheet lined with parchment paper.
- Chill Again: Return the balls to the refrigerator for another 30 minutes to an hour. This will help them hold their shape during the dipping process.
Dipping and Decorating:
- Melt the White Chocolate: In a heatproof bowl set over a saucepan of simmering water (double boiler), or in the microwave in 30-second intervals, melt the white chocolate and vegetable shortening (if using), stirring frequently until smooth. Be careful not to overheat the chocolate, as it can seize up. If using the microwave, stir well after each interval.
- Dip the Balls: Remove the chilled cake balls from the refrigerator. Dip each ball into the melted white chocolate, using a fork or dipping tools to coat it completely. Gently tap off any excess chocolate.
- Decorate: Immediately sprinkle the dipped balls with red, pink, and white sprinkles. The chocolate will set quickly, so you need to work fast.
- Set the Chocolate: Place the decorated balls back on the parchment-lined baking sheet and refrigerate for at least 15 minutes, or until the chocolate is set.
- Serve and Enjoy: Once the chocolate is set, the Red Velvet Balls are ready to serve! Store them in an airtight container in the refrigerator for up to a week.
Conclusion:
And there you have it! These Valentines Day Red Velvet Balls are more than just a treat; they’re a little bite of love, perfect for sharing (or not!) with your special someone, friends, or even just yourself. I truly believe this recipe is a must-try for several reasons. First, the vibrant red color is undeniably festive and screams Valentine’s Day. Second, the combination of the rich red velvet cake, the creamy frosting, and the optional chocolate coating creates an explosion of textures and flavors that’s simply irresistible. And third, they are surprisingly easy to make! You don’t need to be a professional baker to whip up a batch of these delightful little spheres of happiness. But the best part? They are incredibly versatile! While I’ve presented my favorite way to make them, feel free to get creative and experiment with different variations.Serving Suggestions and Variations:
* Drizzle Delight: Instead of fully coating the balls in chocolate, try a simple drizzle of white chocolate or dark chocolate for a more elegant look. You can even use a combination of both! * Nutty for You: Add chopped nuts, like pecans or walnuts, to the chocolate coating for a crunchy texture and nutty flavor. Toasted coconut flakes would also be a delicious addition. * Sprinkle Magic: Don’t underestimate the power of sprinkles! Use Valentine’s Day-themed sprinkles, like hearts or red and pink sugar crystals, to add a touch of whimsy and fun. * Boozy Bites: For an adult twist, add a tablespoon or two of your favorite liqueur, like rum or Kahlua, to the frosting. Just be sure to adjust the amount of liquid accordingly to maintain the desired consistency. * Cream Cheese Dream: If you’re a cream cheese frosting fanatic (like me!), feel free to use your favorite homemade cream cheese frosting recipe instead of the one I provided. The tanginess of the cream cheese pairs perfectly with the sweetness of the red velvet cake. * Cake Pop Transformation: Insert lollipop sticks into the balls before coating them in chocolate to turn them into adorable cake pops. This is a great option for parties or for a more kid-friendly presentation. * Inside Out: Instead of coating the red velvet balls in chocolate, consider rolling them in powdered sugar for a completely different look and taste. This is a great option if you want to highlight the red velvet flavor. I’m confident that you’ll absolutely love making and eating these Valentines Day Red Velvet Balls. They are the perfect way to spread some love and sweetness this Valentine’s Day (or any day, really!). So, what are you waiting for? Gather your ingredients, preheat your oven (or grab that leftover cake!), and get ready to create some magic in the kitchen. I can’t wait to hear about your experience! Please, please, please try this recipe. Once you’ve made your own batch of these delectable treats, I’d love to hear all about it! Share your photos and stories on social media using [insert your social media handle/hashtag here]. Let me know what variations you tried and what your loved ones thought. Your feedback is invaluable, and it helps me continue to create recipes that you’ll enjoy. Happy baking, and happy Valentine’s Day! I hope you enjoy these little bites of heaven as much as I do. Don’t forget to share the love (and the red velvet balls!). Print
Valentines Day Red Velvet Balls: A Delicious & Romantic Treat
- Total Time: 180 minutes
- Yield: 36 cake balls 1x
Description
Decadent Red Velvet Cake Balls dipped in white chocolate and covered in festive sprinkles. A perfect bite-sized treat!
Ingredients
- 2 ½ cups all-purpose flour
- 2 cups granulated sugar
- 1 teaspoon baking soda
- 1 teaspoon baking powder
- 1 teaspoon salt
- 1 cup buttermilk
- 1 cup vegetable oil
- 2 large eggs
- 2 tablespoons unsweetened cocoa powder
- 1 ounce (2 tablespoons) red food coloring
- 1 teaspoon vanilla extract
- 1 teaspoon white vinegar
- 8 ounces cream cheese, softened
- ½ cup (1 stick) unsalted butter, softened
- 4 cups powdered sugar
- 1 teaspoon vanilla extract
- 2–4 tablespoons milk or heavy cream (optional, for desired consistency)
- 12 ounces white chocolate, finely chopped
- 1 tablespoon vegetable shortening (optional, for smoother melting)
- Red, pink, and white sprinkles, for decoration
Instructions
- Preheat oven to 350°F (175°C). Grease and flour a 9×13 inch baking pan (or line with parchment paper).
- In a large bowl, whisk together flour, sugar, baking soda, baking powder, salt, and cocoa powder.
- In a separate bowl, whisk together buttermilk, oil, eggs, red food coloring, and vanilla extract.
- Gradually add wet ingredients to dry ingredients, mixing on low speed until just combined. Do not overmix.
- In a small bowl, combine vinegar and baking soda. It will fizz! Quickly add this mixture to the batter and stir until just combined.
- Pour batter into prepared pan and spread evenly. Bake for 25-30 minutes, or until a toothpick inserted into the center comes out clean.
- Let the cake cool in the pan for 10 minutes before inverting it onto a wire rack to cool completely.
- In a large bowl, beat the softened cream cheese and butter together until smooth and creamy.
- Gradually add the powdered sugar, one cup at a time, beating on low speed until combined.
- Stir in the vanilla extract.
- If the frosting is too thick, add milk or heavy cream, one tablespoon at a time, until you reach your desired consistency.
- Once the cake is completely cool, crumble it into a large bowl.
- Add the cream cheese frosting to the crumbled cake and mix well until everything is evenly combined.
- Cover the bowl with plastic wrap and refrigerate for at least 30 minutes, or up to an hour.
- Remove the mixture from the refrigerator and roll it into 1-inch balls. Place the balls on a baking sheet lined with parchment paper.
- Return the balls to the refrigerator for another 30 minutes to an hour.
- In a heatproof bowl set over a saucepan of simmering water (double boiler), or in the microwave in 30-second intervals, melt the white chocolate and vegetable shortening (if using), stirring frequently until smooth.
- Remove the chilled cake balls from the refrigerator. Dip each ball into the melted white chocolate, using a fork or dipping tools to coat it completely. Gently tap off any excess chocolate.
- Immediately sprinkle the dipped balls with red, pink, and white sprinkles.
- Place the decorated balls back on the parchment-lined baking sheet and refrigerate for at least 15 minutes, or until the chocolate is set.
- Once the chocolate is set, the Red Velvet Balls are ready to serve! Store them in an airtight container in the refrigerator for up to a week.
Notes
- Make sure the cream cheese and butter are at room temperature for the frosting.
- Don’t overmix the cake batter.
- Cool the cake completely before crumbling.
- Chill the cake ball mixture before rolling and dipping for easier handling.
- Work quickly when decorating with sprinkles, as the chocolate sets fast.
- Vegetable shortening helps the white chocolate melt smoothly.
- Prep Time: 45 minutes
- Cook Time: 30 minutes
Leave a Comment